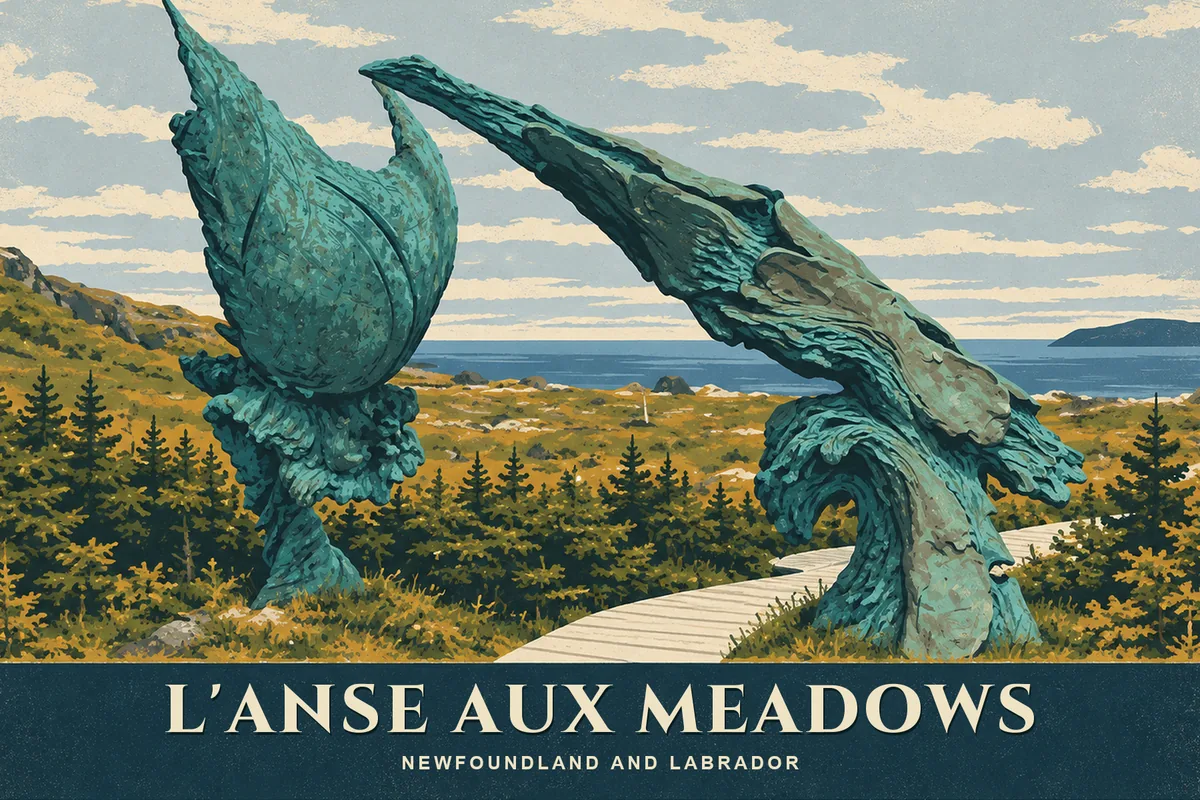
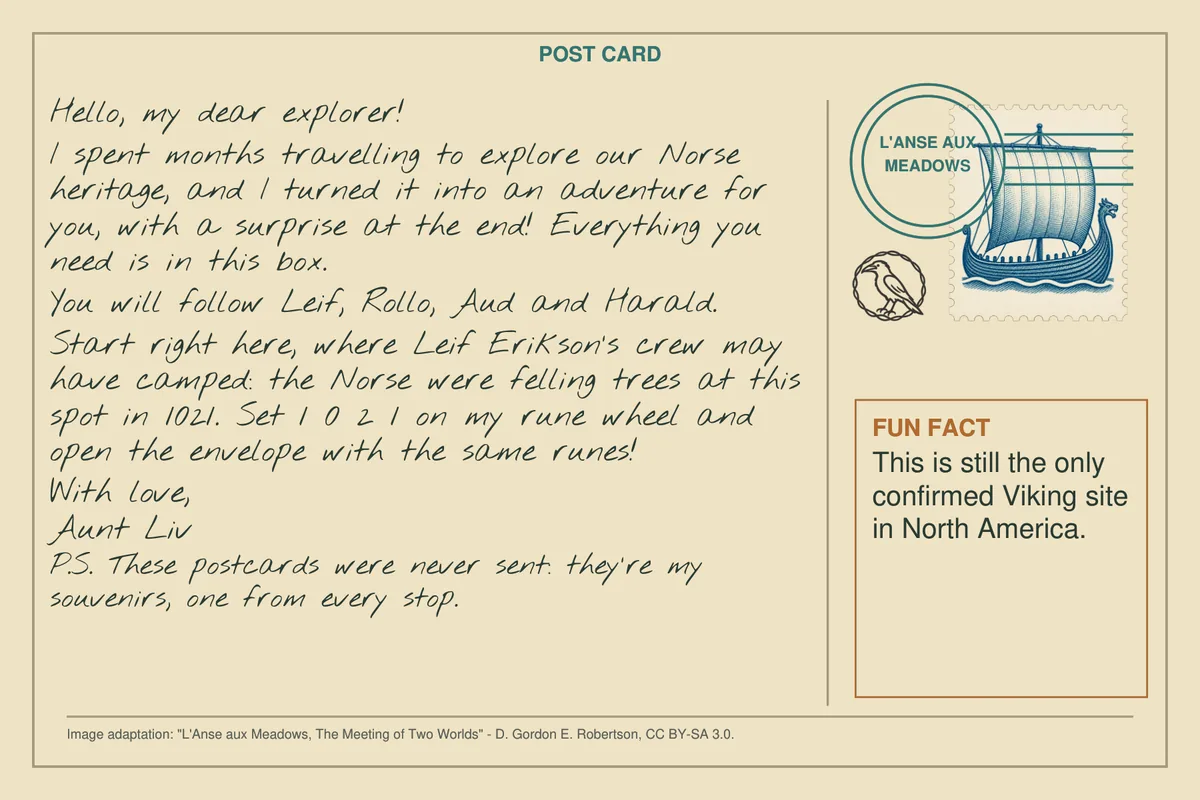
Postcard L1 · L'Anse aux Meadows PP-001
Behind the scenes
Designer copy with spoilers. Design: envelope by envelope, what is inside, the puzzle that opens it, its logic, hints and solution (13 envelopes). Production: components, print costs, how it gets made. Next steps: playtesting, quotes, launch plan. Built from the records, 2026-10-31 12:43.
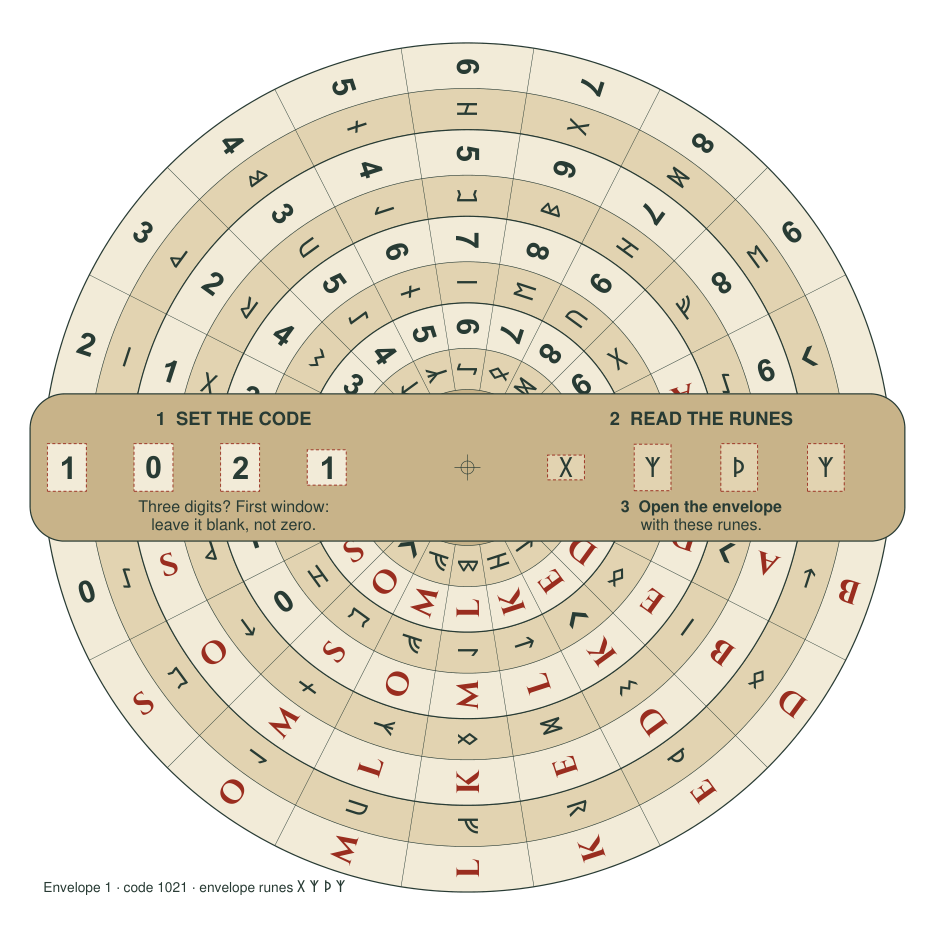
Loose on the lid before any envelope is opened. Postcard L1 and the wheel start the first code (a worked example).
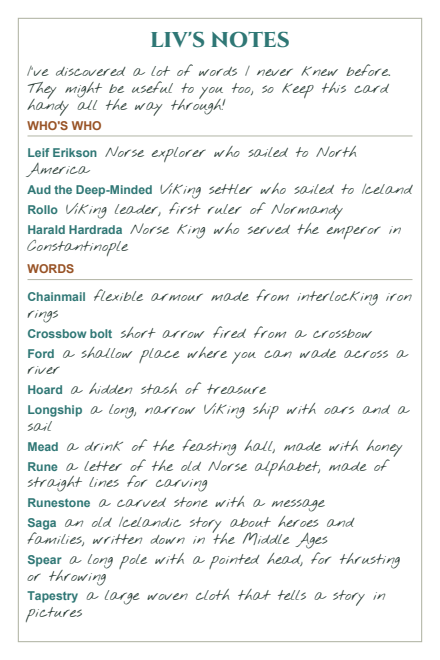
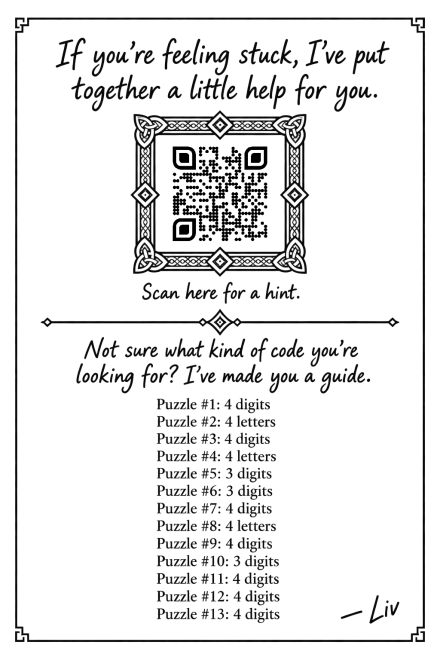
4 × 6 inch card, two sides: names and words on the front, Liv’s hint QR and all 13 code formats on the back. Print at Actual size, duplex, flip on long edge. Test QR scanning and alignment before batch printing.
Opens when players set the code from The opening puzzle on the wheel.
Uses: Postcard L1 · L'Anse aux Meadows · on the box Rune cypher wheel and marked envelopes · on the box
14 Oct 2026 (designer, box + envelopes, PR-007): no longer a puzzle: a worked example. The luggage tags are gone (PP-023 parked, Q-047 answered). Postcard L1, loose on top of the box with the rune wheel, tells the story and hands over the first code as an example of how the wheel works: “Set 1 0 2 1 on my rune wheel and open the envelope with the same runes!” The wheel's arm prints the three steps (PP-047), so the rule stays in front of players for every later code. Designer's brief in chat: the first note explains that the package is the adventure, how the cypher works and that it picks the next envelope (with an example leading to envelope 1), and the story; option 2 of three (story on L1, rule on the wheel) chosen. The tag text below is superseded.
Players have: Opening the box: postcard L1 and the rune cypher wheel lie loose on top of the envelopes. L1's message introduces Aunt Liv, the adventure and the four Norse figures, then says the Norse were felling trees at this spot in 1021 and asks players to set 1 0 2 1 on the wheel.
Players do: Turns the four rings until the left-hand windows read 1 0 2 1 (step 1 on the arm), reads the four runes in the right-hand windows (step 2) and finds the envelope with the same runes (step 3). This is the loop every later code uses.
They get: Code 1021 → runes ᚷᛉᚦᛉ → envelope 1: AD and Aud's comb (PR-007, reordered 15 Oct 2026; was L2, L3 and the magnifier).
Why it is there: The data is in plain sight on both tags; the only hidden thing is which tag goes first, and the postcard hands that over. It teaches the game’s core habit — the card carries the rule, the props carry the data — at its lightest.
Set 1021 on the wheel. The windows show ᚷᛉᚦᛉ, the runes on envelope 1.
Superseded 14 Oct 2026 (luggage tags): Tag A: Vinland Trail Lodge, 10 Skipper’s Wharf, L’Anse aux Meadows, NL — matches the postcard, so it reads first: 10. Tag B: Hôtel Rollon, 21 avenue Rollo, Rouen, France — reads second: 21. Code 1021, the year tree-ring dating placed the Norse at L’Anse aux Meadows.
Code: 1021 → wheel runes ᚷᛉᚦᛉ → envelope 1
Opens when players set the code from The comb grille on the wheel.
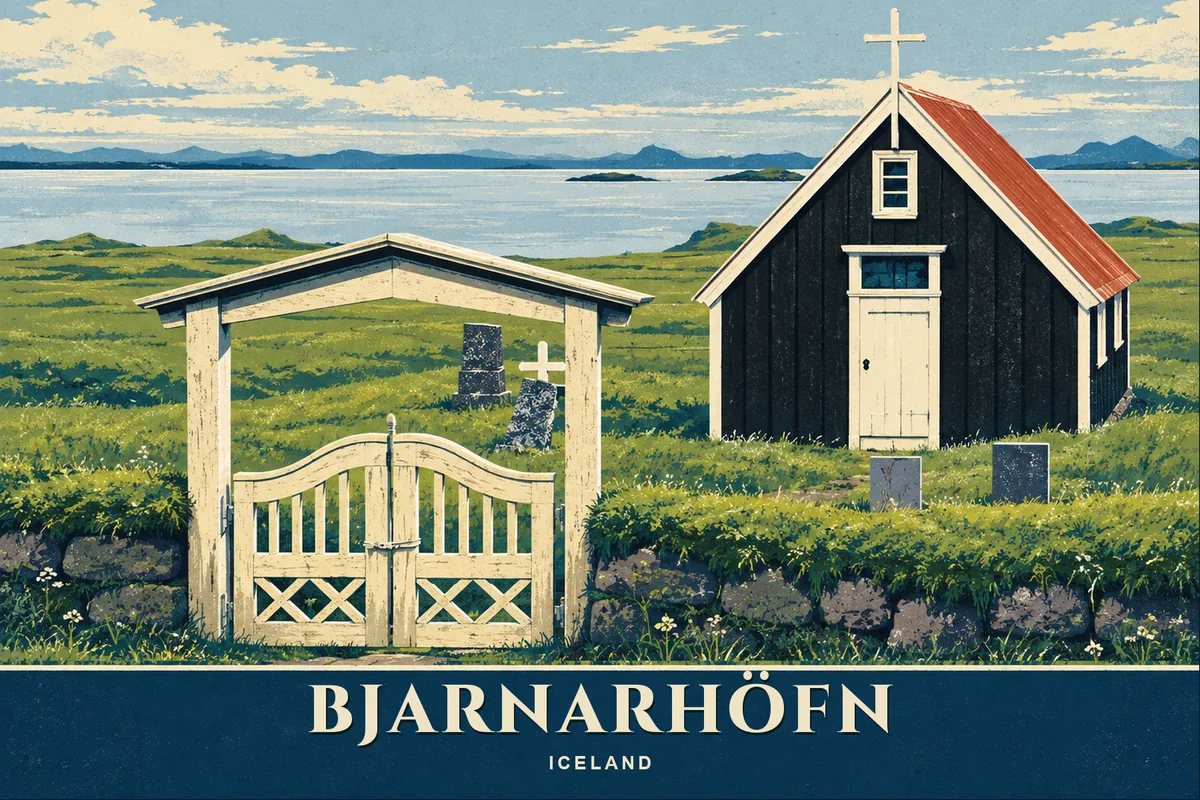
Uses: Postcard AD · Bjarnarhöfn (decoy) · envelope 1 Aud's comb · envelope 1
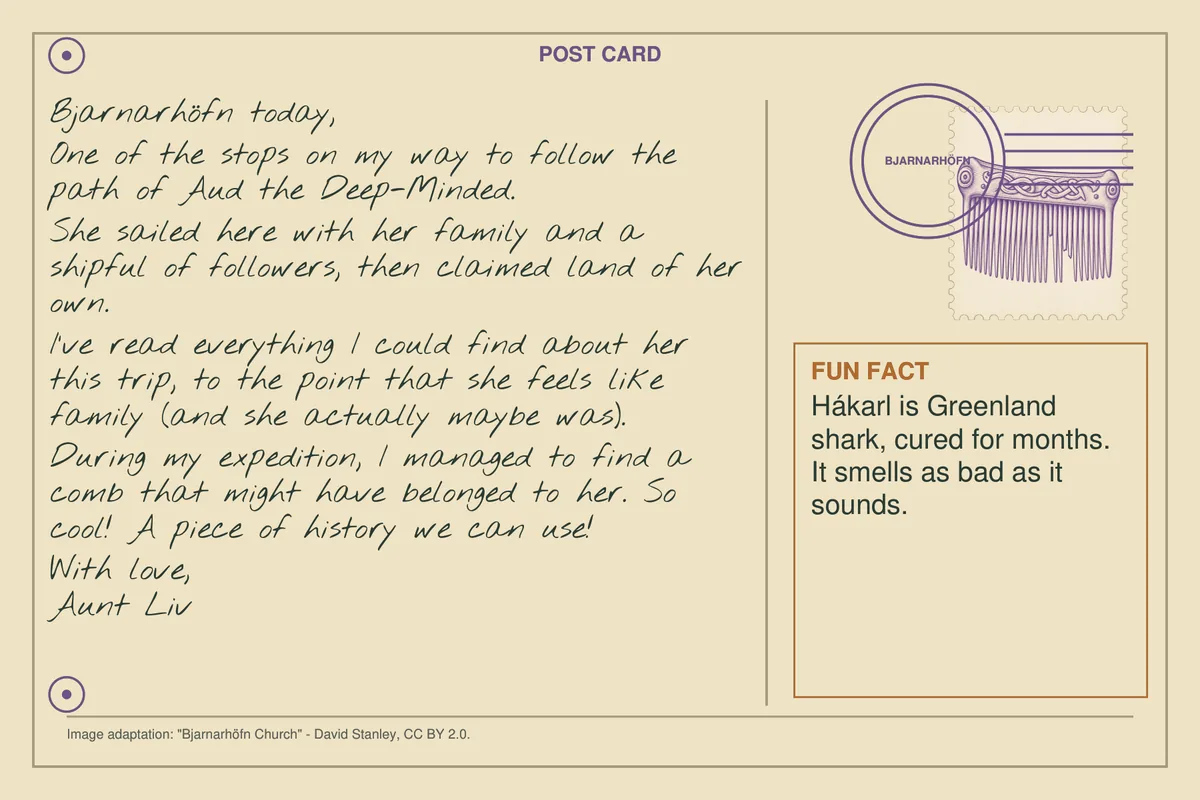
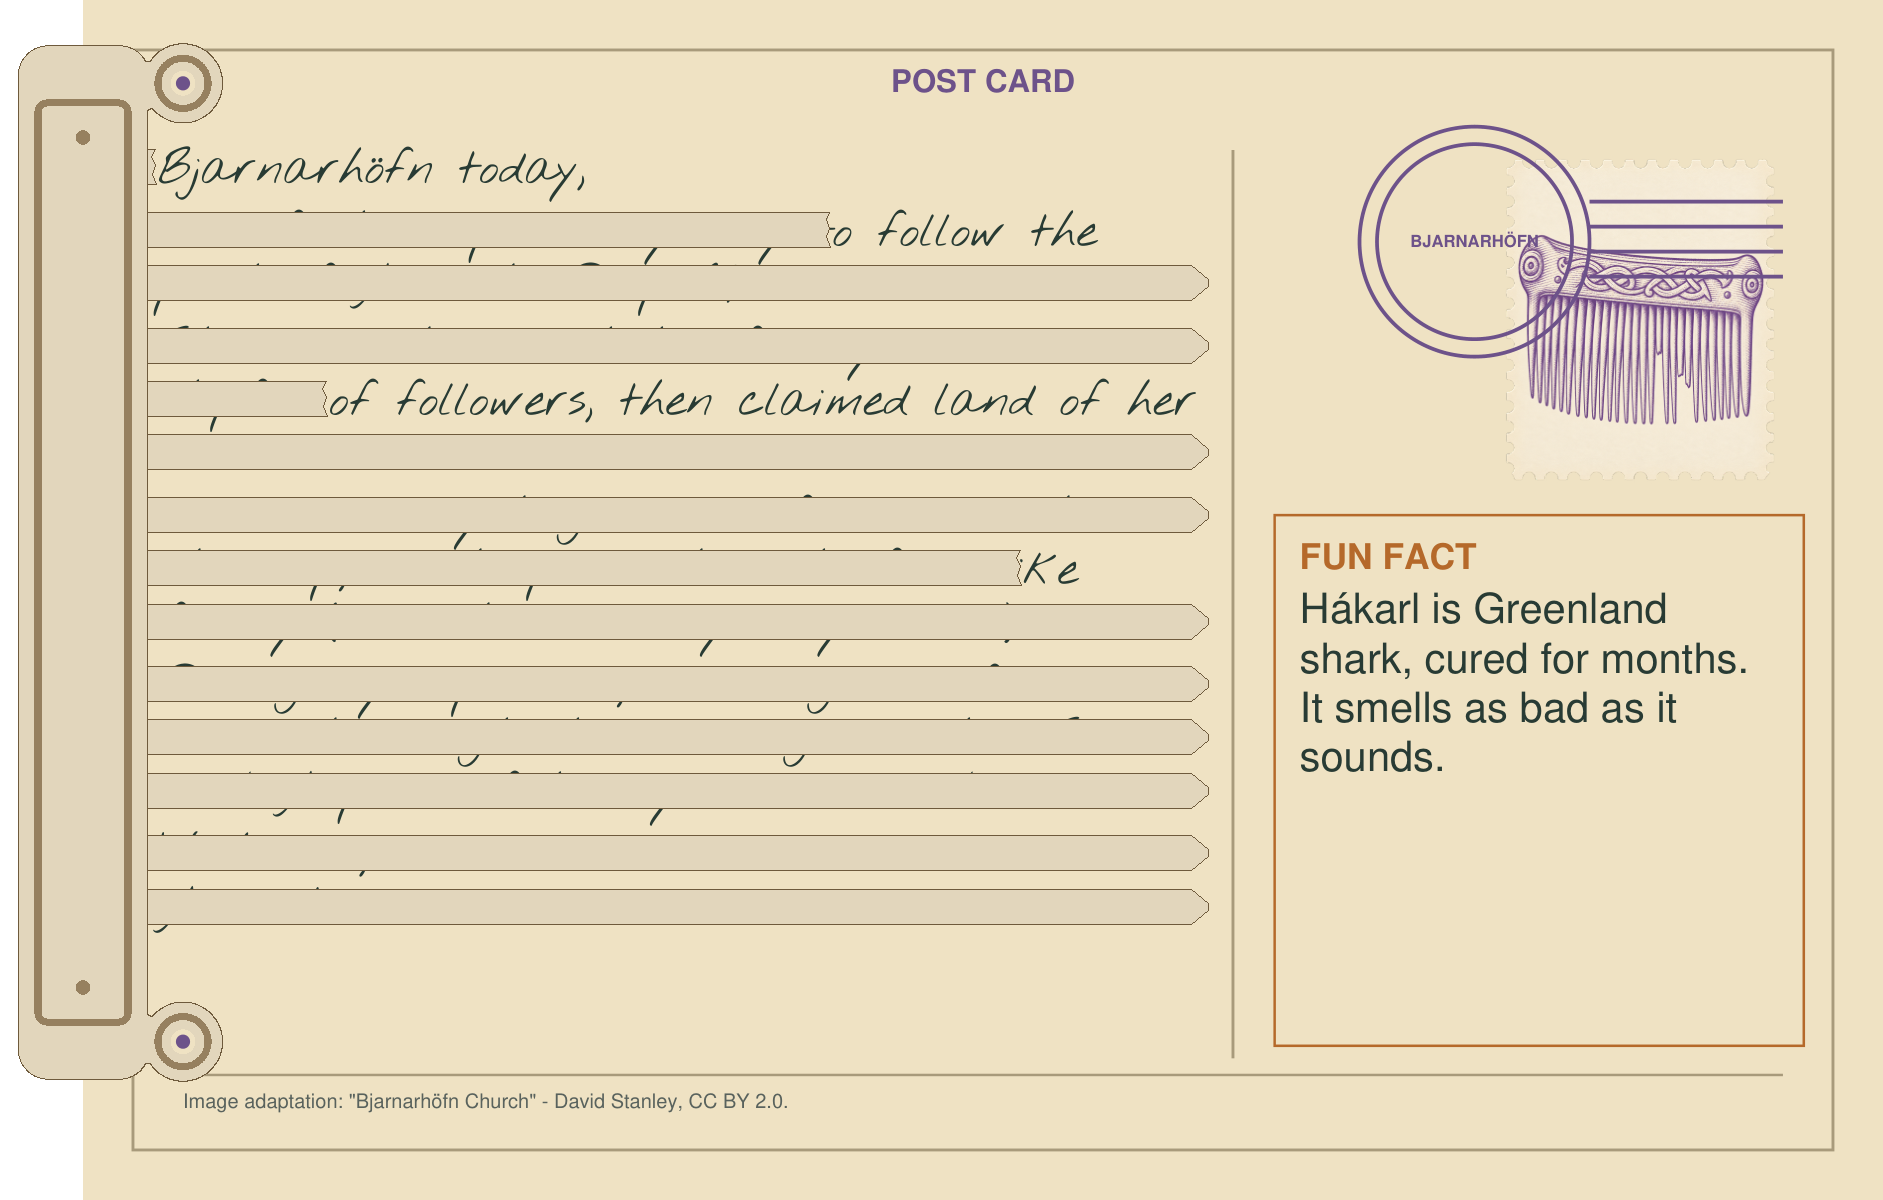
Aud’s comb, laid upright on the decoy card’s message, covers every line except the four its broken teeth leave open.
Players have: The comb and decoy postcard AD (Bjarnarhöfn), both in envelope 1, opened by 1021 from L1 (since 15 Oct 2026, PR-007); ; .
Players do: Sit the comb’s two end ring-and-dots over the two printed on AD, handle in the left margin, teeth across the message. One tooth covers each line. Read the first letter showing on each line that is not covered.
They get: Code BOOK. Set on the wheel, it opens envelope 2 (L2, L3, magnifier: PP-002, PP-003, PP-027).
Why it is there: Gives the comb a job as an instrument rather than a keepsake, and gives the Aud decoy a reason to be kept rather than discarded.
With the comb in place only four lines show: Bjarnarhöfn today, / o follow the / of followers, then claimed land of her / ke (the end of “feels like”). Reading the first visible letter of each, top to bottom: BOOK. (Changed 15 Oct 2026 with AD's new message; the lines are 1, 2, 5 and 8.)
Superseded 15 Oct 2026: brother’s harbor… / could… / o awesome to find that comb / keep it!
Superseded 13 Oct 2026 (5 × 3.5 in card): With the comb in place only four lines show: brother’s harbor… / ould find about / ongside the coins… / keep it! Reading the first visible letter of each, top to bottom: BOOK.
Code: BOOK → wheel runes ᛉᛖᚠᛁ → envelope 2
Opens when players set the code from The joined top edge on the wheel.

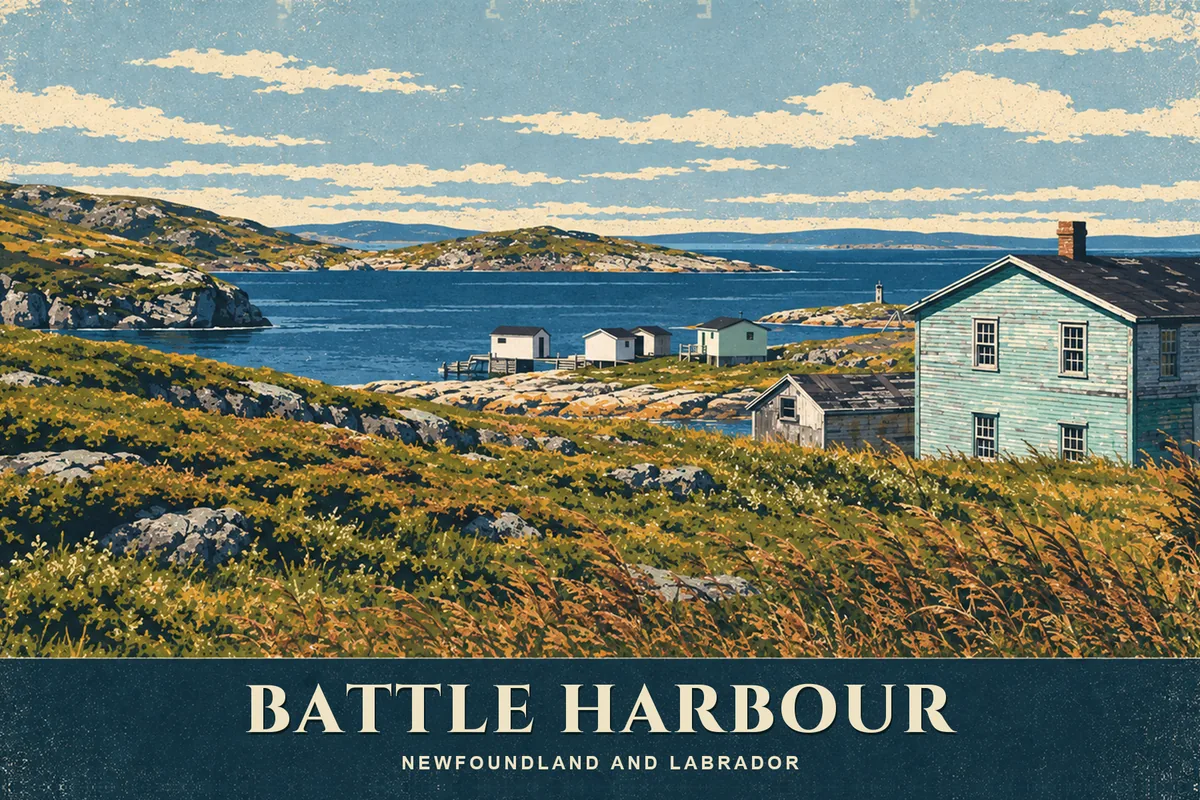
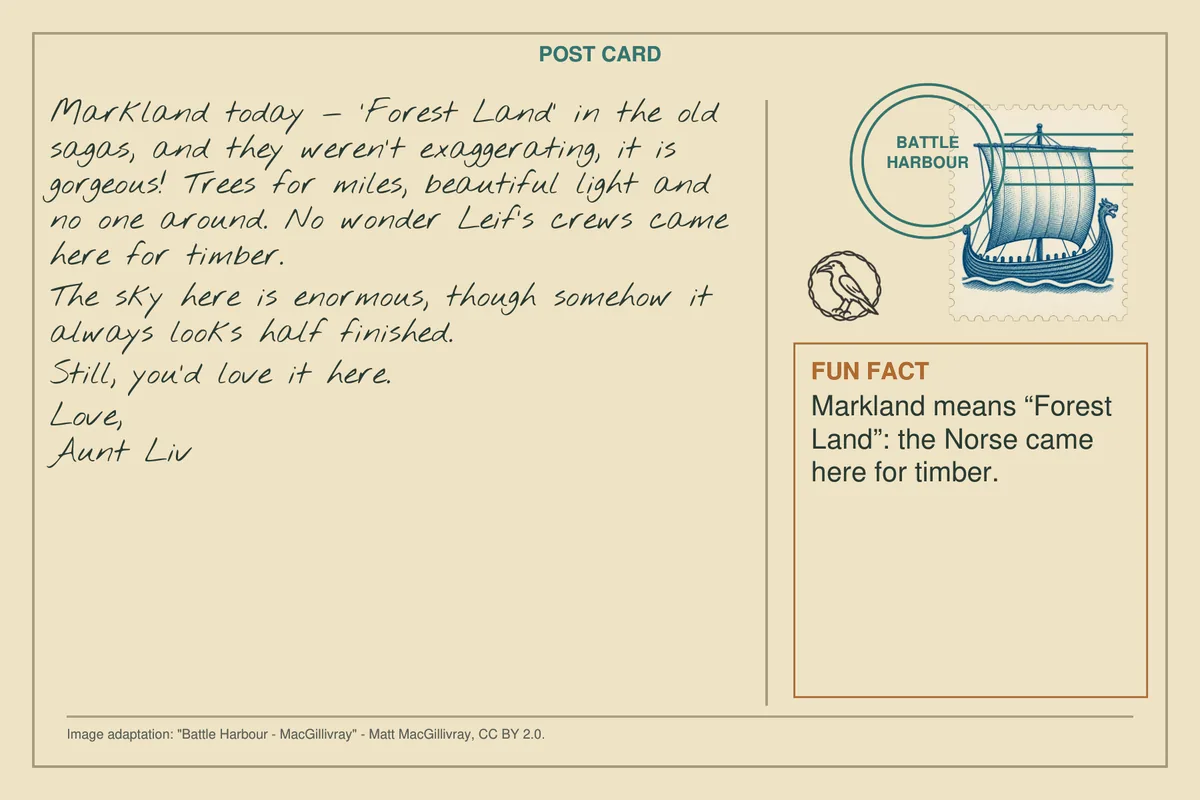
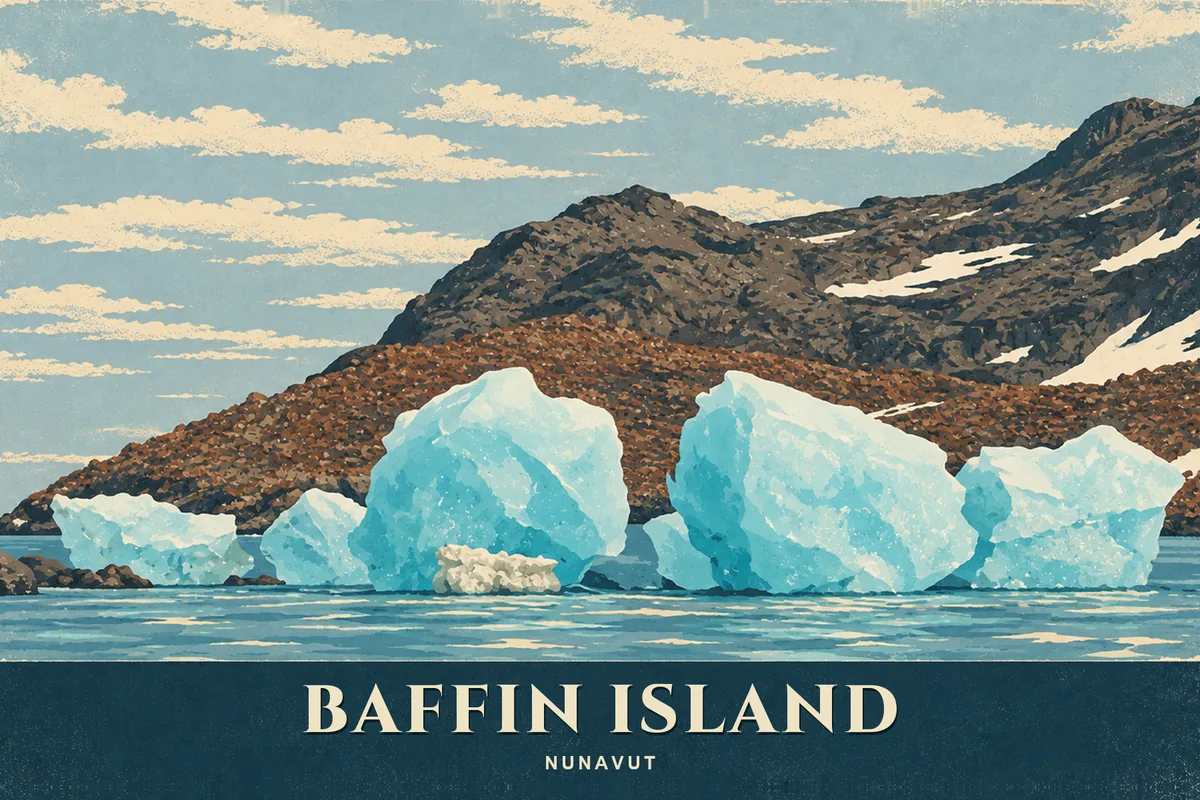
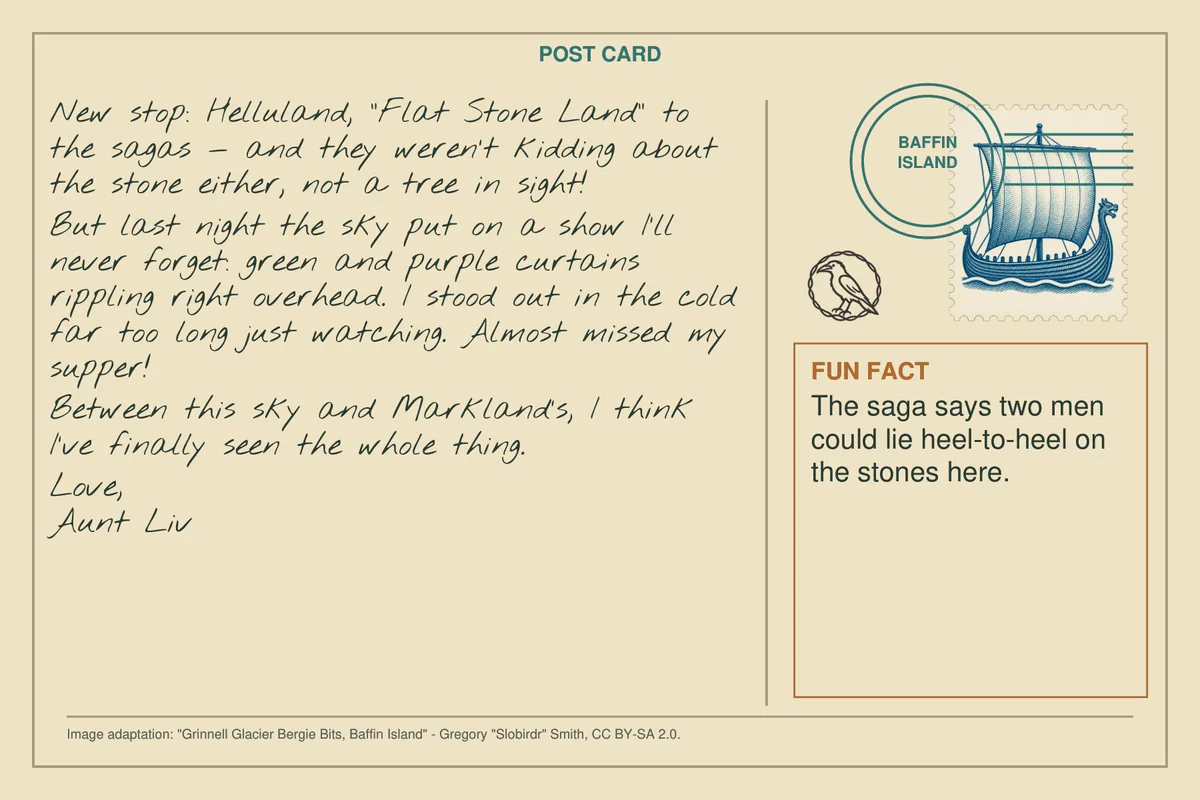
Uses: Postcard L2 · Battle Harbour (Markland) · envelope 2 Postcard L3 · Qikiqtarjuaq, Baffin Island (Helluland) · envelope 2 Magnifier · envelope 2
Laid together, postcards L2 and L3’s top edges join into a four-digit code, read with the magnifier.
Players have: Postcards L2 and L3, both in hand once lock 1 has opened (lock 2 until 27 Sept 2026).
Players do: Lay card L2 against card L3, rotated 180°, so their top edges meet. The cloud fragments printed across the two edges align into four digits; read them with the magnifier. Changed 7 Oct 2026 (user): holding the cards up to the light is not needed, the magnifier is enough.
They get: Code 1576. Set on the wheel, it opens envelope 3 (H2, H3, HD: PP-017, PP-018, PP-022).
Why it is there: Gives Leif’s trail a third lock from its own cards without adding a fourth card. Establishes early that cards can be combined physically, not just read individually, ahead of harder cross-trail combines later.
Laid top edge to top edge, one card upside down, the cloud fragments across the join read 1576.
Code: 1576 → wheel runes ᛒᛚᛟᛉ → envelope 3
Opens when players set the code from What’s in the horn on the wheel.
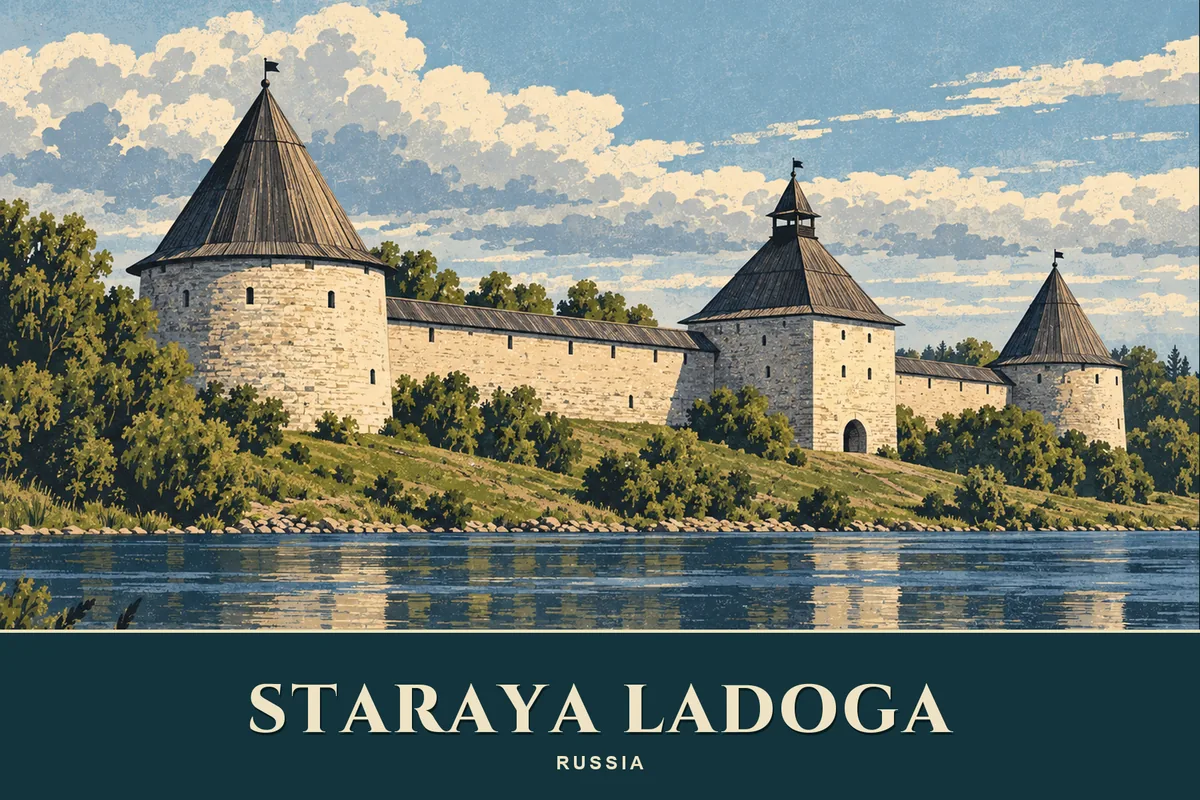
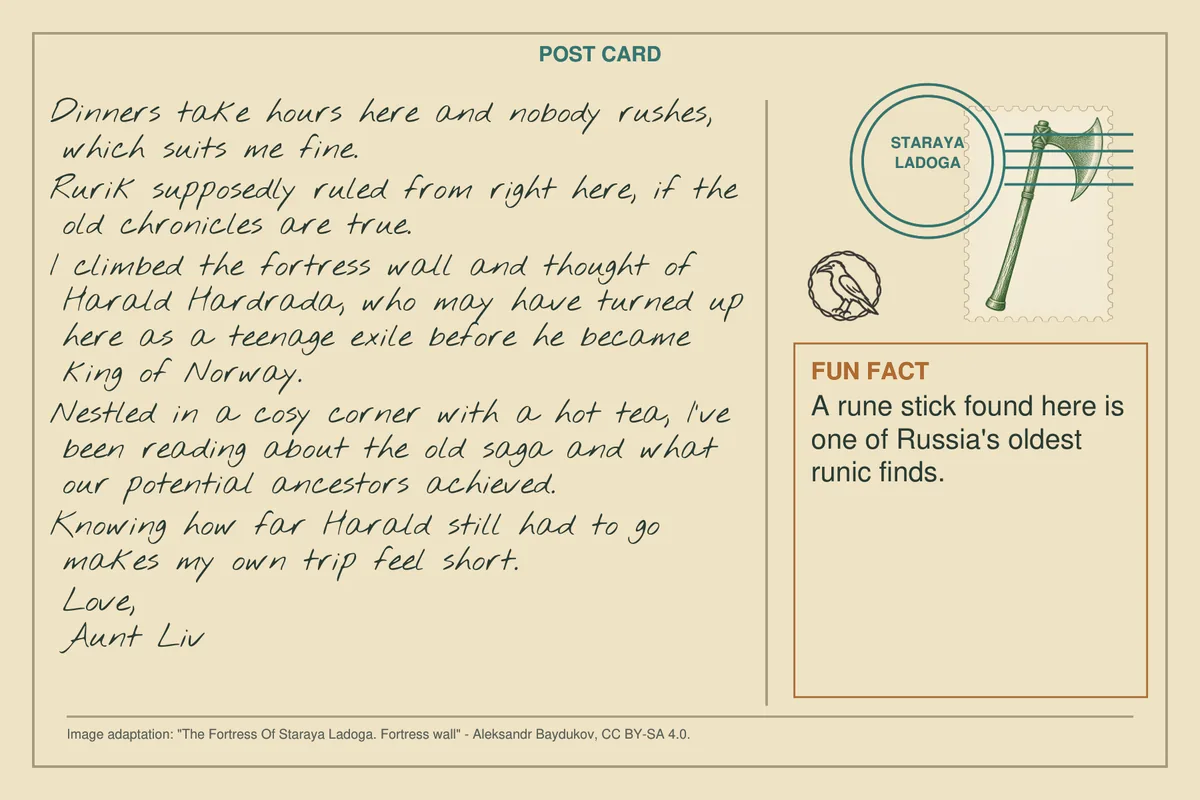
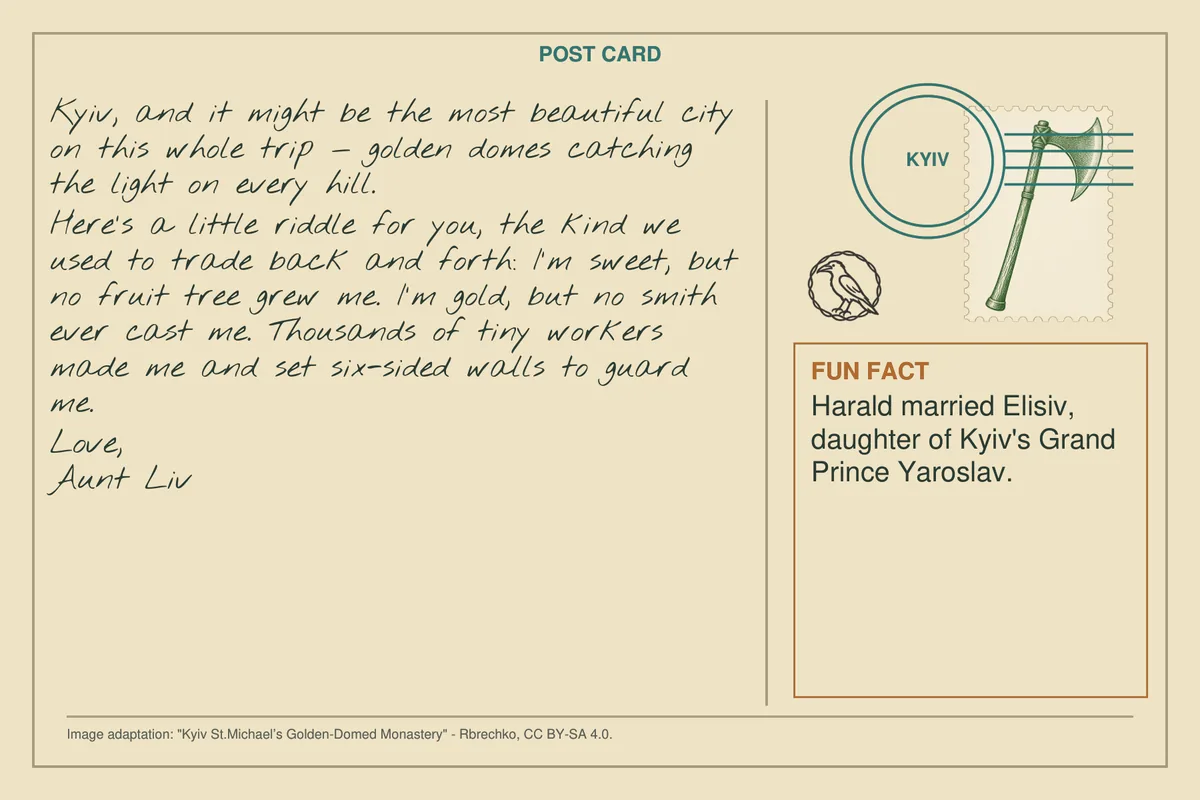
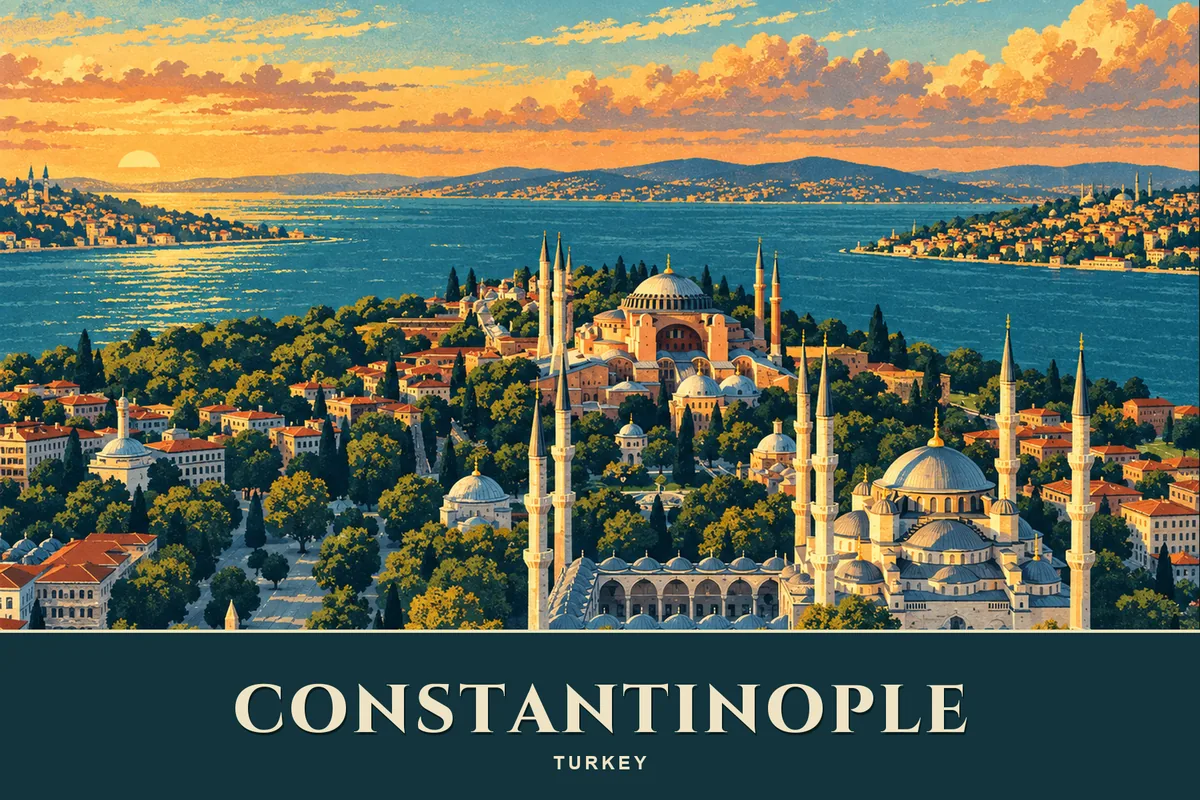
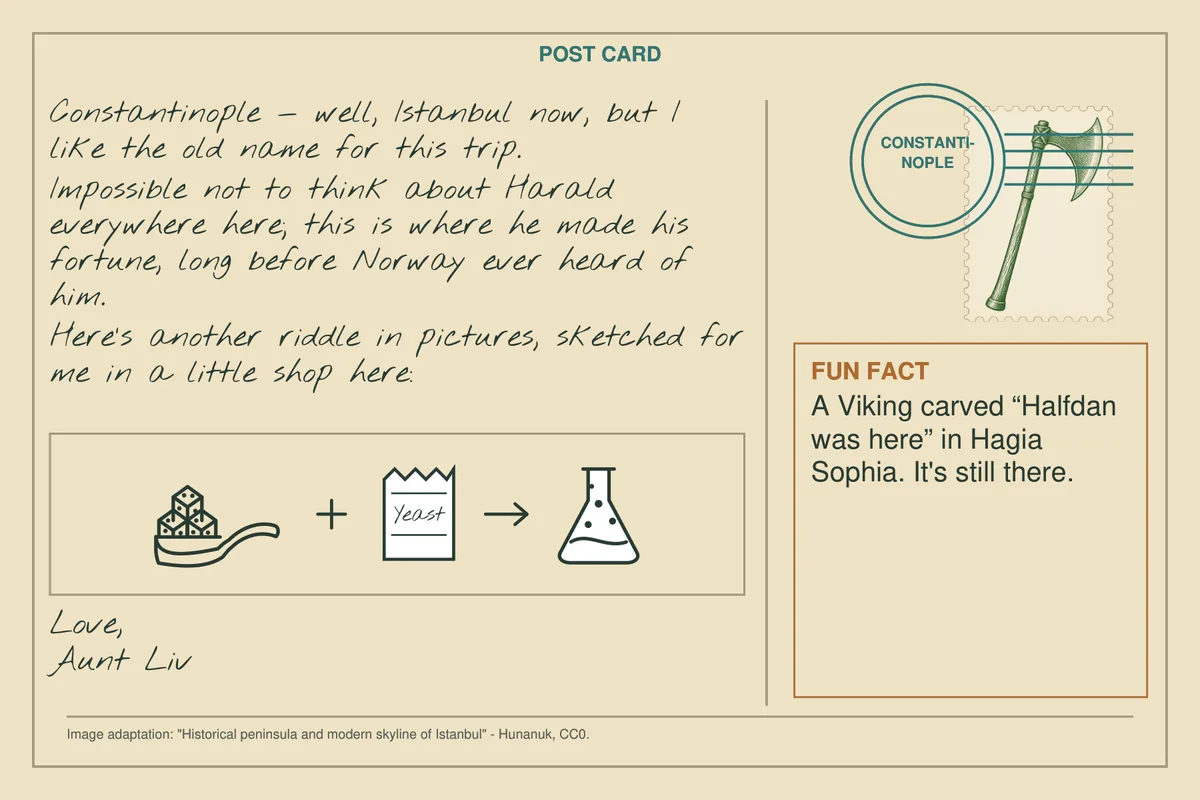
Uses: Postcard H2 · Staraya Ladoga · envelope 3 Postcard H3 · Kyiv · envelope 3 Postcard HD · Constantinople (decoy) · envelope 3
Three postcards each hide one attribute word behind a different riddle technique; only one drink fits all three.
Players have: Postcard H3 (Kyiv), postcard H2 (Staraya Ladoga) and postcard HD (Constantinople) — HD stops being a pure decoy and takes on this leg’s third lock, closing the “Constantinople still needs one assigned” gap in the [Final riddle tab].
Players do: Solve each card’s riddle for its one word — HONEY, DRINK, FERMENTED — using a different technique per card so no two feel the same, then combine the three attributes: the only drink that is honey, fermented and a drink is MEAD.
They get: Code MEAD. Opening this lock releases PP-013, PP-030, PP-031, PP-025.
Why it is there: Closes the last open lock of Harald’s leg (PZ-004) without touching the map, which the rune-and-perch branch already uses. Gives HD the real puzzle job every decoy is required to carry ([Final riddle tab]) instead of leaving Constantinople unassigned. H3 and HD are linked by real Rus’-Byzantine history, not only by this puzzle: Oleg of Novgorod made Kyiv the Rus’ capital and, per the Primary Chronicle, sailed on Constantinople in 907 — the treaty that followed gave Rus’ merchants trading rights there. That fact carries H3’s Fun Fact, deliberately not honey/bees, since the riddle itself already is the honey content and a Fun Fact repeating its own answer would break Q-015’s one-fact-per-voice rule. Superseded 26 Sept 2026: on review this was judged too close after all — same core claim (fortune made here funded the throne), just with dates added. HD’s Fun Fact is now unrelated Constantinople trivia (Varangian runic graffiti in the Hagia Sophia) instead.
Staraya Ladoga spells DRINK with the first letter of each of its five sentences. Kyiv’s riddle (sweet but not fruit, gold but not metal, made by thousands, six-sided walls) is HONEY. Constantinople’s picture puzzle (sugar feeding yeast, a bubbling flask) means FERMENTED. A fermented honey drink is MEAD.
Code: MEAD → wheel runes ᚱᛒᛚᚷ → envelope 4
Opens when players set the code from The treasure route on the wheel.
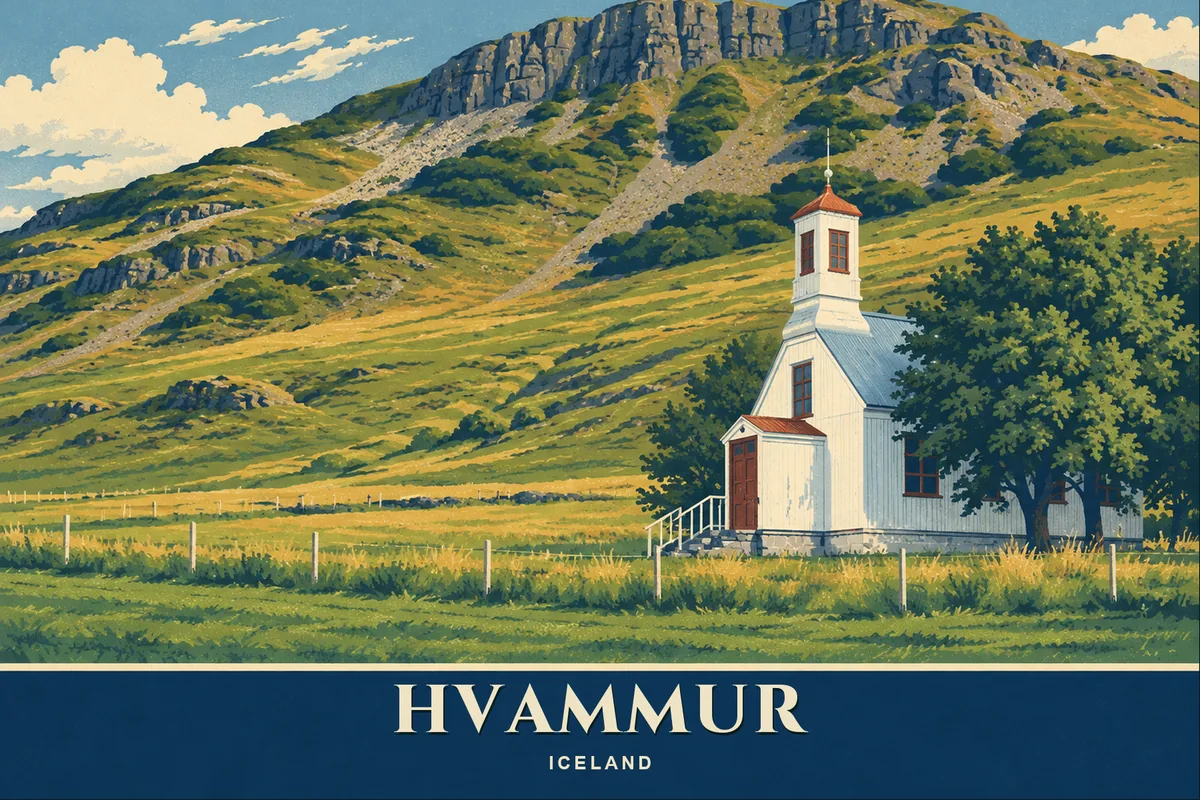
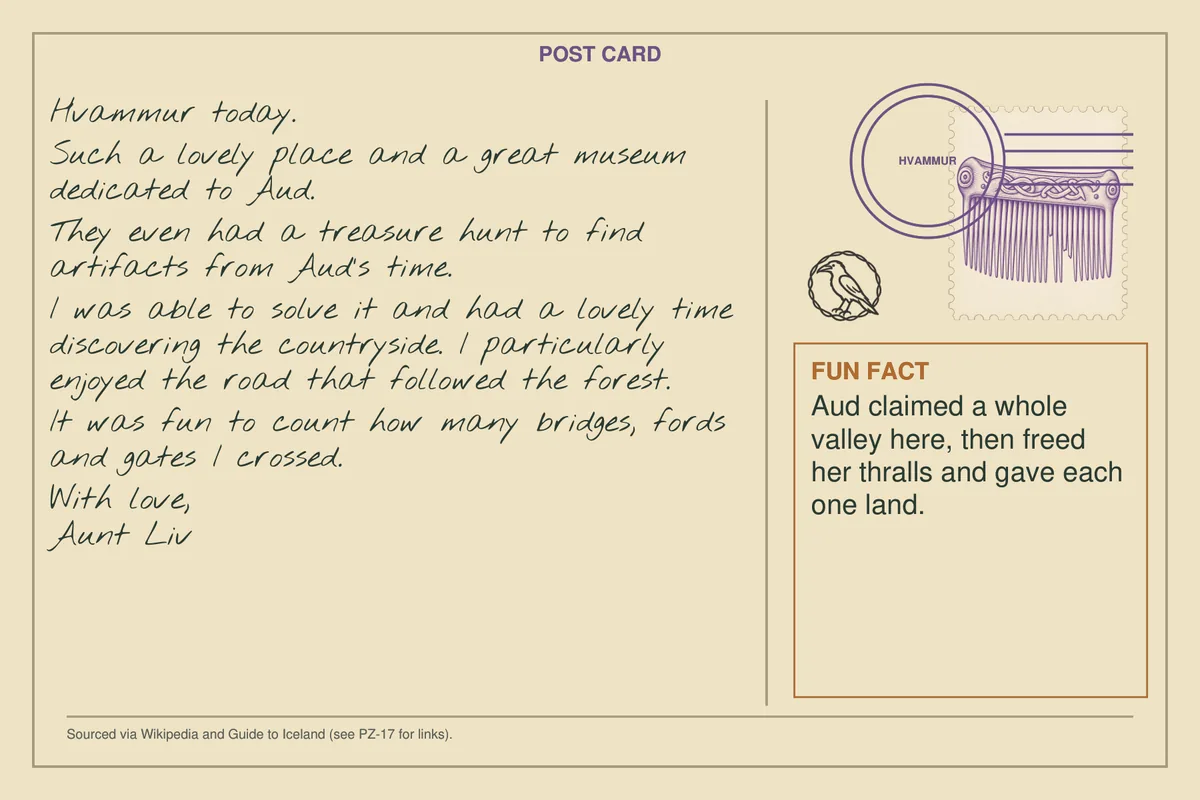
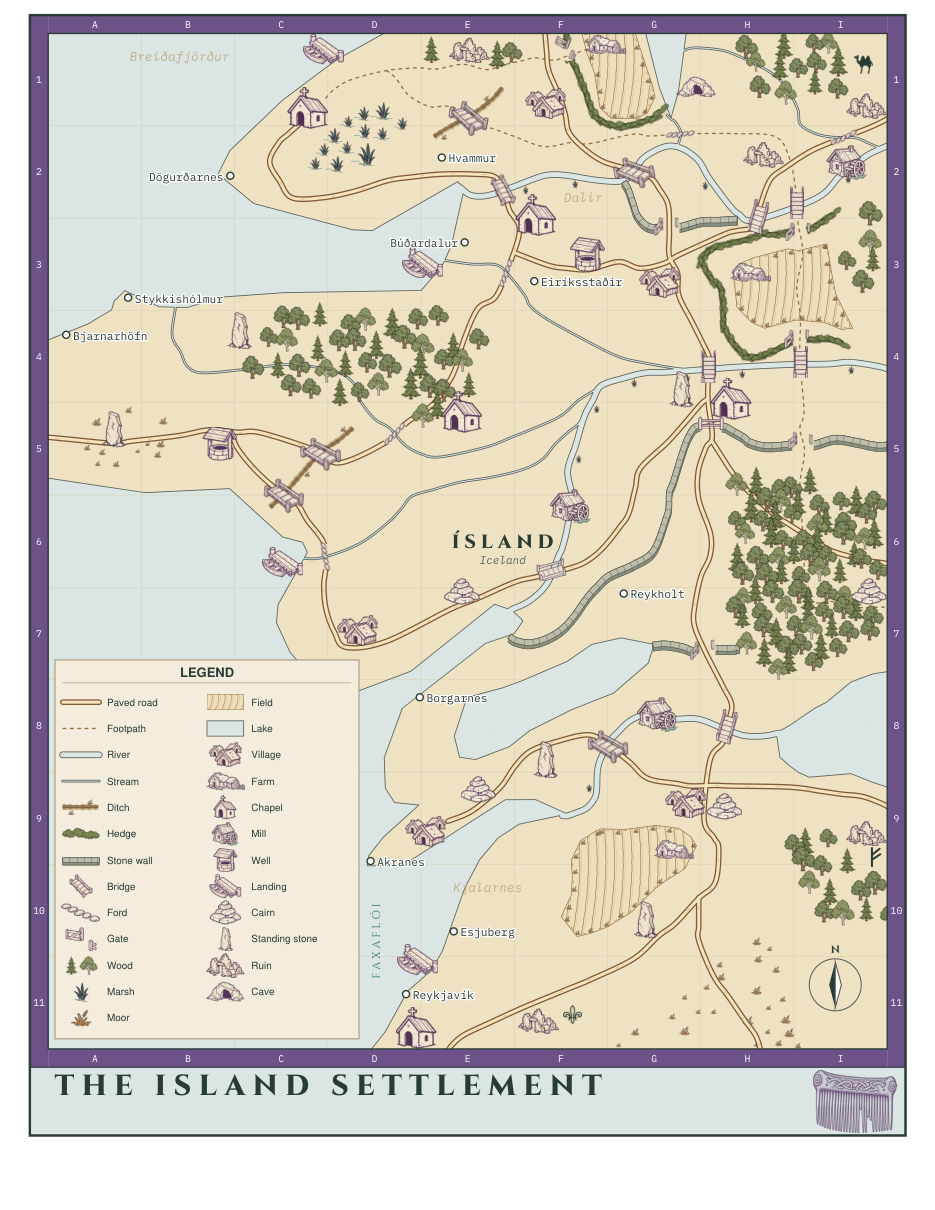
Uses: Postcard A2 · Hvammur · envelope 4 Aud's trail map (The Island Settlement) · envelope 4 Aud's Treasure Museum ticket · envelope 4
One portrait map, symbols not to scale, carrying line/area/point symbols instead of isolated icons — the split-panel design below was shelved 17 Sept 2026 in favour of this. Players walk the drawn path network and count what the route crosses.
Players have: Postcard A2 (Hvammur), Aud’s laminated journey map, and the Aud’s Treasure Museum ticket (six rows, one per leg, three tally columns: bridges, fords, gates).
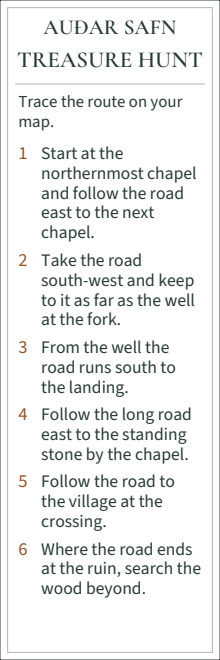
Players do: Walk the six legs on the real drawn network, from the northern chapel to the wood beyond the ruin at I9. At the merged leg 5, follow the road to the correct “village at a crossing” (H9, not the lookalike near H3/G3) — A2’s message gives only the forest detail (“the road that followed the forest”) to tell them apart; it does not name a direction (corrected 17 Oct 2026, Q-063: the card never said “south”). Tally bridges, fords and gates crossed across all six legs.
They get: Code 532 (521 until the map redraw of 16 Oct 2026). Opening this lock releases PP-005, PP-010, PP-011.
Why it is there: Turns Aud’s own map from a final-route prop into a working treasure map without printing a second sheet, and makes the tally self-checking — a blue line or a gate is unmistakable, so counting is hard to get subtly wrong.
Six legs: chapel → chapel (1 bridge), → well (2 fords, 1 bridge), → landing (1 ford, 1 bridge), → standing stone (1 bridge), → village at the crossing, south along the forest road (2 gates, 1 bridge), → the wood beyond the ruin (nothing). Totals: 5 bridges, 3 fords, 2 gates: 532.
Code: 532 → wheel runes ᛈᚹᛟᛇ → envelope 5
Opens when players set the code from Counting in the illustration on the wheel.
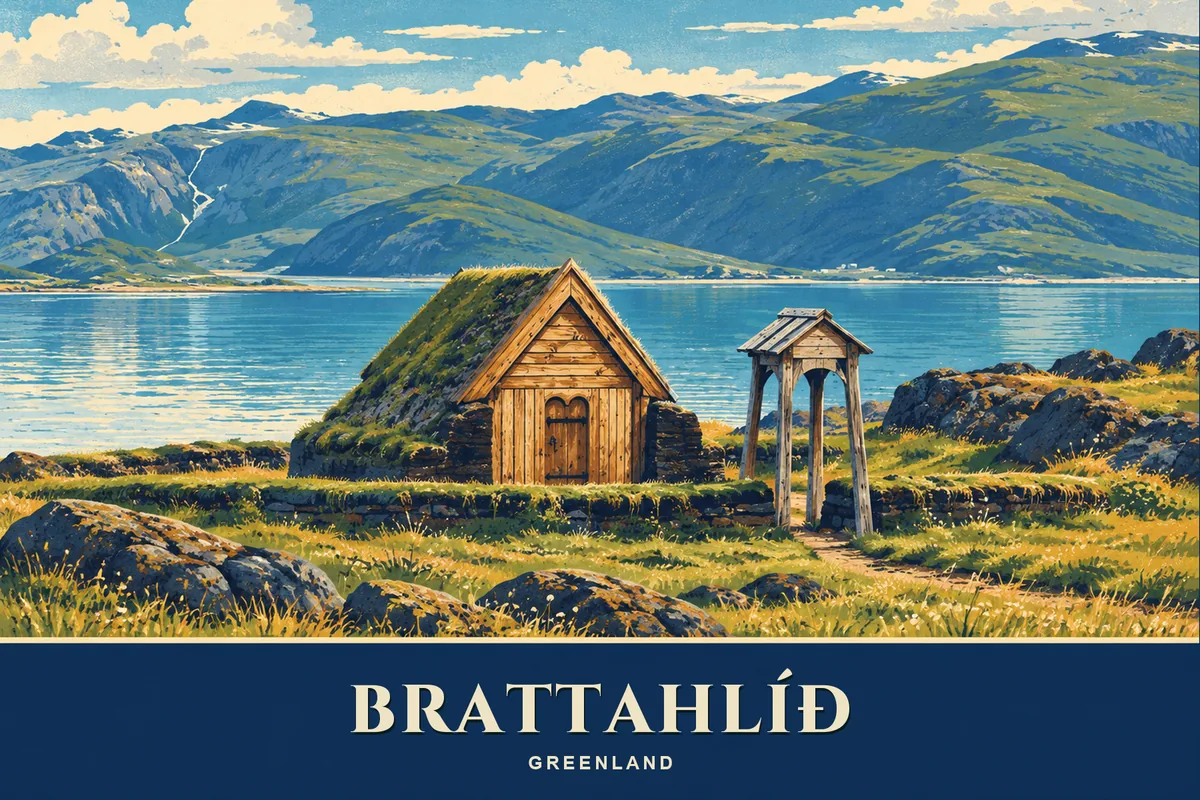
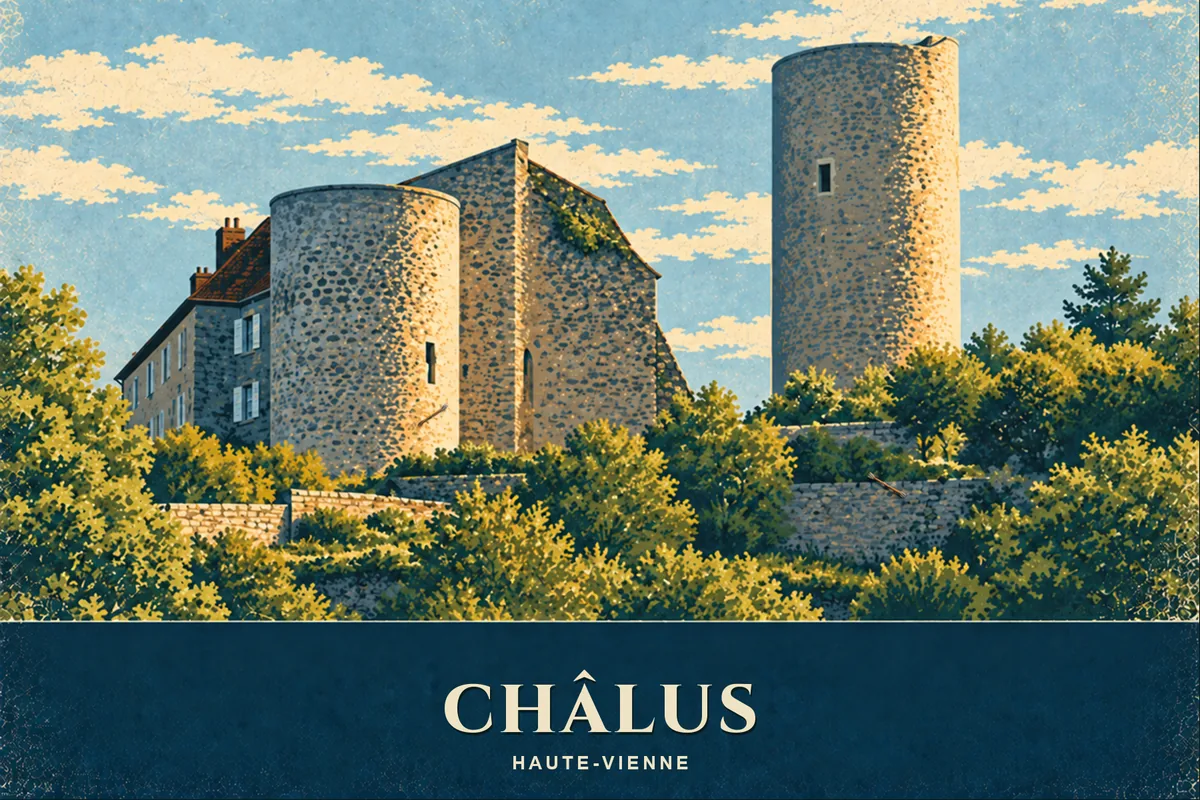
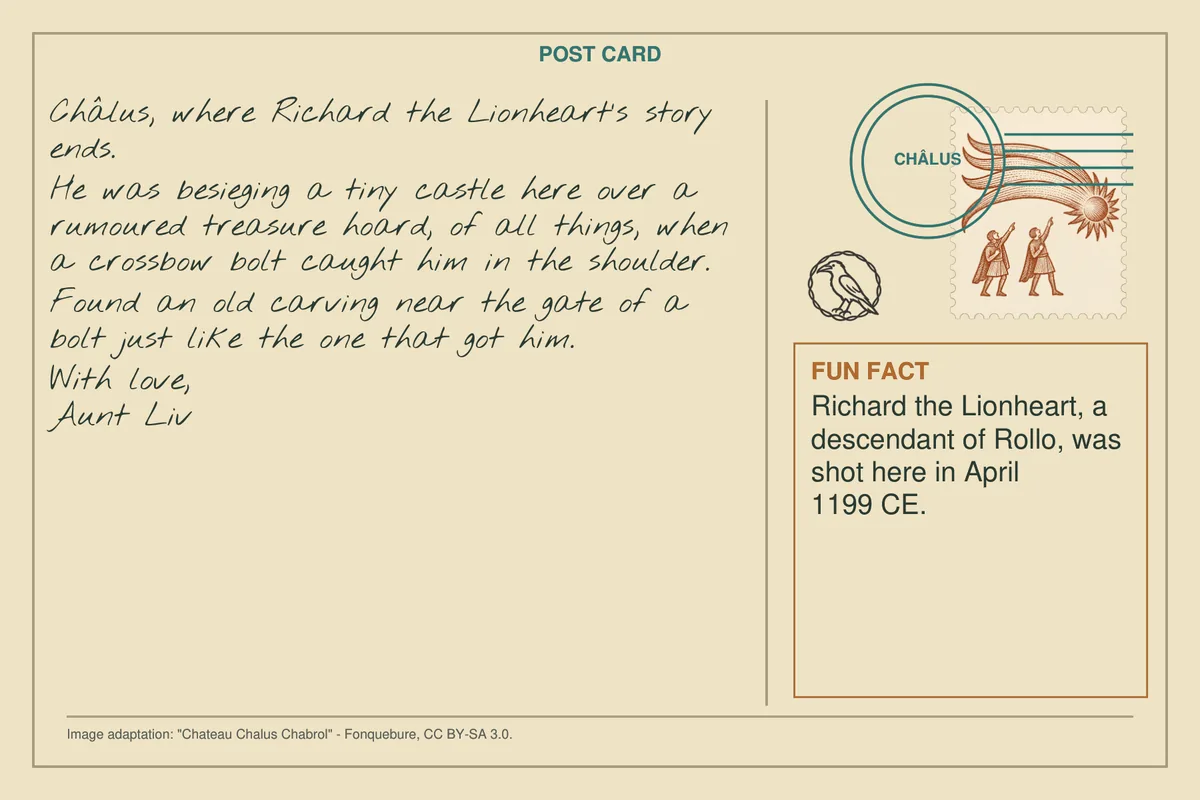
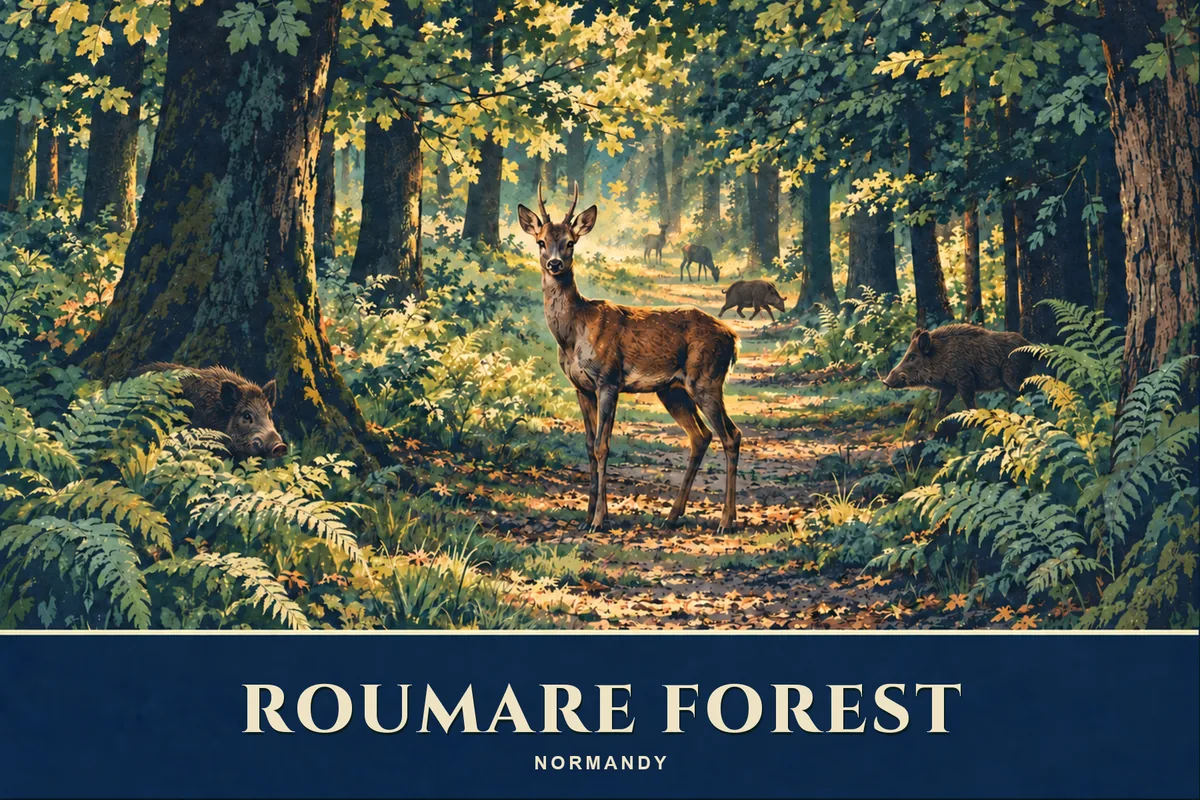
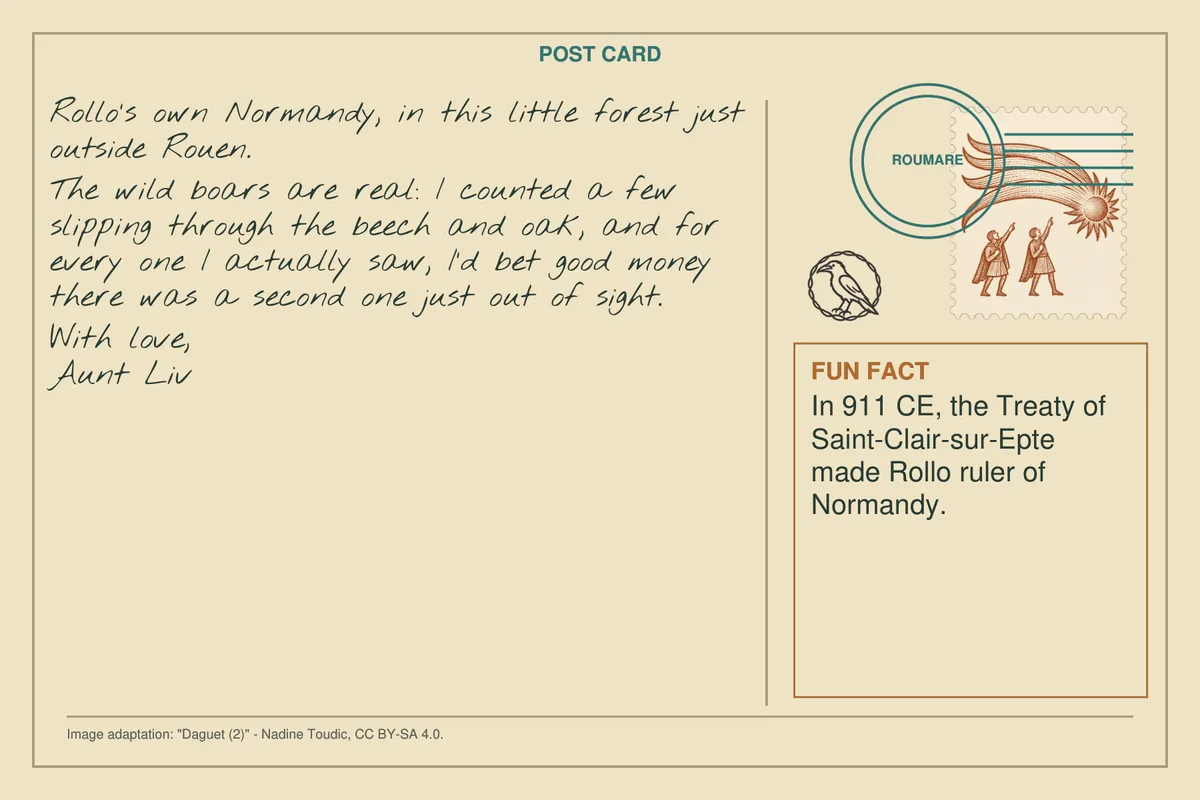
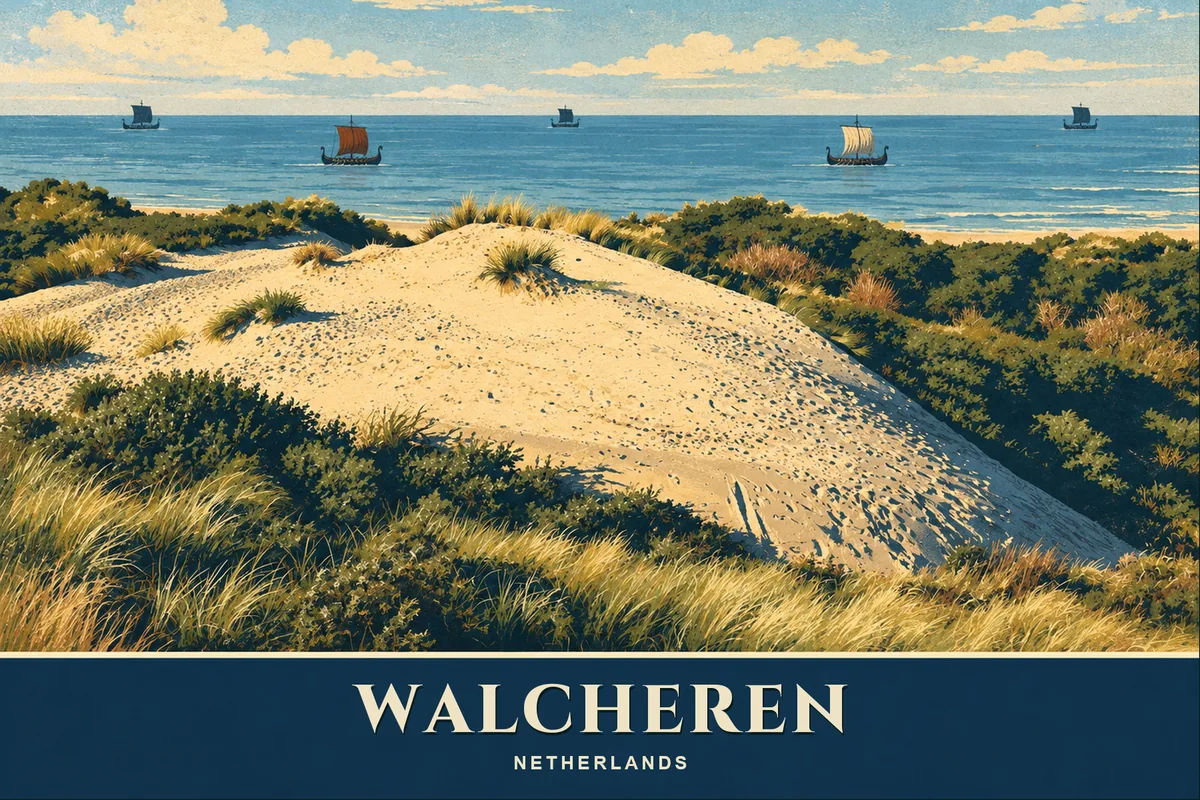
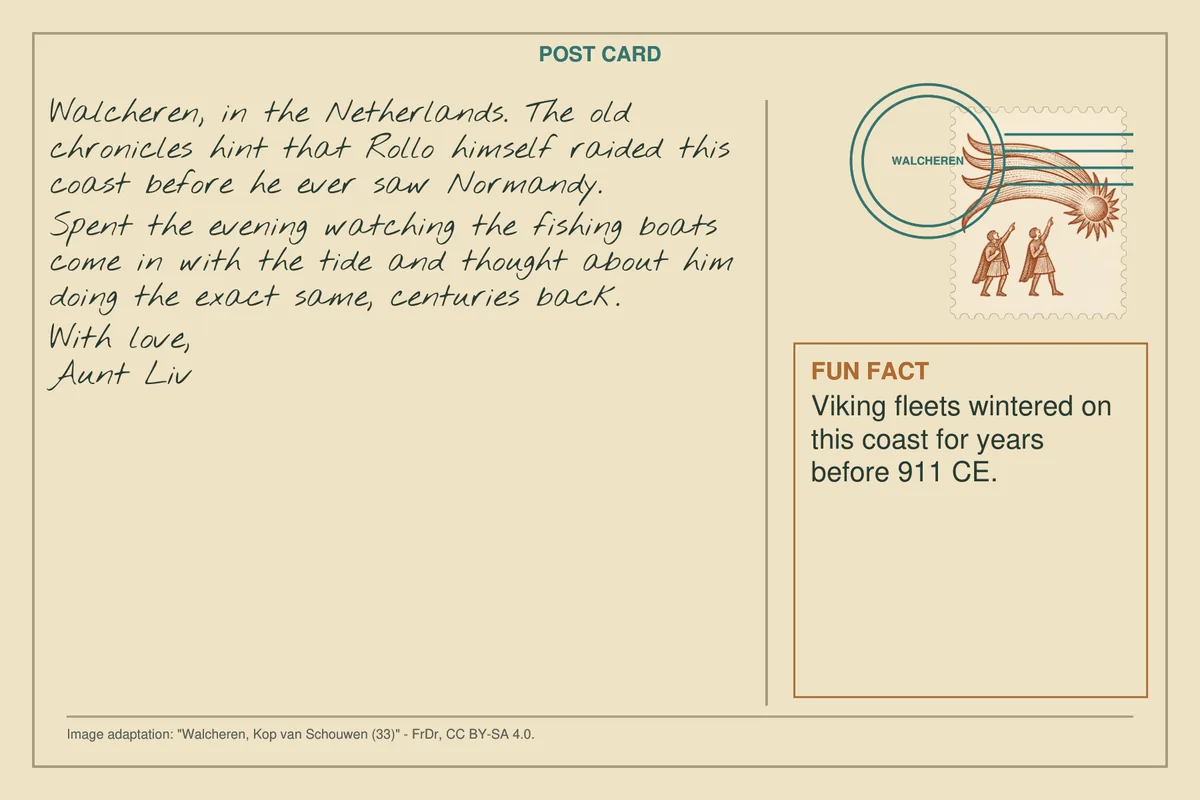
Uses: Postcard R1 · Châlus · envelope 5 Postcard R6 · Roumare Forest · envelope 5 Postcard RD · Walcheren (decoy) · envelope 5
Three Rollo-trail fronts each hide a count of one repeated object. Their Fun Facts fix the order.
Players have: Postcards R1 (Châlus), R6 (Roumare Forest) and the decoy RD (Walcheren). Nothing else.
Players do: Count the repeated object on each front. Read each card’s typed Fun Fact for its date, put the three in chronological order, and read the counts in that order.
They get: Code 562. Opening this lock releases PP-004, PP-029, PP-024.
Why it is there: Gives the only three Rollo-trail cards without a lock job one, satisfying PZ-013’s rule that every card gates a lock. The doubling step keeps it from being plain counting.
Walcheren 5 boats (before 911), then Roumare 3 boars doubled to 6 (911), then Châlus 2 crossbow bolts (1199): 562.
Code: 562 → wheel runes ᛈᛏᛟᛇ → envelope 6
Opens when players set the code from The beasts on the chart on the wheel.
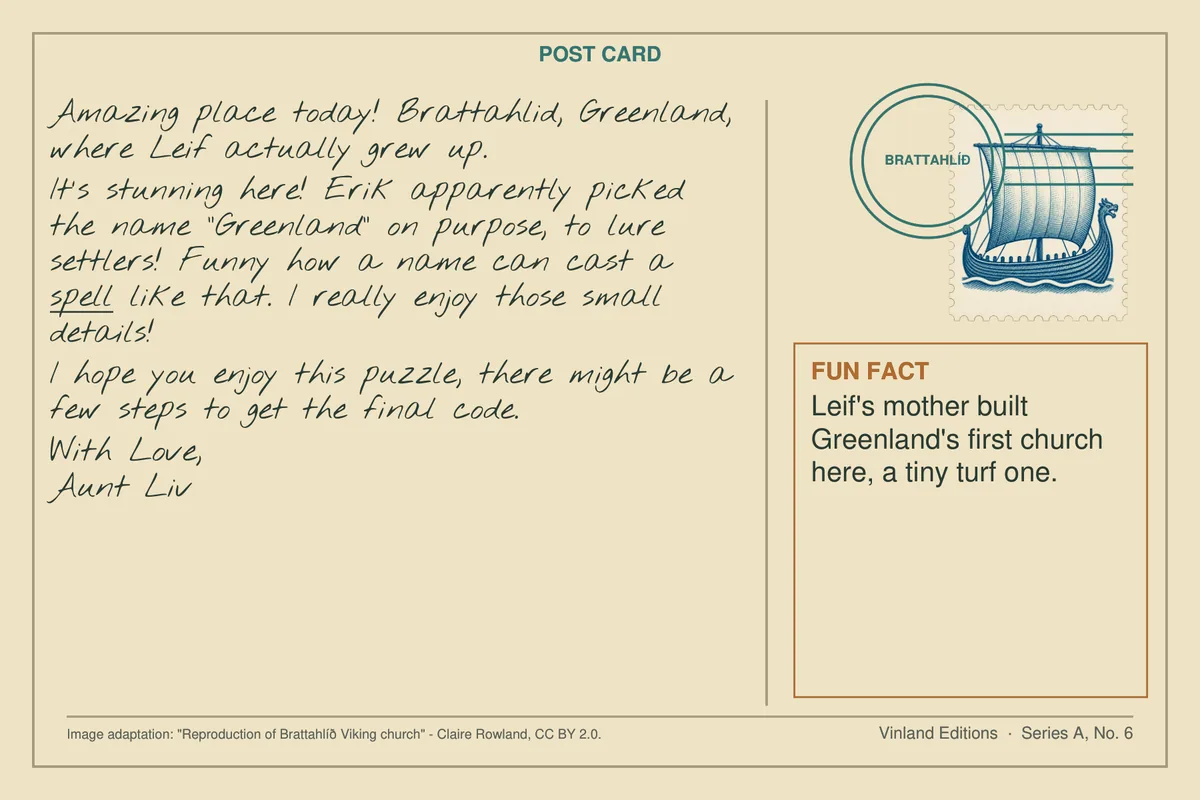
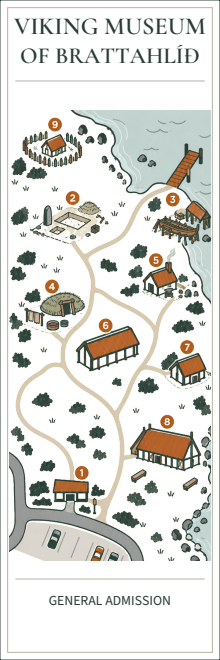
Uses: Postcard LD · Brattahlíð (decoy) · envelope 6 Leif's trail map (The Western Lands) · envelope 6 Viking Museum of Brattahlíð ticket · envelope 6
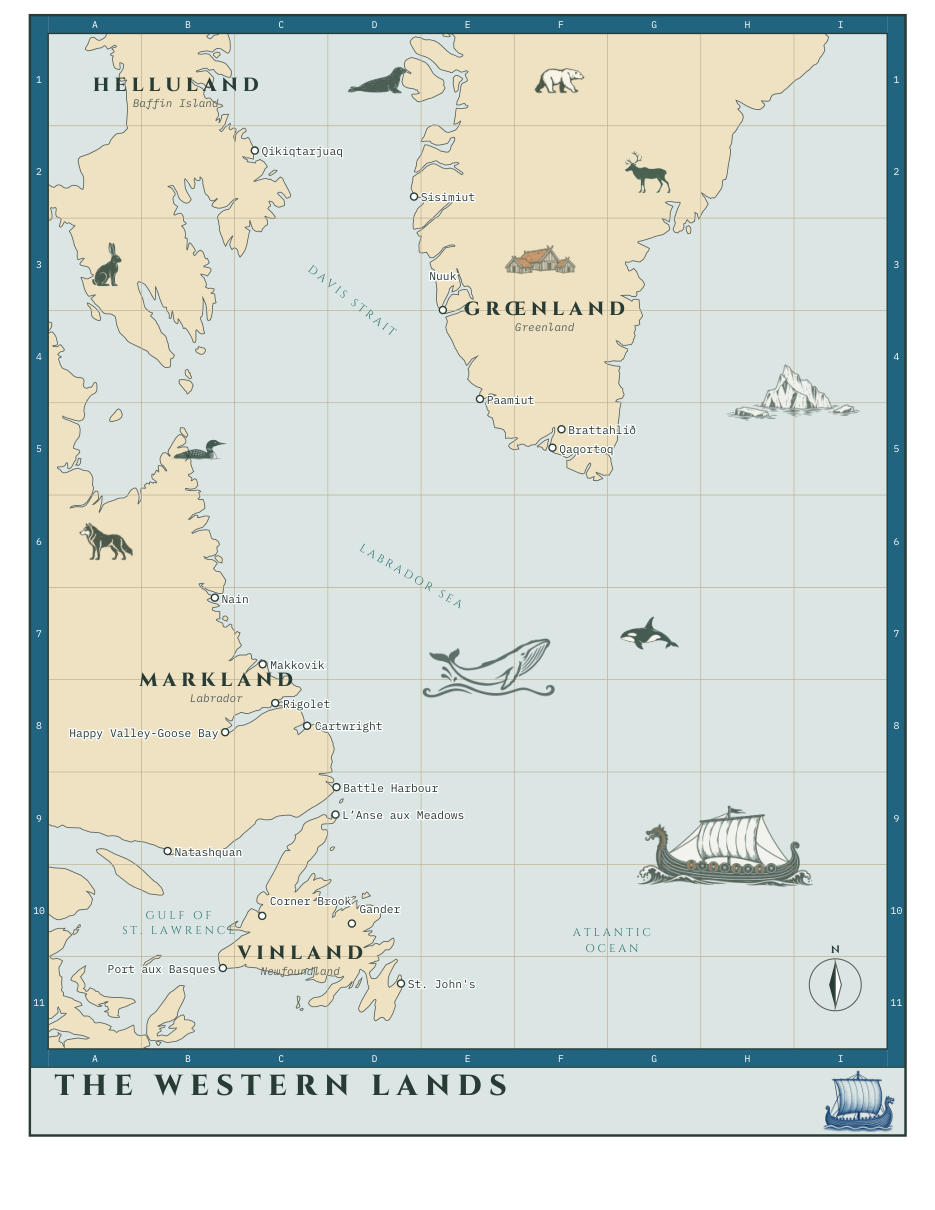
A hidden imprint on the decoy card points to one square of Leif’s sea chart. The unlabelled animal drawn there names the key to a lookup on the museum ticket.
Players have: Leif’s trail map — a North Atlantic sea chart with seven animal vignettes drawn into the empty water and land — decoy postcard LD, which points into it, and the museum ticket (Viking Museum of Brattahlíð since 28 Sept 2026). The card and the map arrive together from lock 4 (MEAD) since 7 Oct 2026 (Q-005); . Since 9 Oct 2026 the card, the map and the ticket all arrive together from lock 6 (counting, PZ-009).
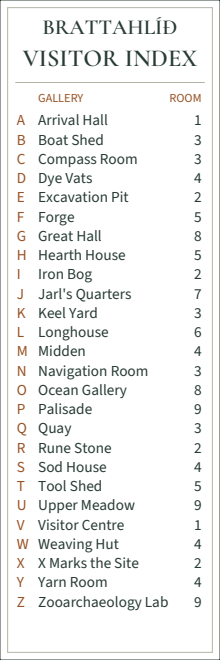
Players do: Follow the decoy card’s imprint to one beast on the chart, identify it from how and where it is drawn, then read its four letters off the A–Z visitor index printed on the back of the ticket. Each letter gives one digit.
They get: Code 4865. Opening this lock releases PP-012, PP-014, PP-037, PP-026.
Why it is there: It gives Leif’s map a job on the front, using the geography rather than just the paper. It is a transformation chain rather than a pointer: the map’s answer becomes the key that operates the next prop, so neither object is any use alone.
The postcard points to square A6 on the sea chart, where the wolf is drawn. Reading W, O, L, F off the museum ticket’s visitor index gives 4865.
Code: 4865 → wheel runes ᚺᛏᛏᚦ → envelope 7
Opens when players set the code from The hoard and treasure tally on the wheel.
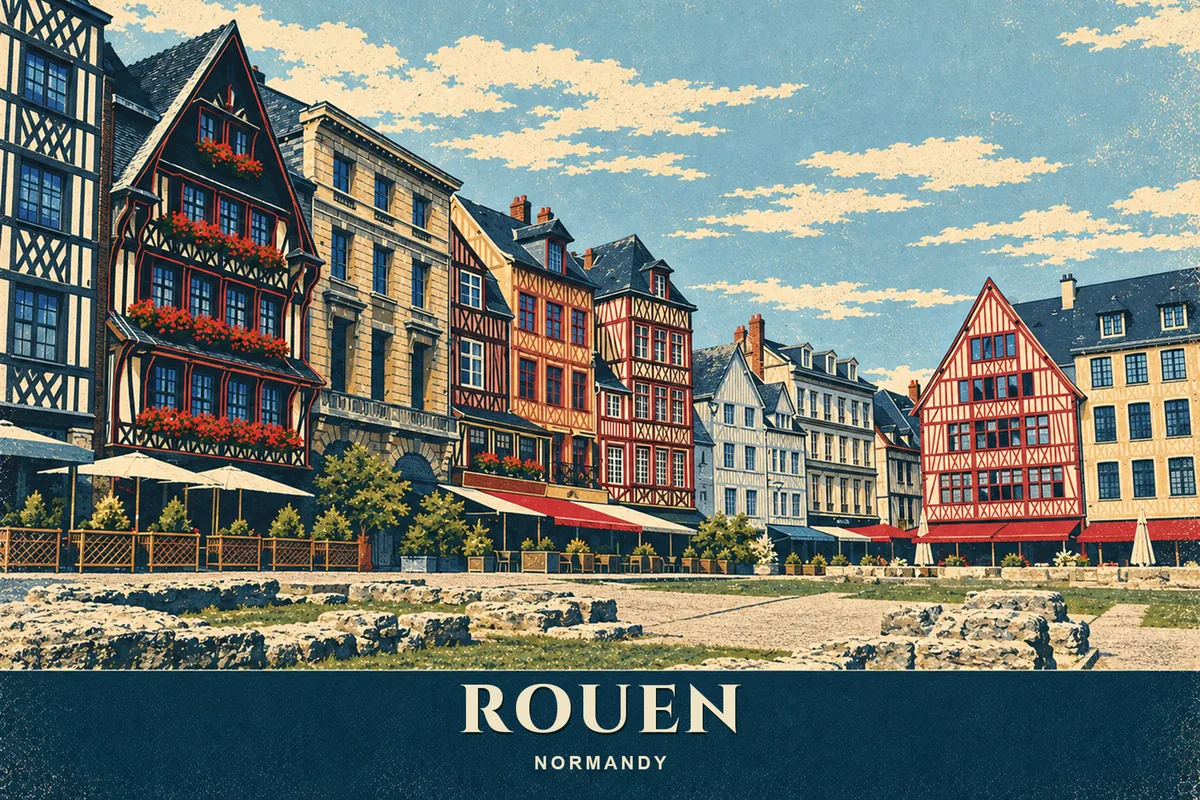
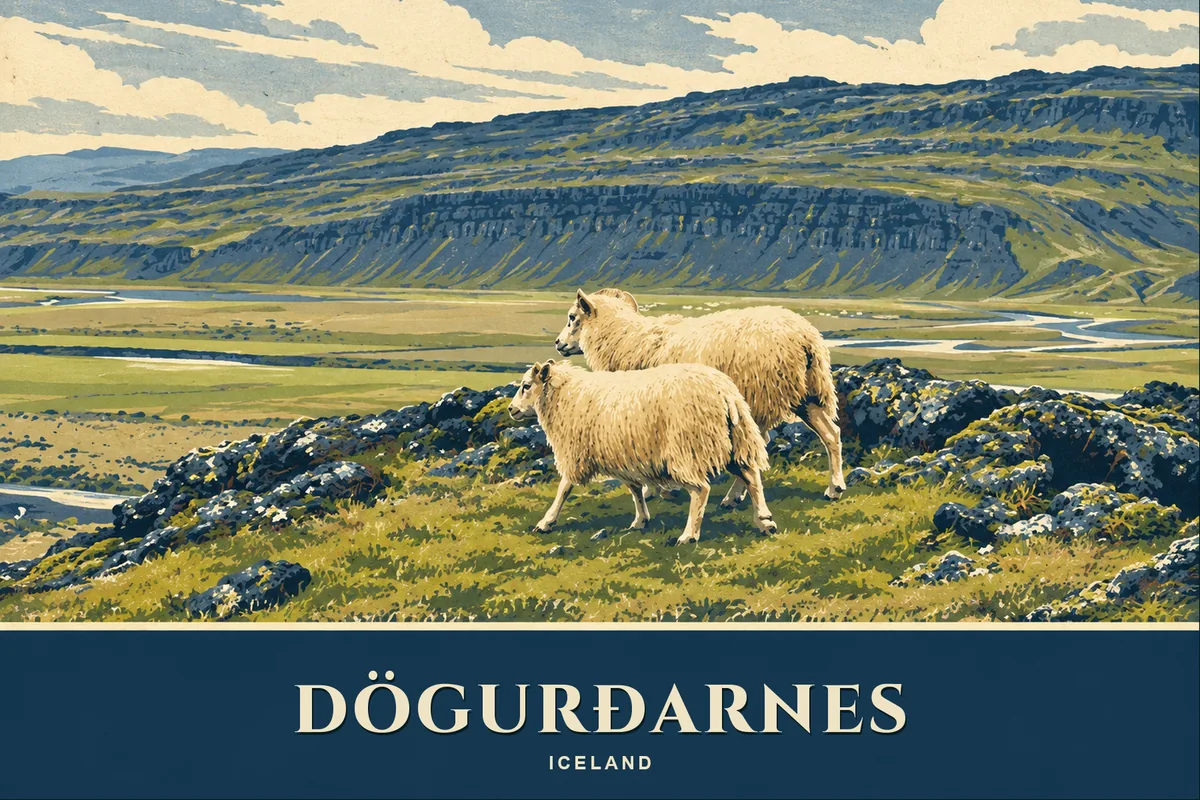
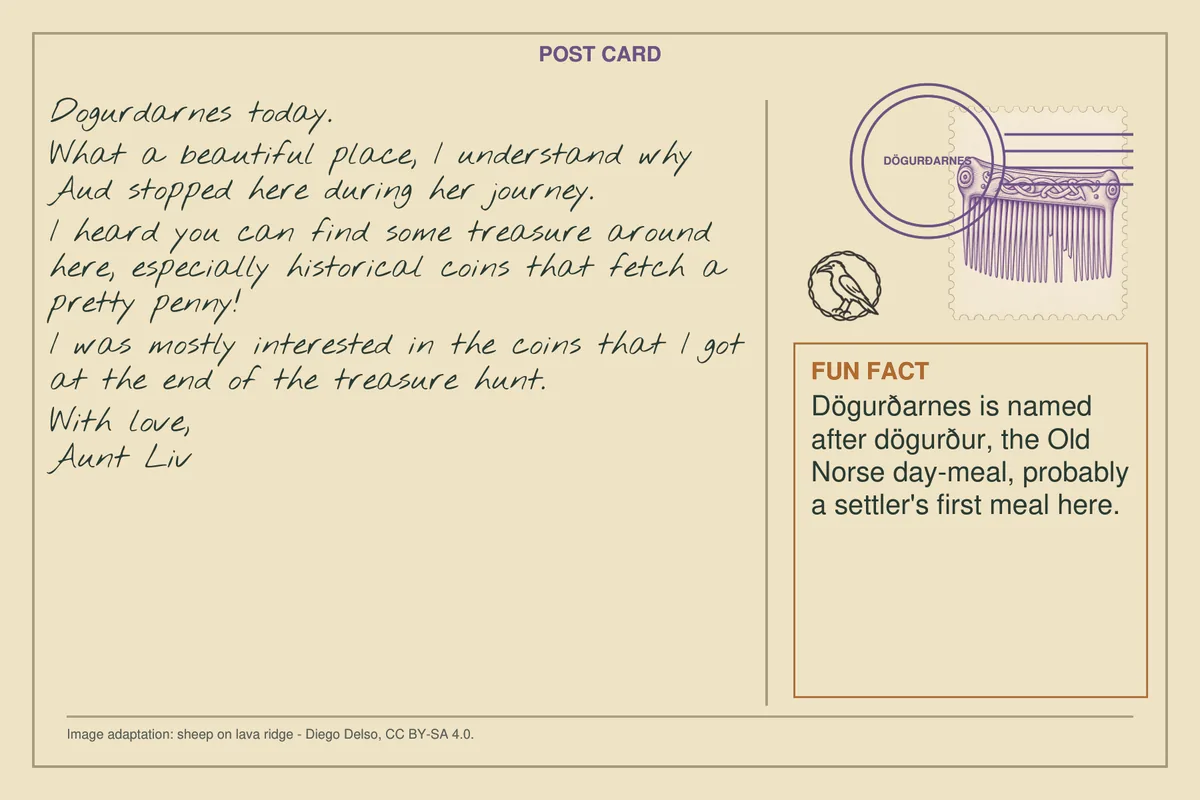
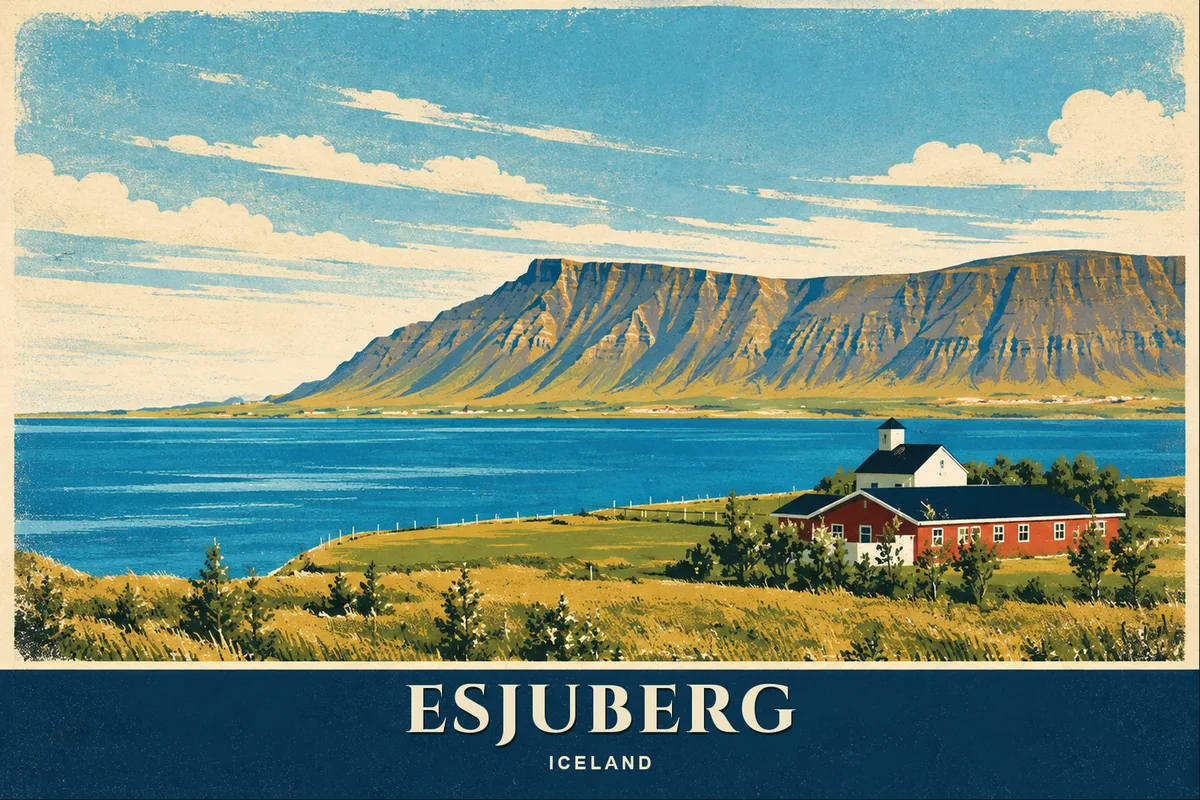
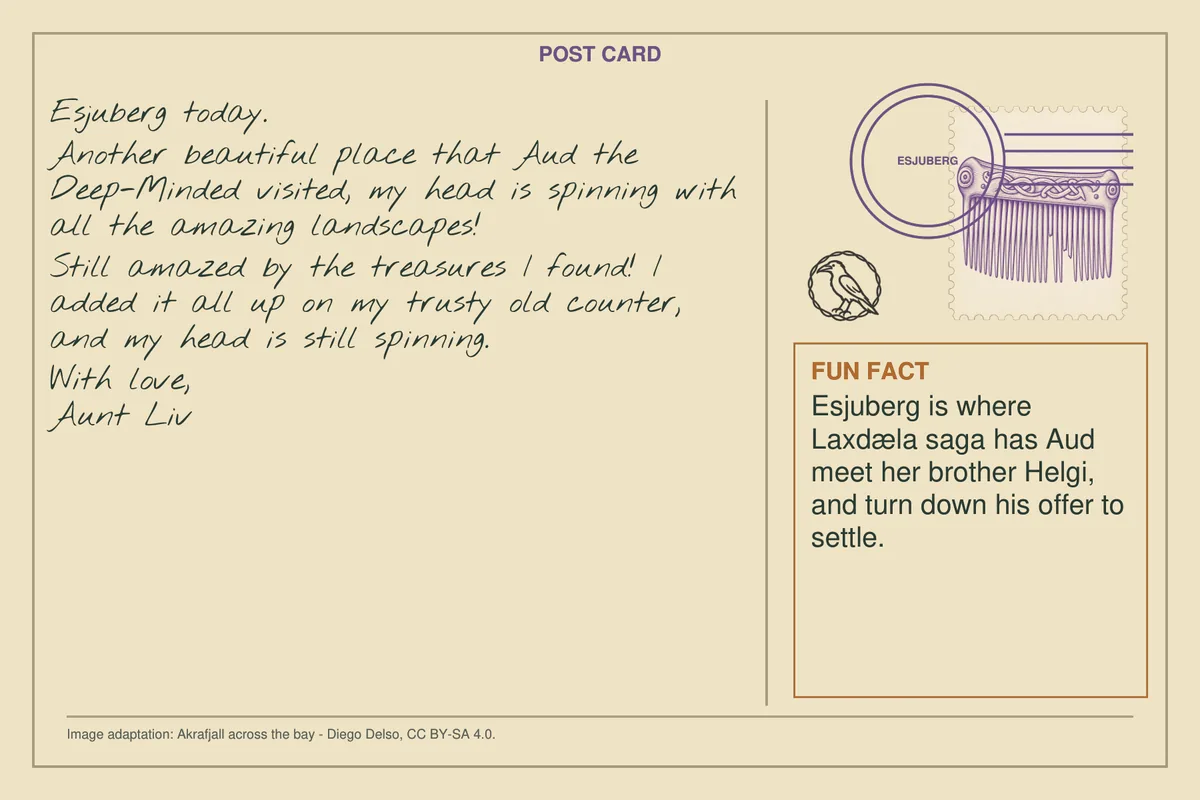
Uses: Postcard A1 · Dögurðarnes · envelope 7 Postcard A3 · Esjuberg · envelope 7 The coin hoard · envelope 7 Aud's Treasure Museum ticket · envelope 4 Aud's trail map (The Island Settlement) · envelope 4 Treasure tally · envelope 7
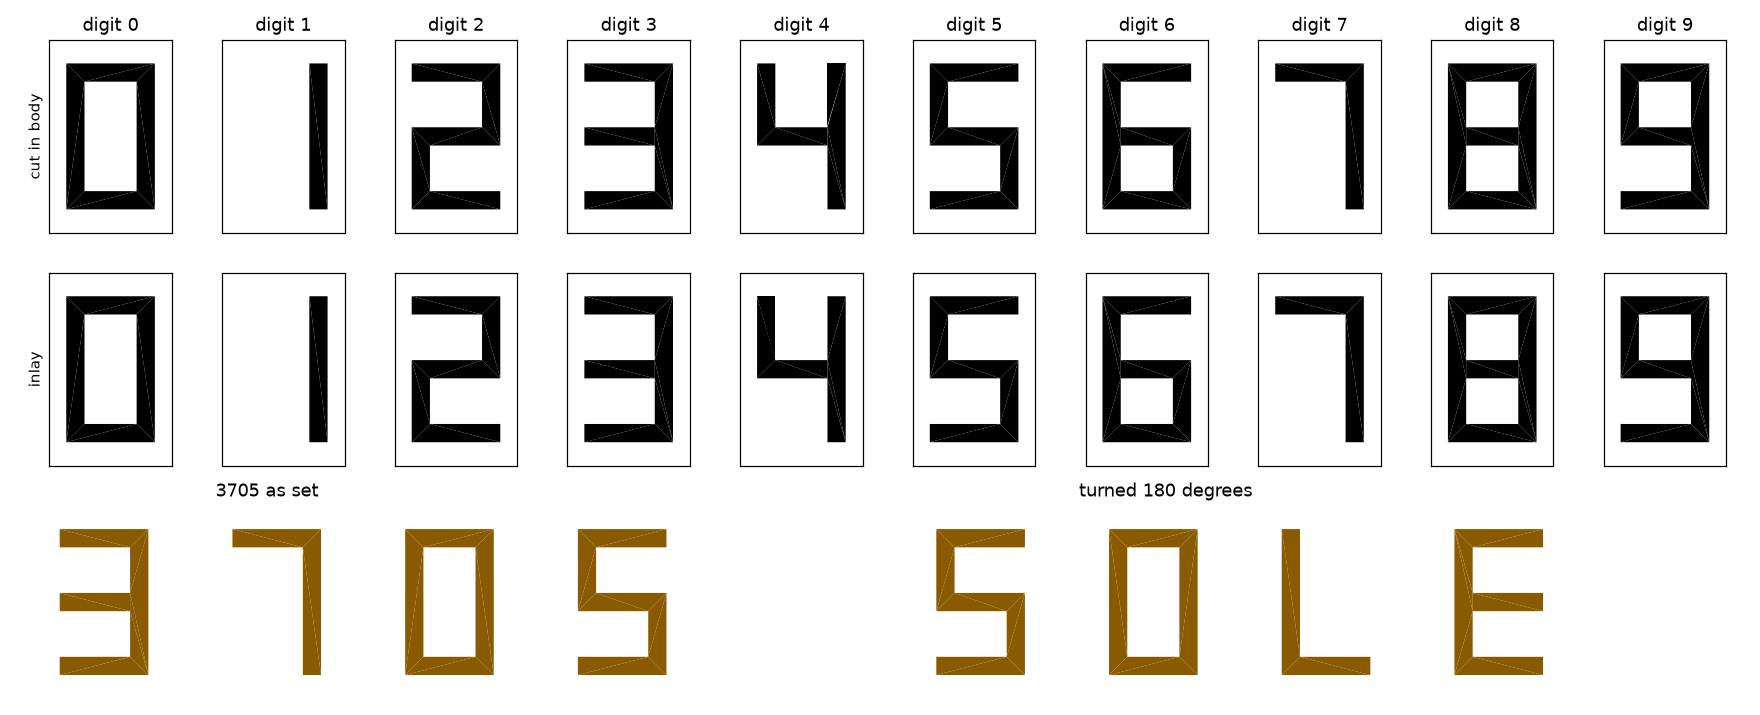
Sort three real-history coin piles, convert the Viking pile's values, add to 3705, and turn the total upside down to find a word.
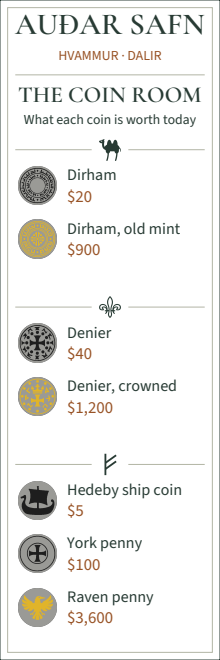
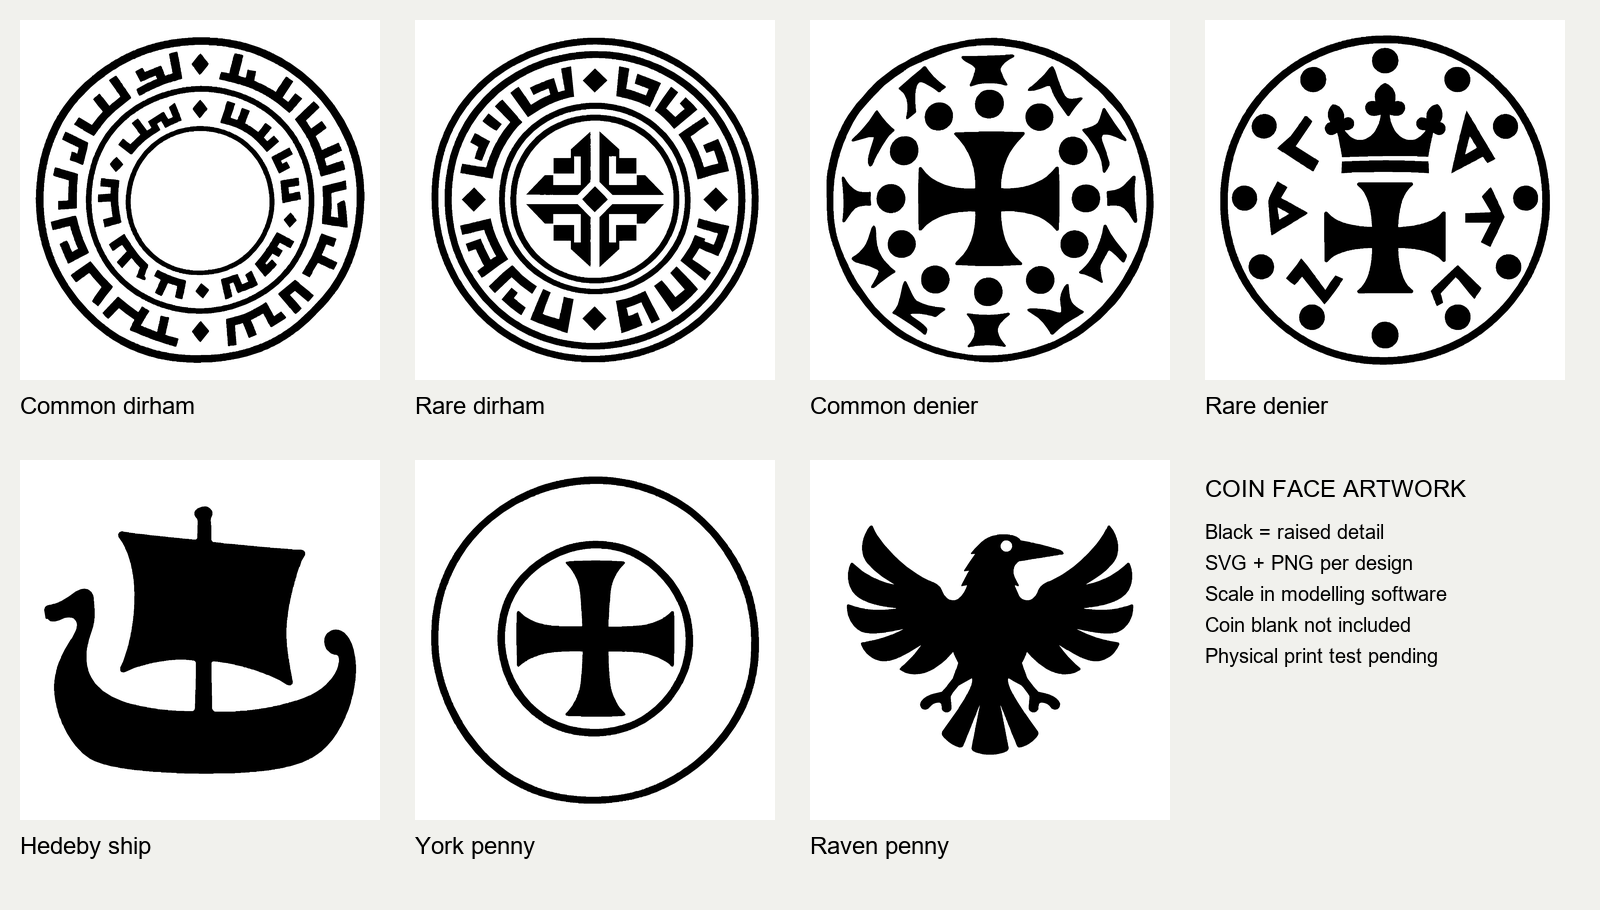
Players have: Loose mixed hoard of 12 coins (dirham, denier, Norse), the museum ticket’s Coin Room key, the three icon marks on Aud’s map, A1/A3, calculator or four-wheel tally.
Players do: Sort the loose coins by face against the ticket’s Coin Room. The fehu rune beside the ruin at the end of the route on Aud’s map matches the ticket’s Norse group; add those three coins’ values ($5 + $100 + $3,600 = 3705) and rotate the entire tally 180 degrees.
They get: Code SOLE. Opening this lock releases PP-006, PP-032, PP-033.
Why it is there: Preserves physical sorting and the word reveal without a calibrated scale, and gives each currency's rarity a real-history basis instead of an arbitrary number.
The marked group adds up to 3705, which reads SOLE upside down.
Code: SOLE → wheel runes ᛏᚾᚠᛖ → envelope 8
Opens when players set the code from The word-lock chain on the wheel.
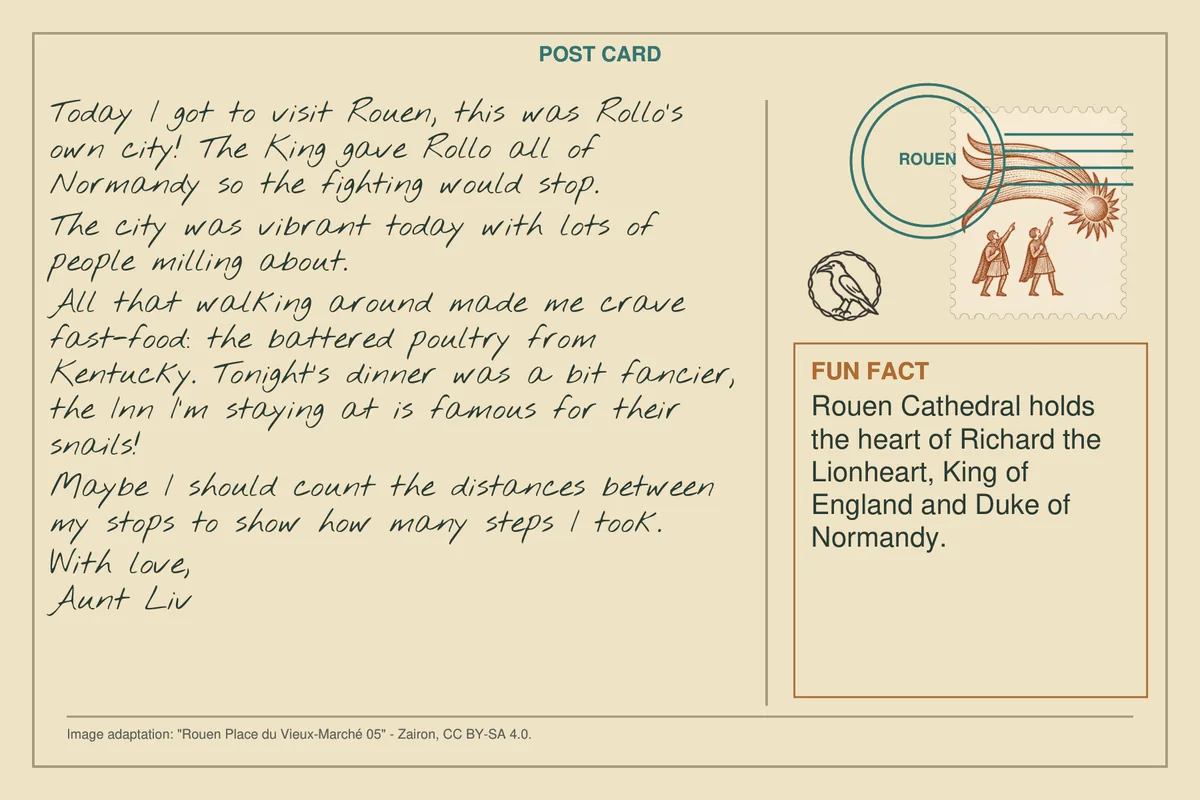
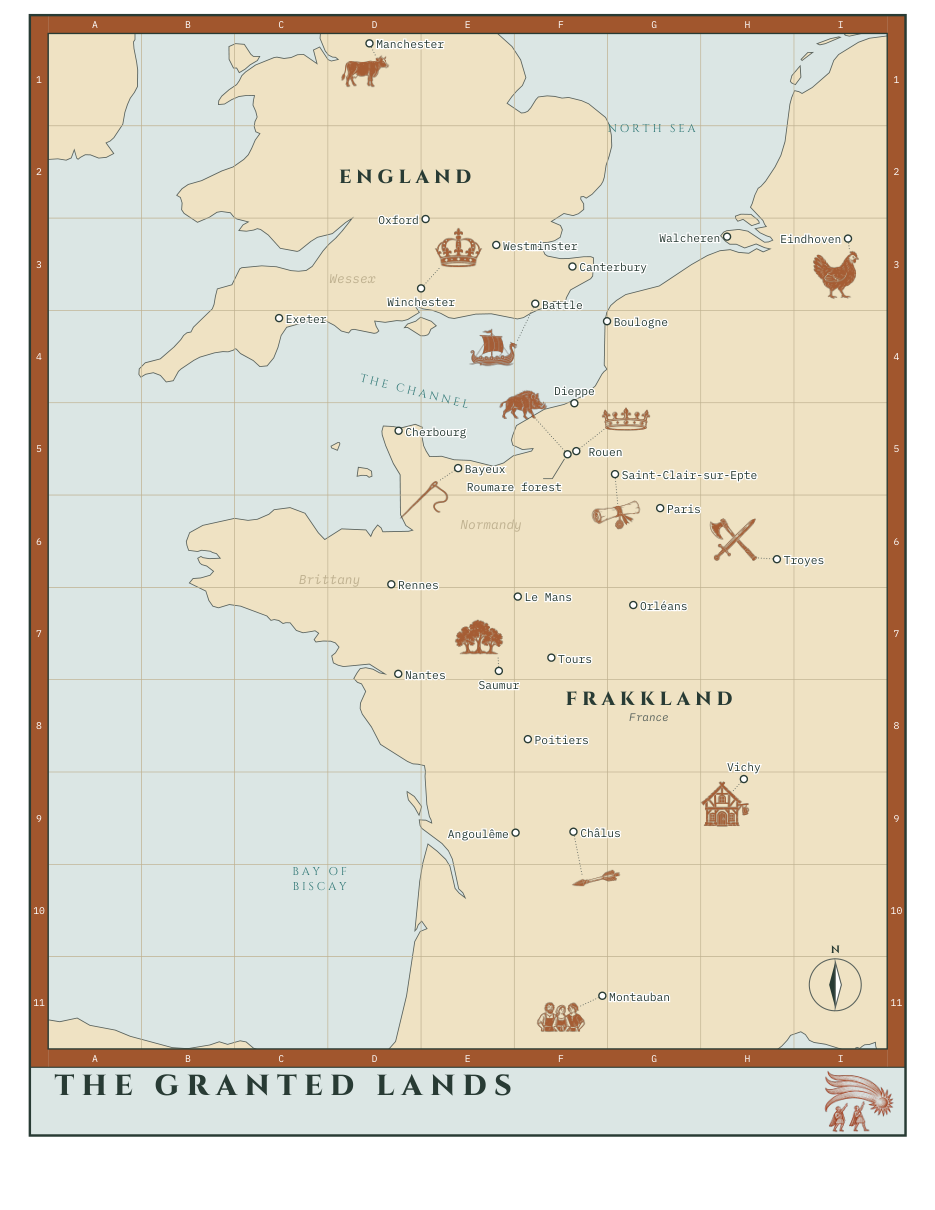
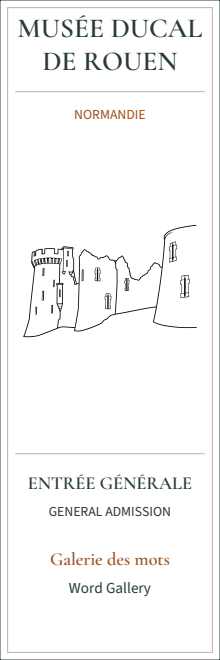
Uses: Postcard R2 · Rouen · envelope 8 Musée Ducal de Rouen ticket · envelope 8 Rollo's trail map (The Granted Lands) · envelope 8
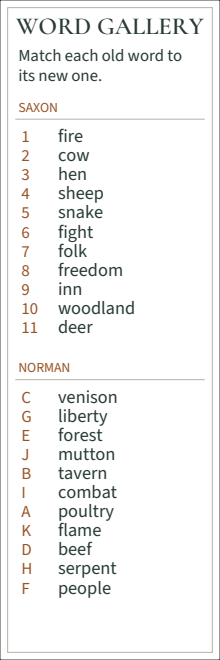
Four English word pairs split along the Norman Conquest’s class line. The Rouen card fixes the order, the ticket turns pairs into coordinates, the map turns coordinates into a square-count.
Players have: Postcard R2 (Rouen), the Musée Ducal de Rouen ticket, and Rollo’s trail map with its word icons.
Players do: Read the four Saxon-register words out of the Rouen message in the order they appear. For each, find its Norman partner on the ticket — the Norman column gives a letter, the Saxon column a number, together a grid coordinate. Find that word’s icon already drawn on Rollo’s map, and count the squares between the icon and the coordinate. Four counts, one per dial of the lock.
They get: Code 1486. Opening this lock releases PP-007, PP-008, PP-009.
Why it is there: Gives Rollo’s map a second job besides the final route, and makes the Conquest’s language history the puzzle rather than the flavour. Swapping the directional lock for a numeric one keeps the same props, ticket and map work, just cheaper, more common hardware.
Fight: 1 square. People (folk): 4. Poultry (hen): 8. Inn: 6. In the postcard’s order the code is 1486.
Code: 1486 → wheel runes ᛒᚠᛞᛉ → envelope 9
Opens when players set the code from The rebus distance on the wheel.
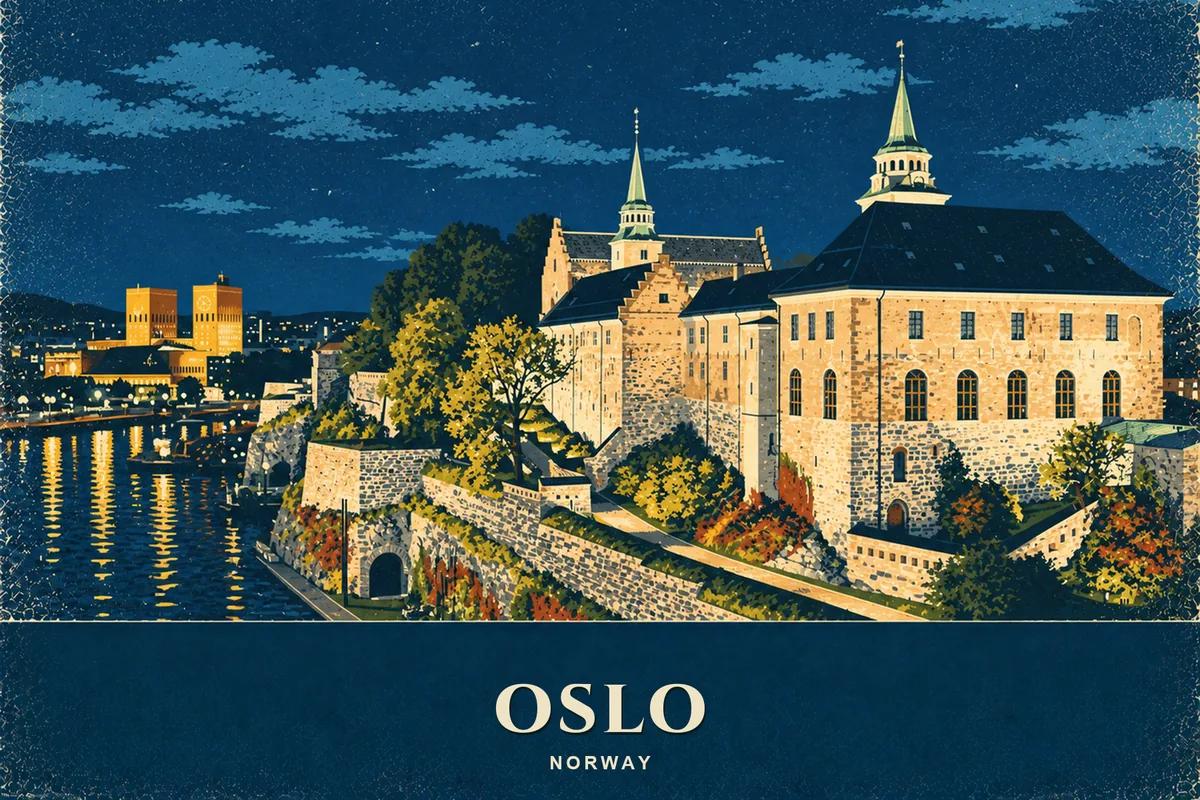
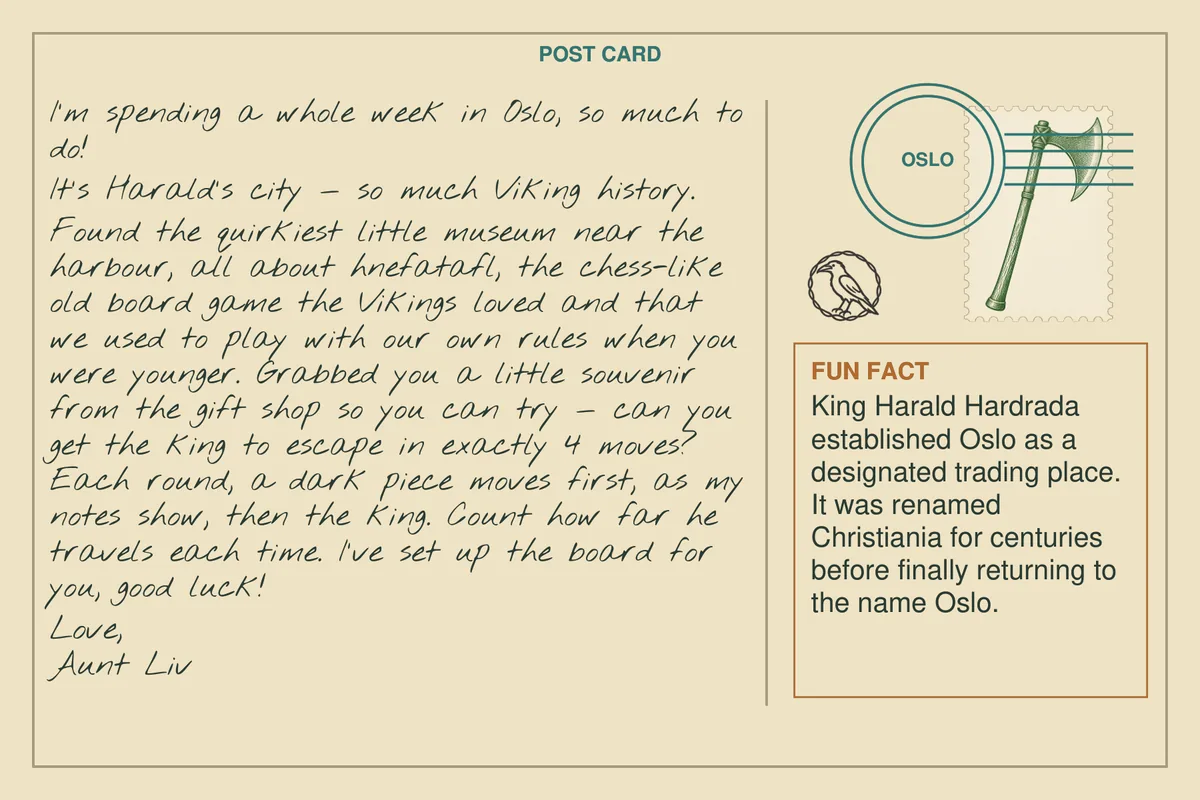
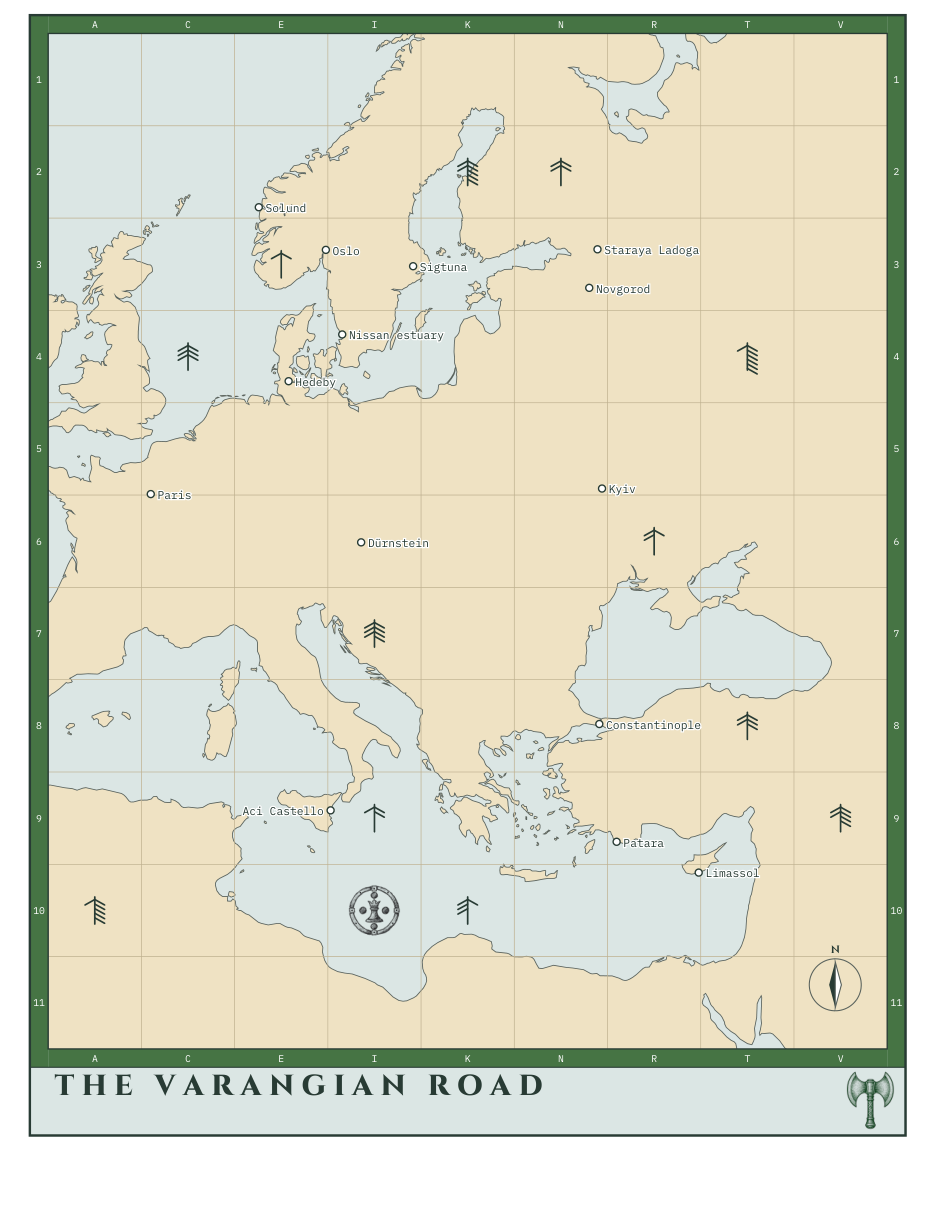
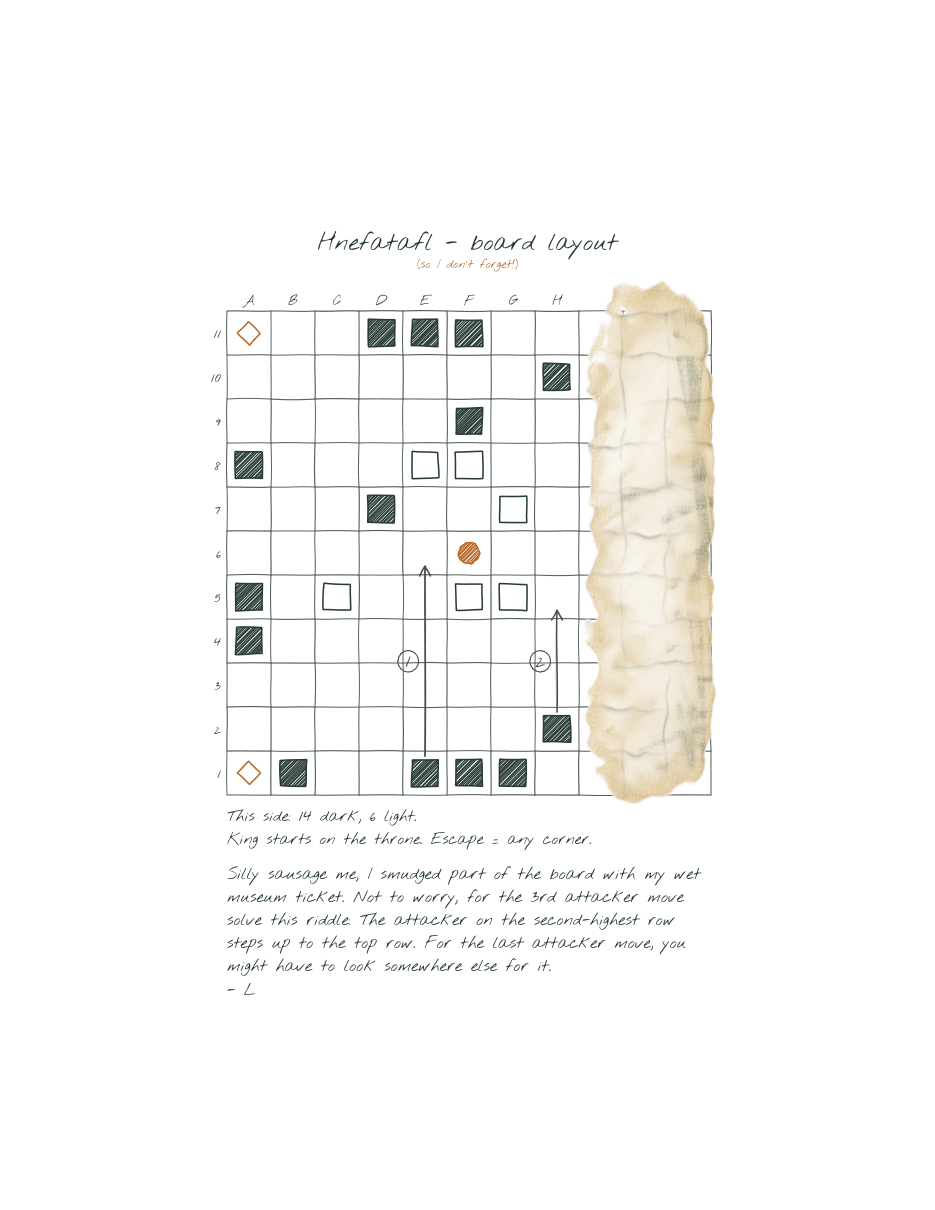
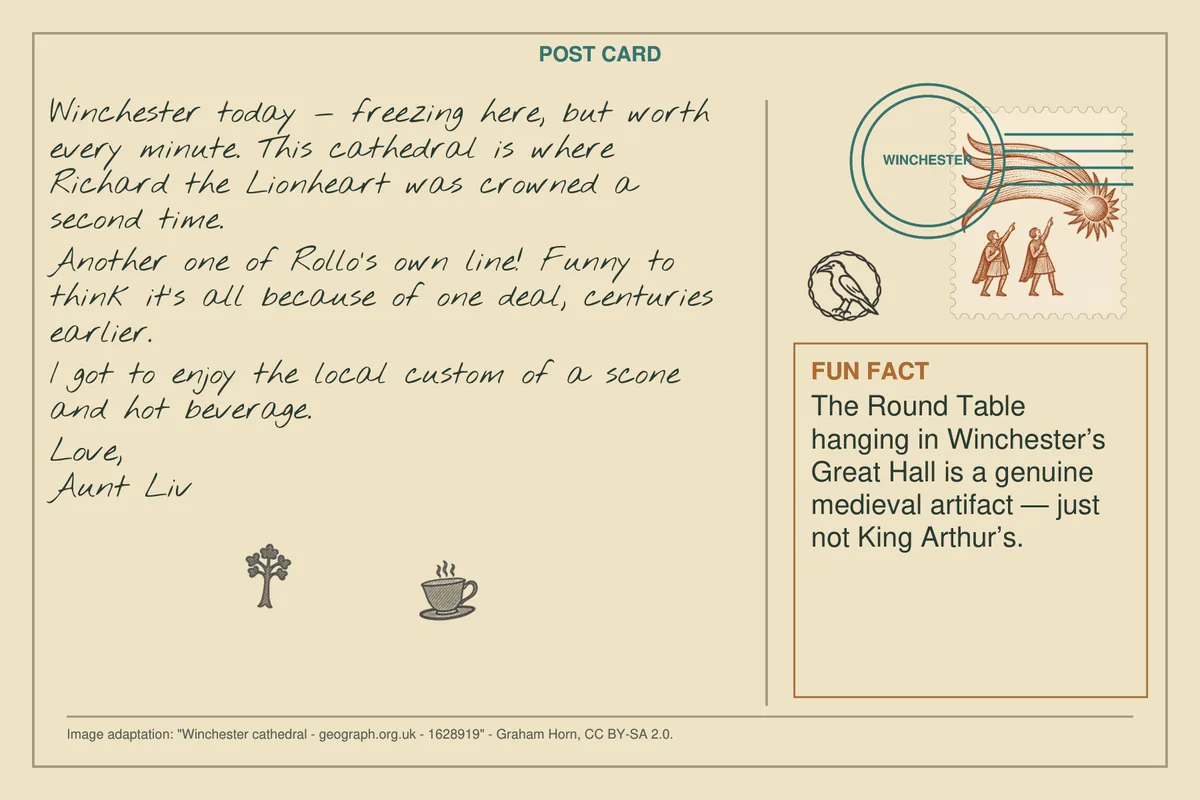
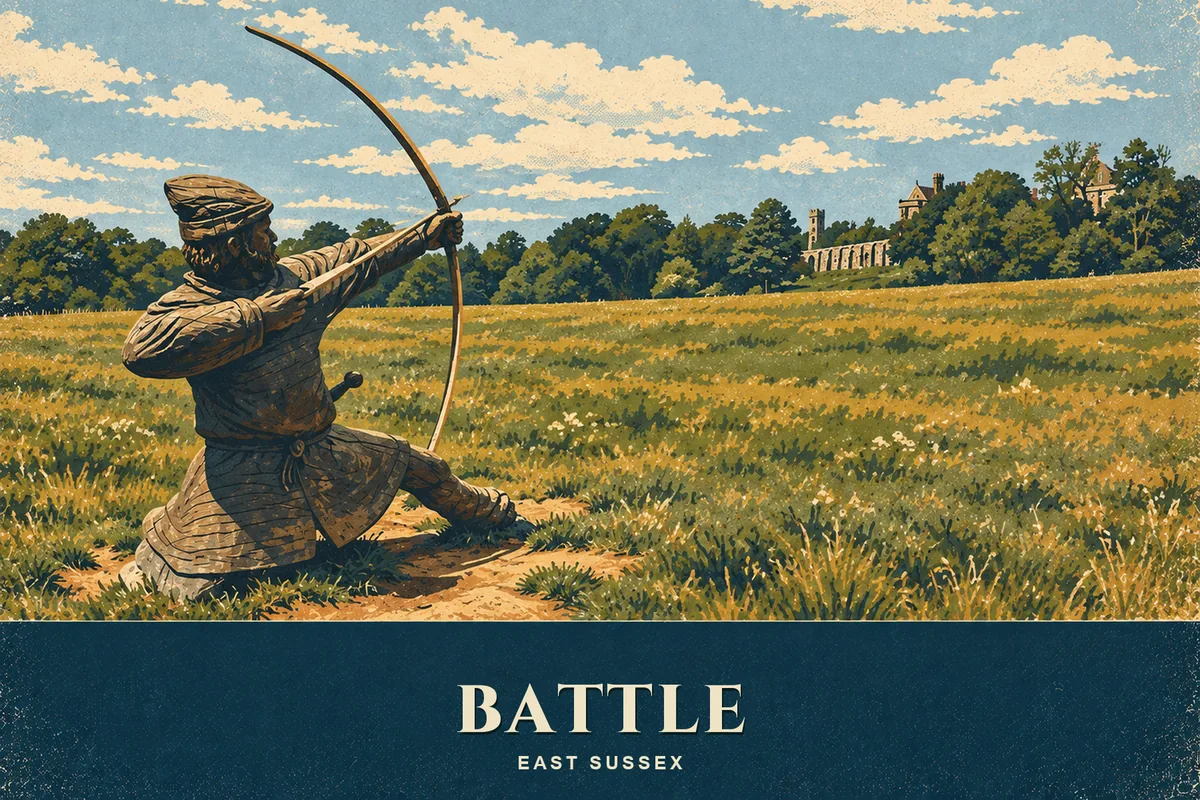
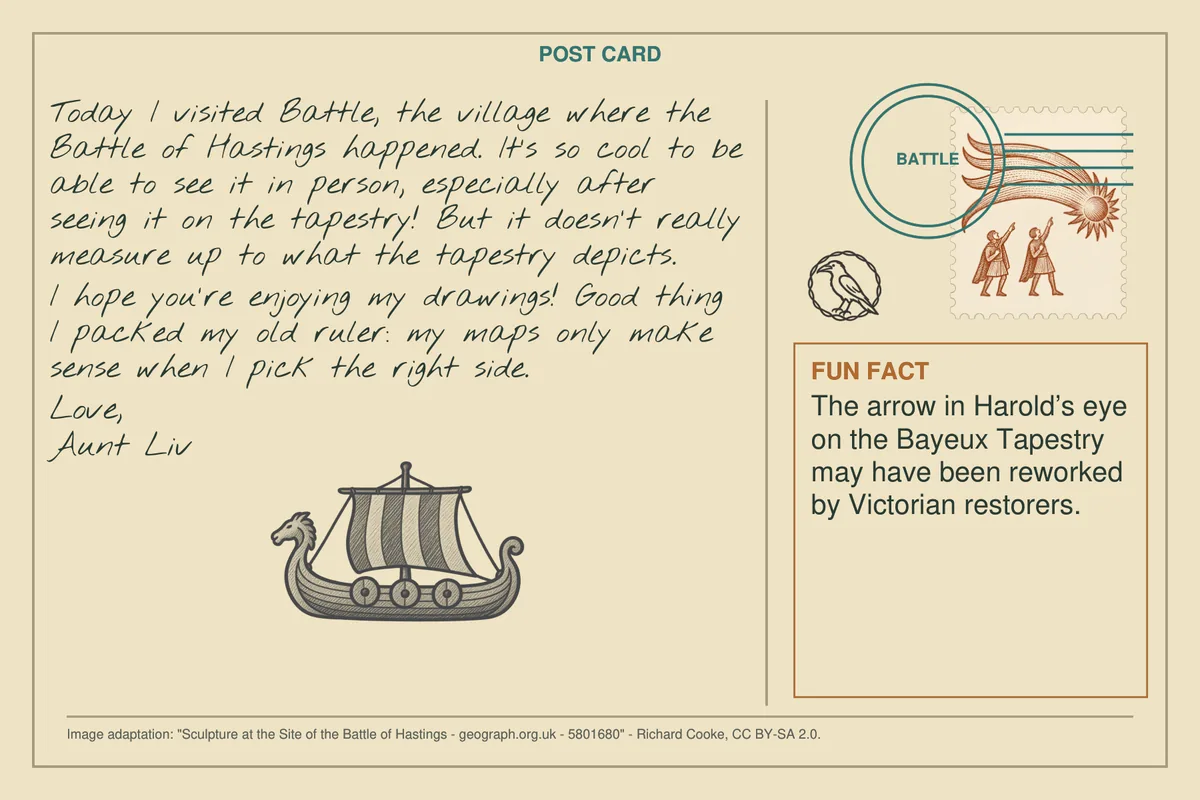
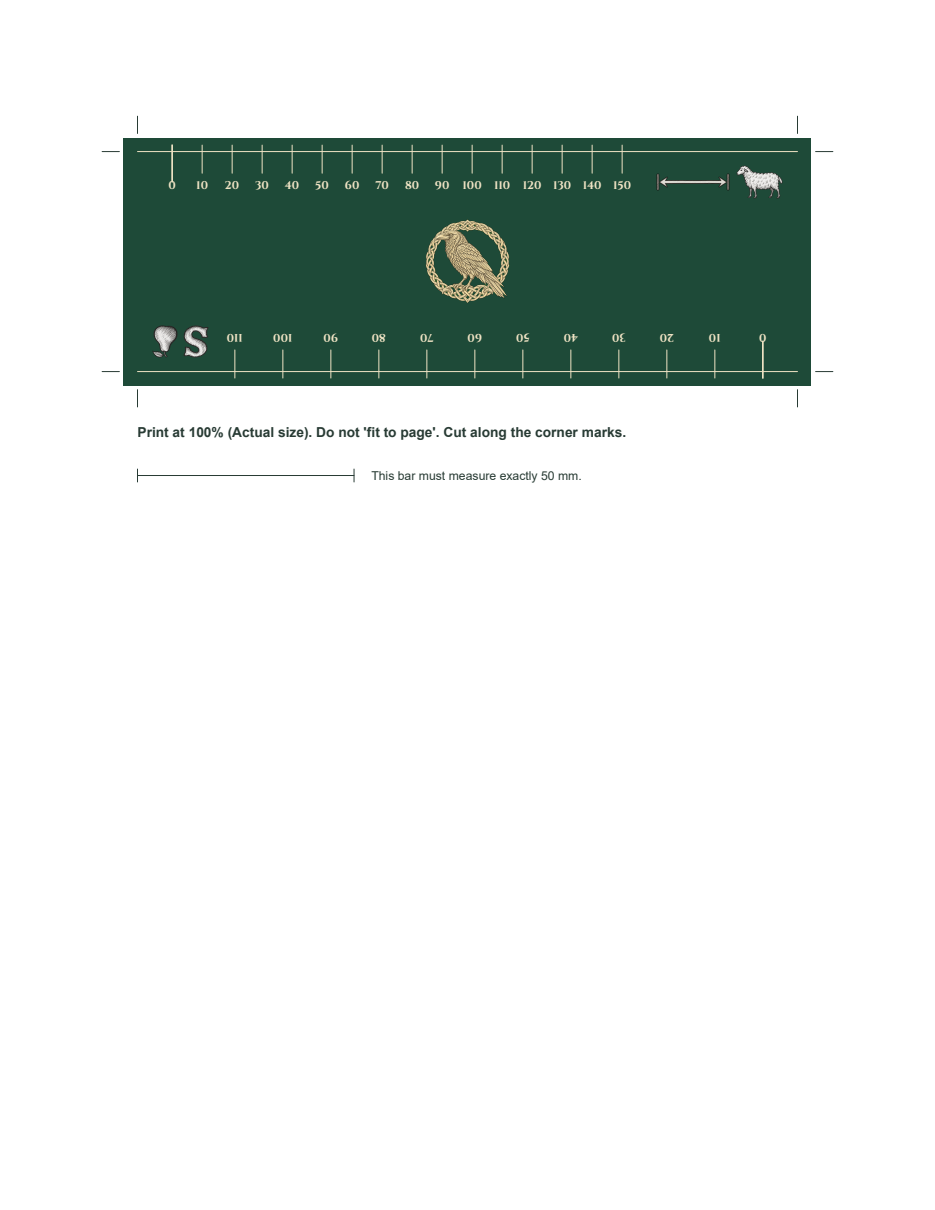
Uses: Postcard R3 · Bayeux · envelope 9 Postcard R4 · Winchester · envelope 9 Postcard R5 · Battle · envelope 9 Architect's scale ruler · envelope 9 Rollo's trail map (The Granted Lands) · envelope 8
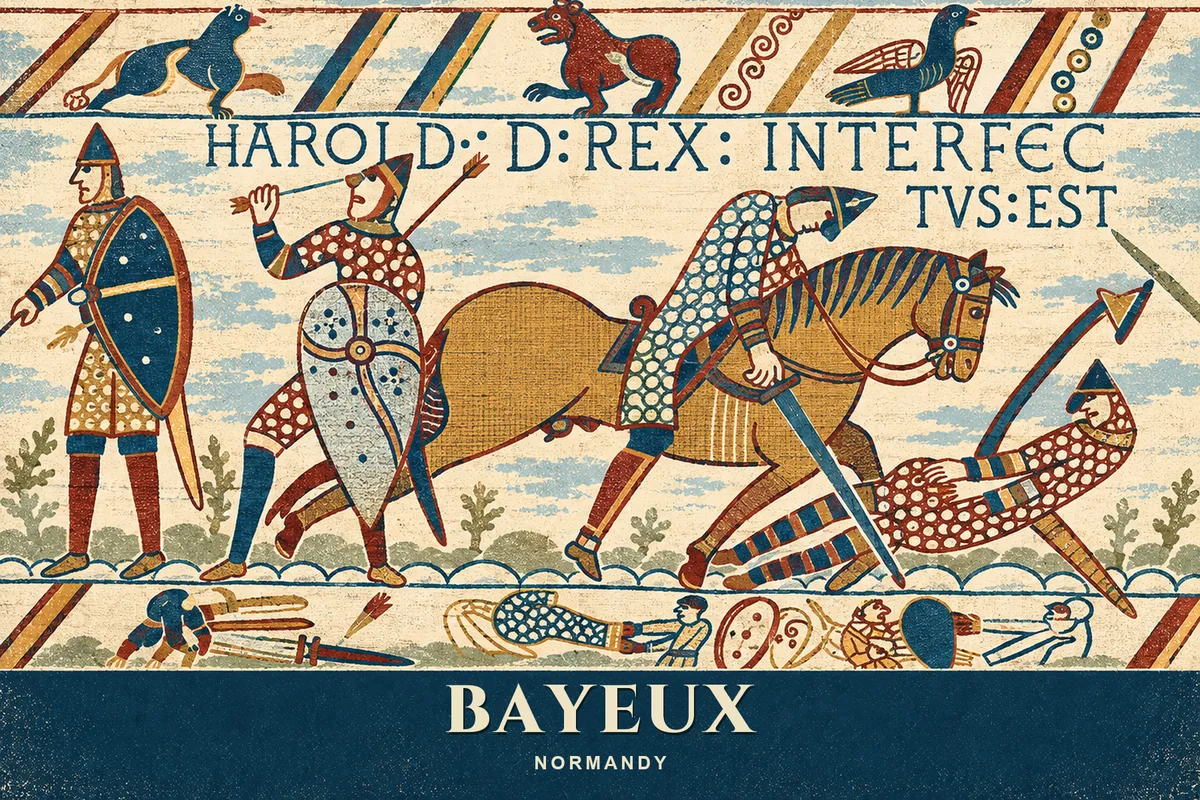
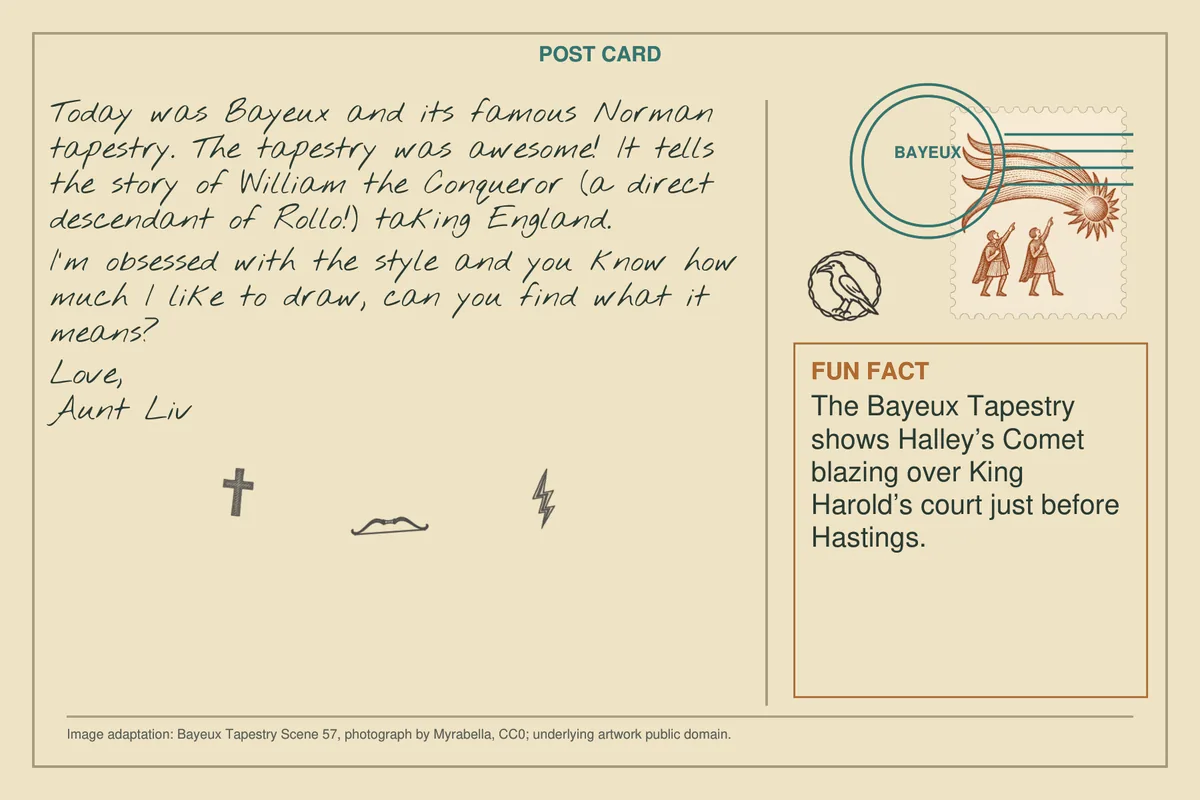
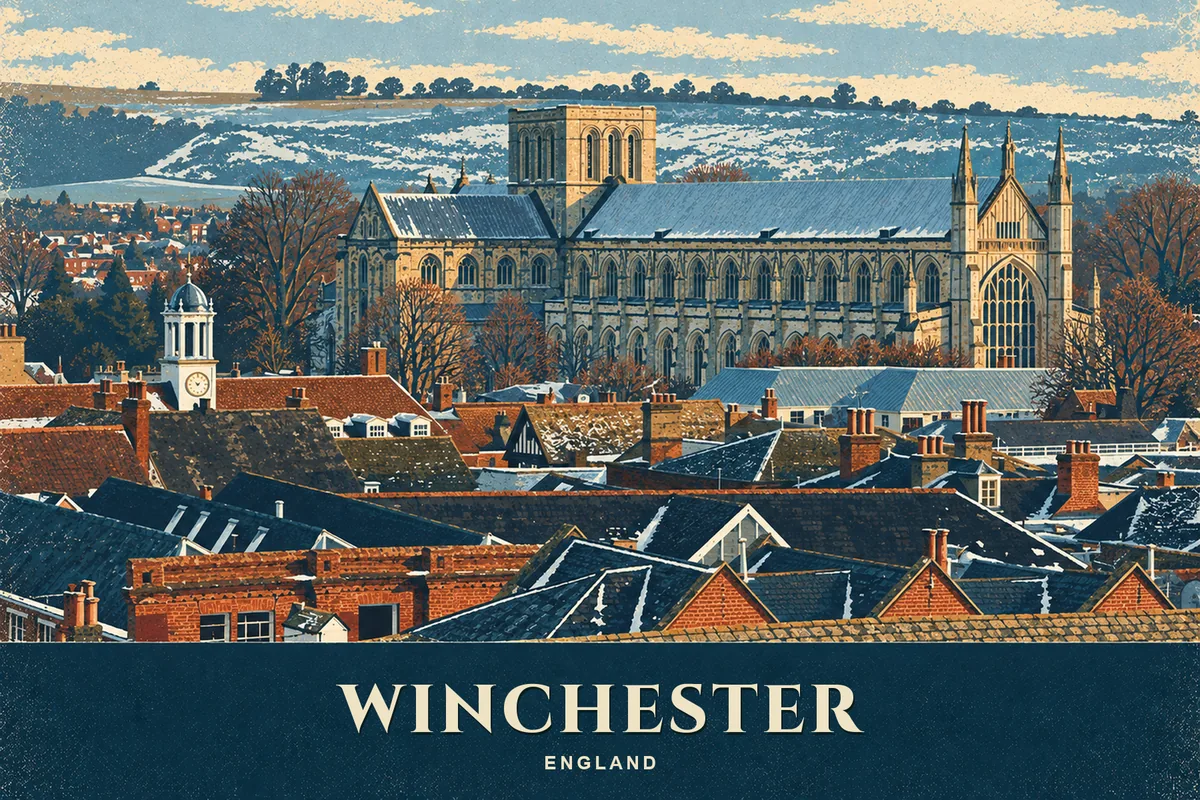
The Bayeux card explains why Liv’s postcards start carrying tapestry-style drawings — and carries the first rebus itself. Winchester carries the second. Battle names which ruler scale to use.
Players have: Rollo’s Bayeux, Winchester and Battle postcards (all built), his trail map with its story icons, and the architect’s scale ruler already in the kit.
Players do: Read each card’s rebus as a word or phrase, find the map icons the first two name, set the ruler to the scale the third names, and measure the distance between the two points.
They get: Code 104. Opening this lock releases PP-016, PP-034, PP-035, PP-036.
Why it is there: Gives two props that currently have no job a job together, and gives the margin drawings an in-fiction reason to exist rather than reading as unexplained publisher art.
Bayeux: cross + bow + lightning bolt = CROSSBOW BOLT, so Châlus. Winchester: tree + tea = TREATY, so Saint-Clair-sur-Epte. Battle: a drawing of a longship, so use the LONGSHIP edge of the ruler (the other edge, SPEAR, is a decoy). Châlus to Saint-Clair-sur-Epte reads 120 on the LONGSHIP edge: 120.
Code: 120 → wheel runes ᛁᛉᚲᛇ → envelope 10
Opens when players set the code from The king’s unfinished escape on the wheel.
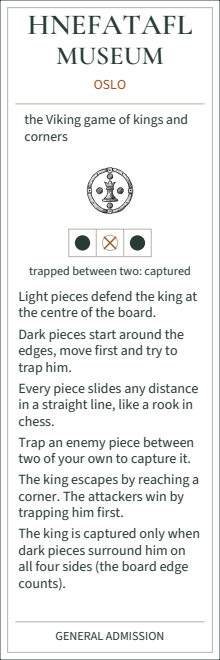
Uses: Postcard H1 · Oslo · envelope 10 Hnefatafl board and pieces · envelope 10 Hnefatafl Museum ticket, Oslo · envelope 10 Harald's trail map (The Varangian Road) · envelope 10
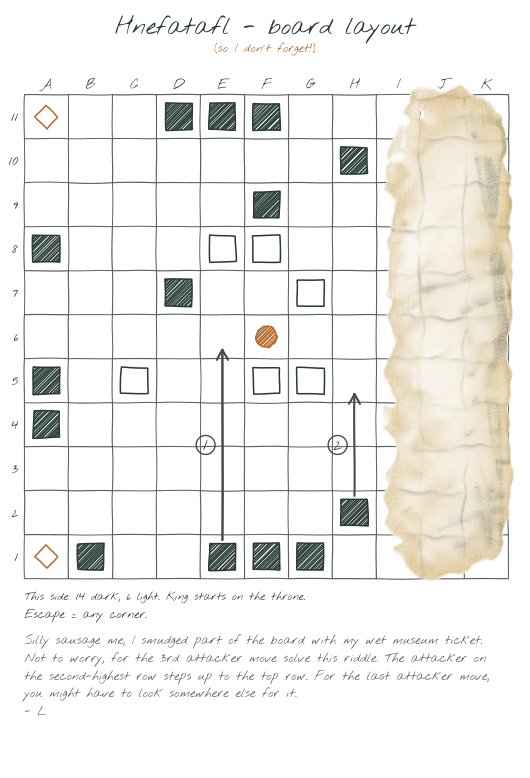
Rebuild the board your aunt sketched on the back of a map, then finish the game she left set up.
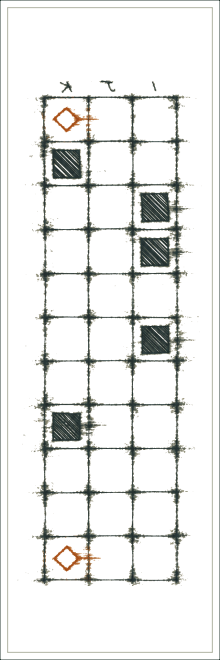
Players have: The 11 × 11 board and pieces, the Hnefatafl Museum ticket with the rules, Harald’s Oslo map whose back carries the setup, and postcard H1 which sets the task.
Players do: Recover the setup from Liv's papers (the back of Harald's map and the museum ticket), place the pieces, then play the sequence: a dark piece moves, then the king, four times. The first two dark moves are the numbered arrows on the map back, the third is Liv's riddle, the last is marked by the shield icon on Harald's map. The king must reach a corner in exactly four straight-line moves. Count how far he travels on each leg.
They get: Code 253. Opening this lock releases PP-019, PP-020, PP-038.
Why it is there: The strongest physical centrepiece in the set, the only puzzle that can release something mechanically rather than through a dial, and the only one that gives a trail map a job before the endgame.
Set out the starting position from Liv's note, with columns I to K taken from the museum ticket. Then play: dark E1 → E6, king F6 → H6; dark H2 → H5, king H6 → H7; dark H10 → H11 (the attacker on the second-highest row steps up to the top row), king H7 → K7; dark K10 → I10 (the shield on Harald's map is at I10, and moving the piece on K10 frees column K), king K7 → K11. The moves are 2, 1, 3 and 4 squares long: 2134.
Code: 2134 → wheel runes ᛚᚹᚲᛏ → envelope 11
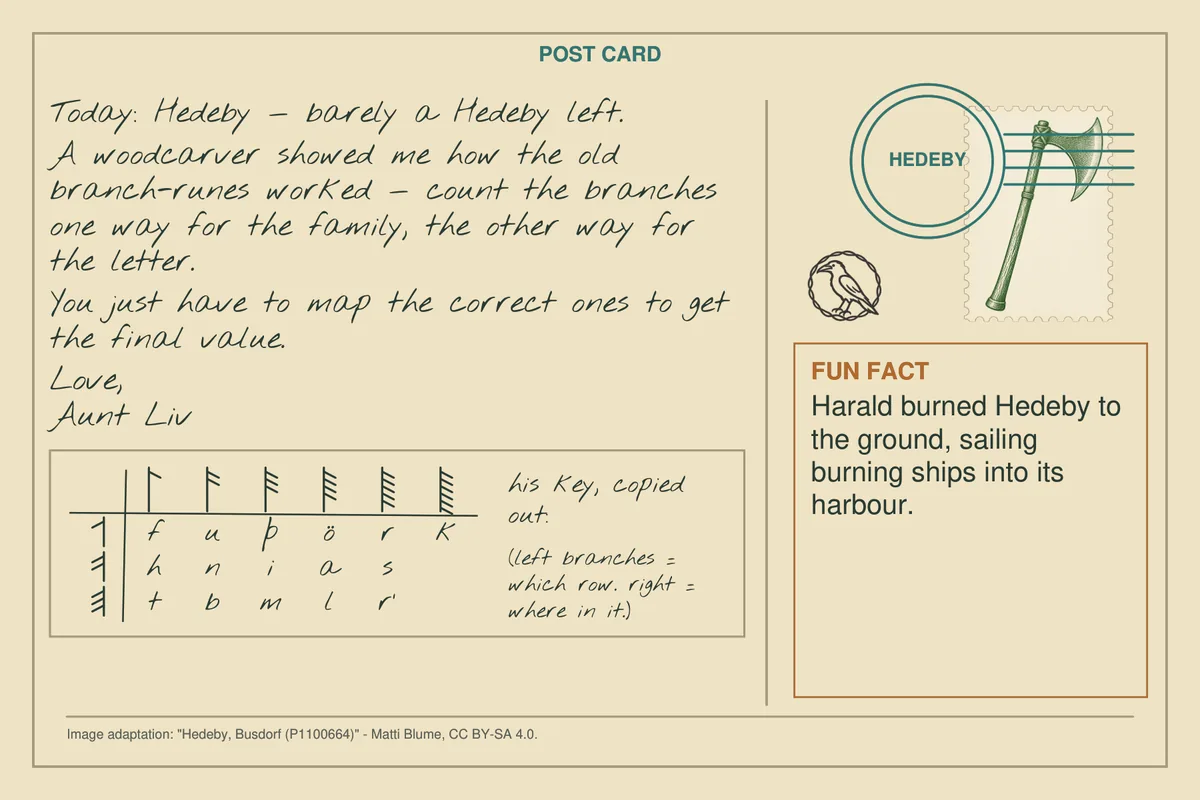
Opens when players set the code from Branch runes and the raven’s flights on the wheel.
18 hop tickets, each 3½ × 2 inches, in the matching fancy carrier designs. Print one Letter sheet per carrier, single-sided at 100% / actual size on the paper colour shown. Check the one-inch ruler before cutting.
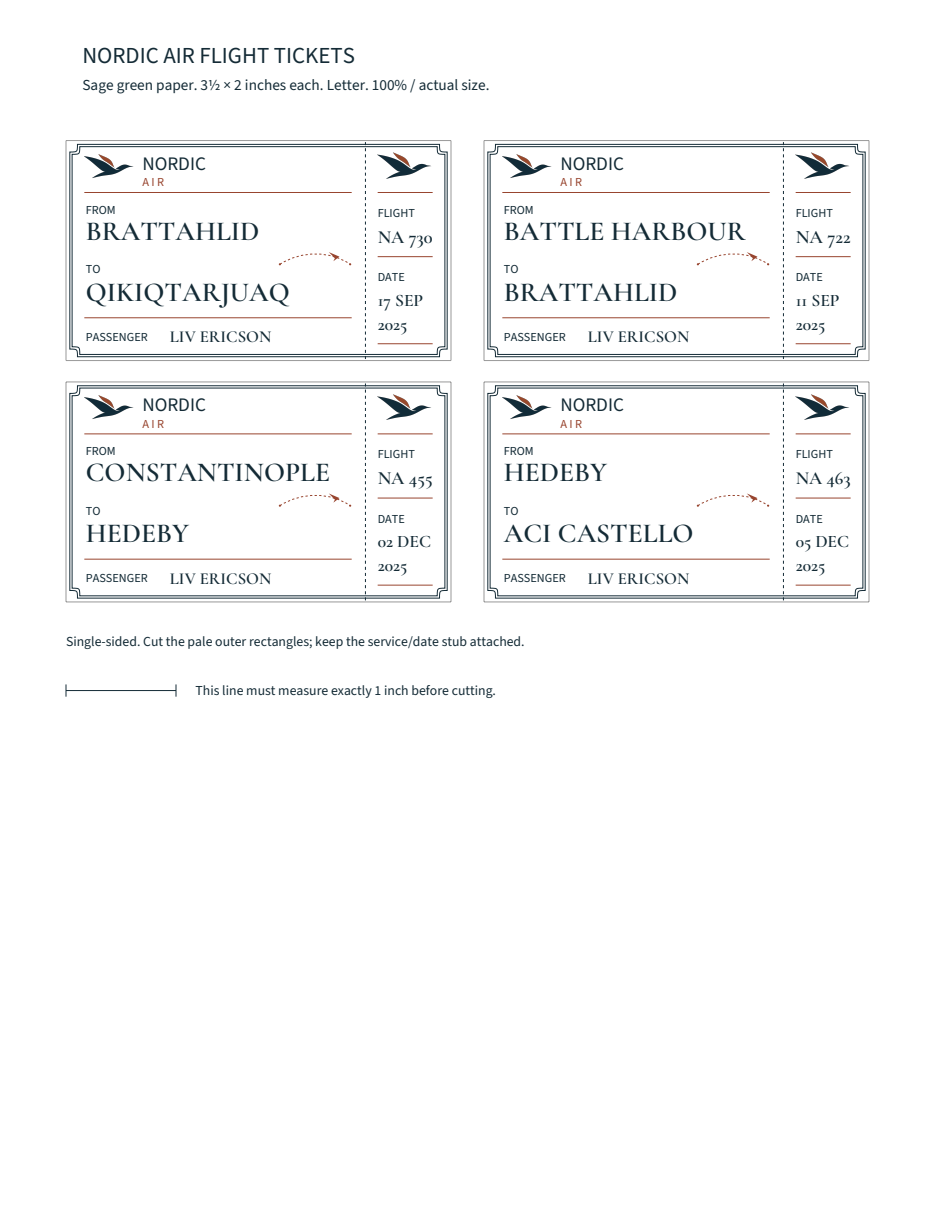
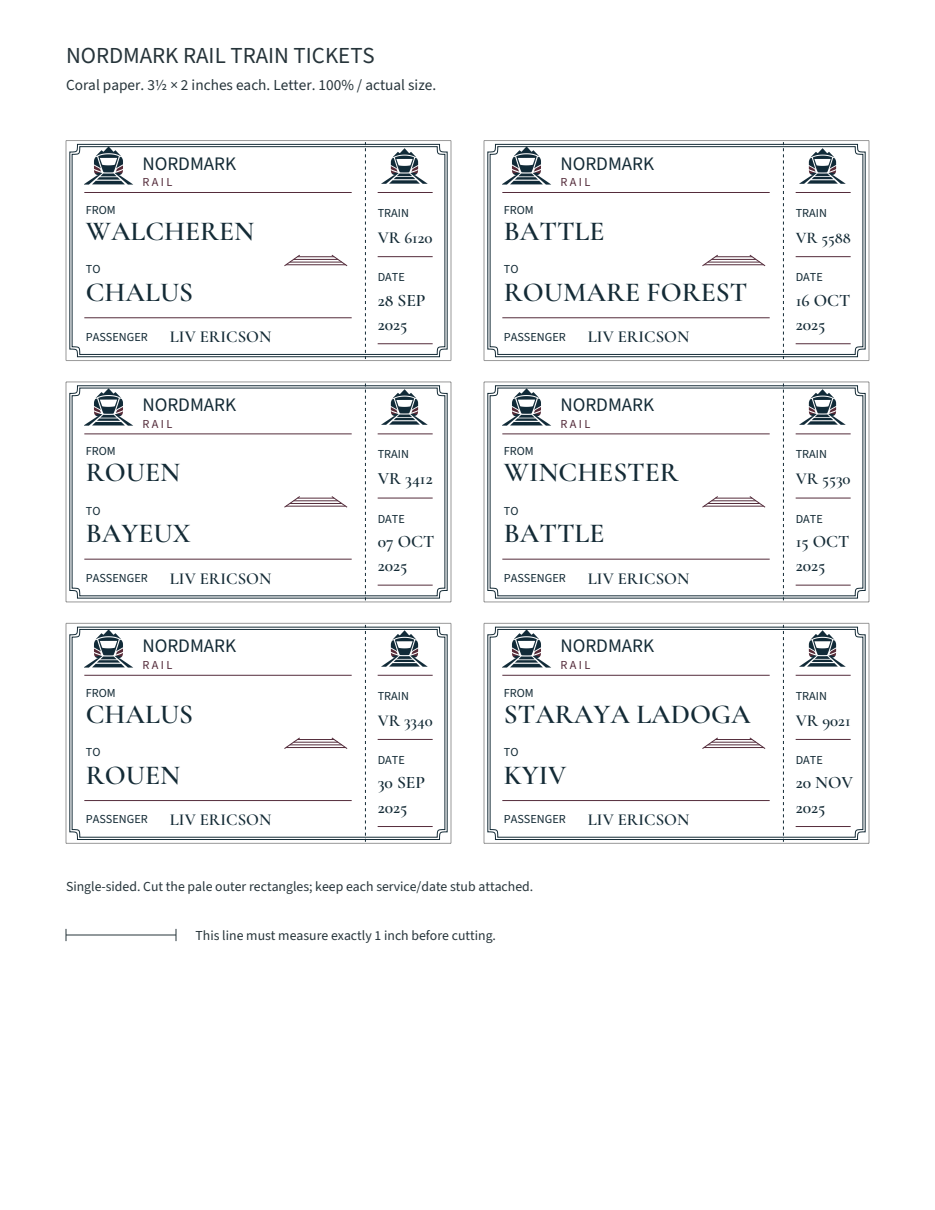
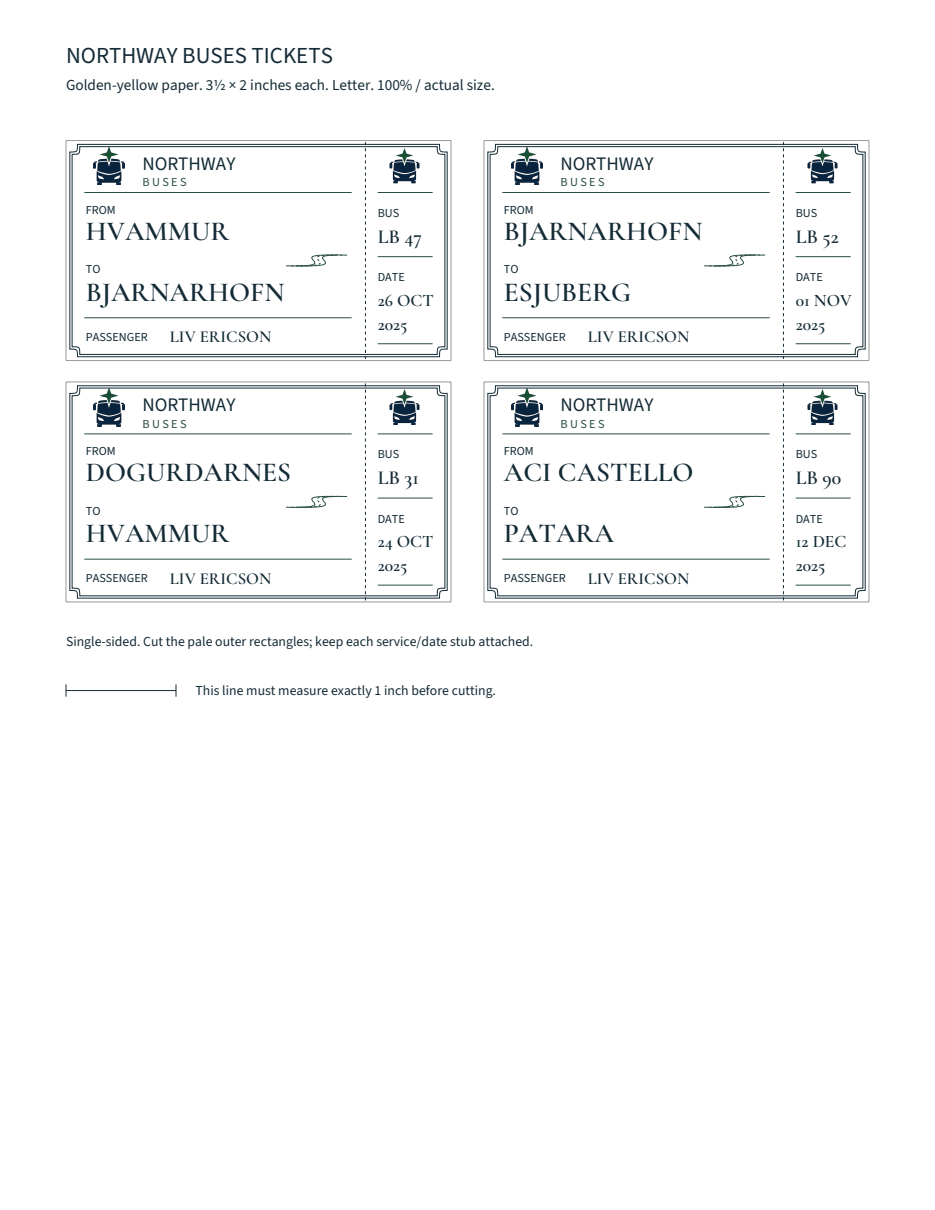
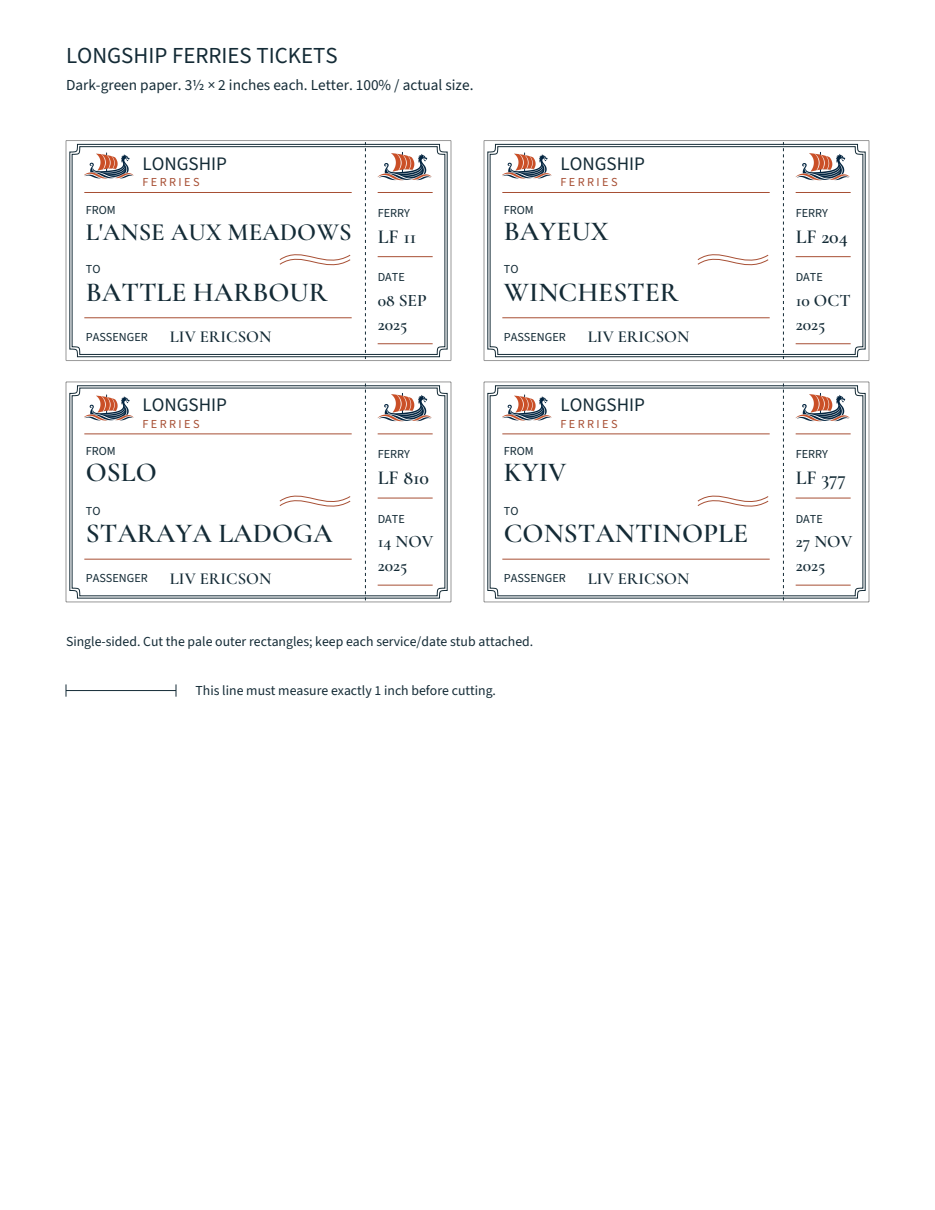
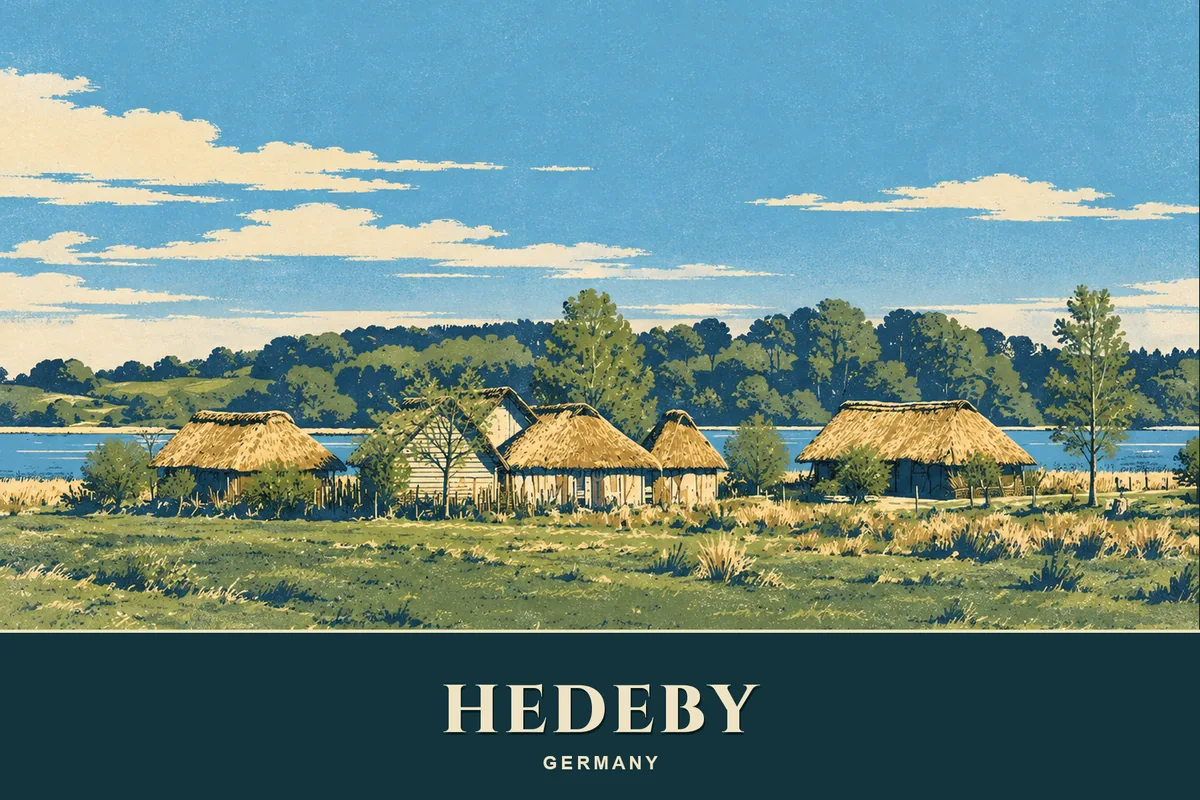
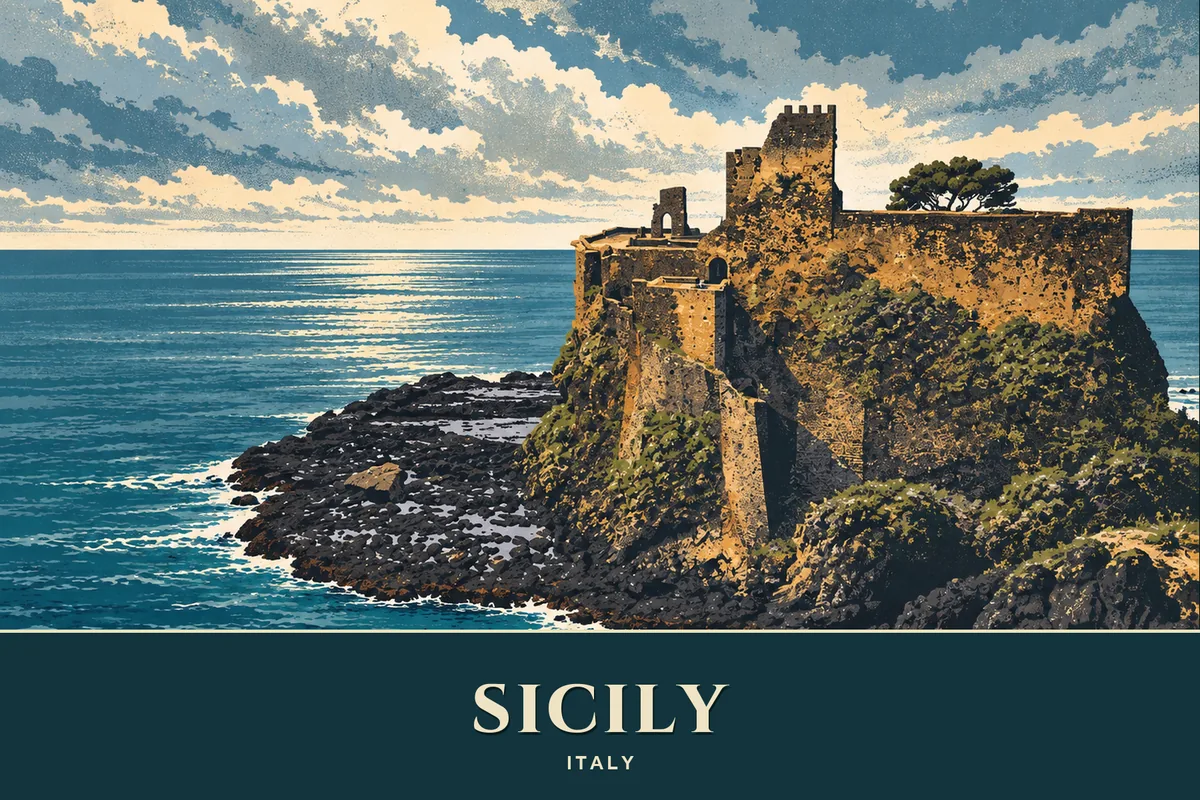
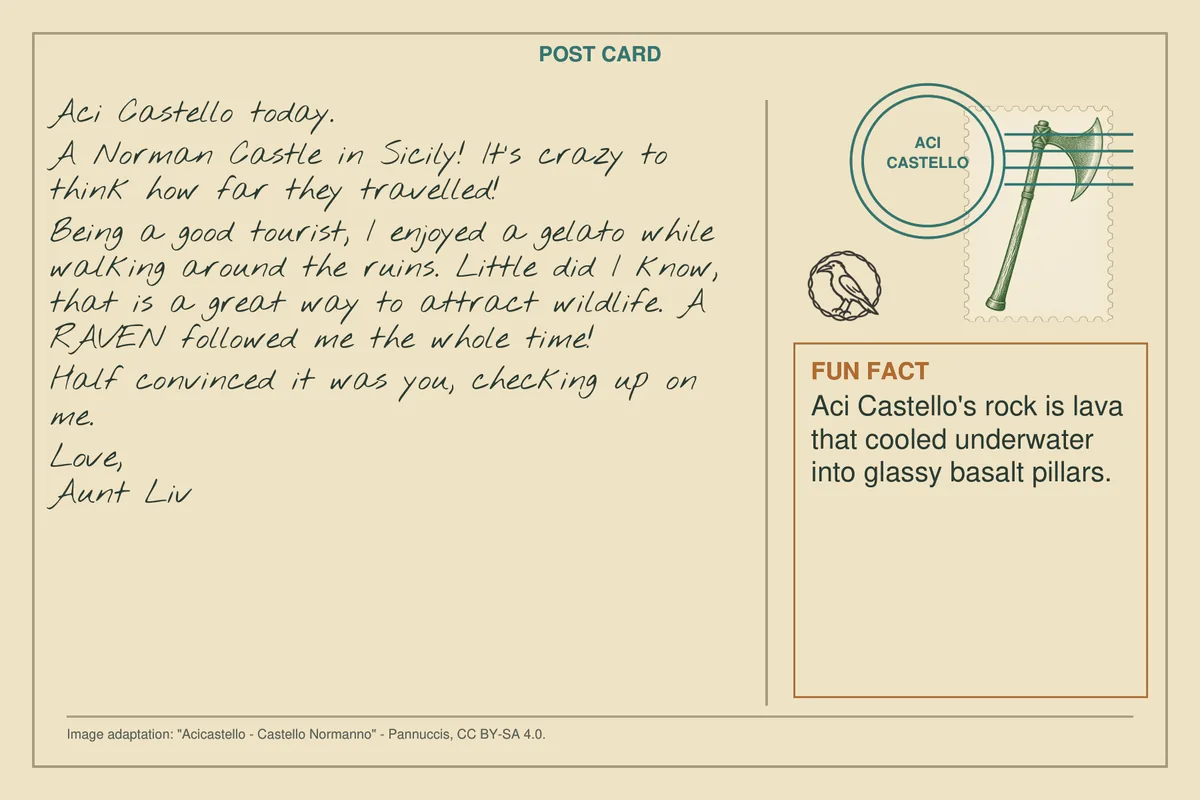
Uses: Postcard H4 · Hedeby · envelope 11 Postcard H5 · Aci Castello, Sicily · envelope 11 Harald's trail map (The Varangian Road) · envelope 10 The raven's flights card · envelope 11 Magnifier · envelope 2
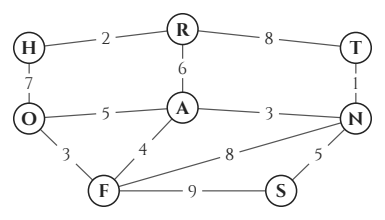
Decode five letters, then use them as five perches to read four flight digits.
Players have: H4/H5 and the player-only perch card (from lock 11) and the corrected Harald map (from lock 7, with the board kit), since 7 Oct 2026.
Players do: Use RAVEN to select map columns; H4 decodes HRAFN. Follow the direct connections H→R→A→F→N and read one digit per flight in that order.
They get: Code 2648. Opening this lock releases PP-021, PP-039, PP-040, PP-041.
Why it is there: Keeps the existing cipher and replaces the cryptex with one printable card and a normal lock.
R6 → H, A10 → R, V9 → A, E3 → F, N2 → N: HRAFN. Then H → R = 2, R → A = 6, A → F = 4, F → N = 8: 2648.
Code: 2648 → wheel runes ᚲᛟᛉᛏ → envelope 12
Opens when players set the code from The route hidden in plain sight on the wheel.
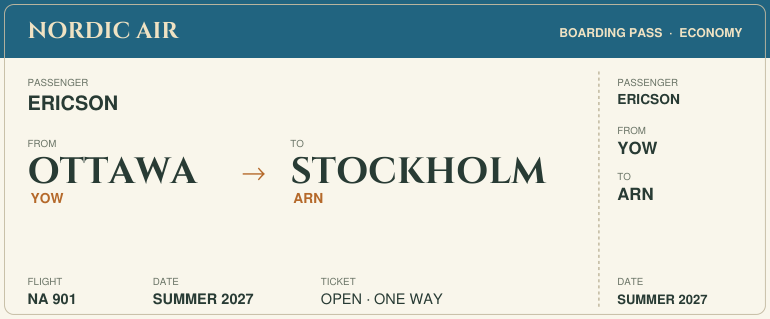
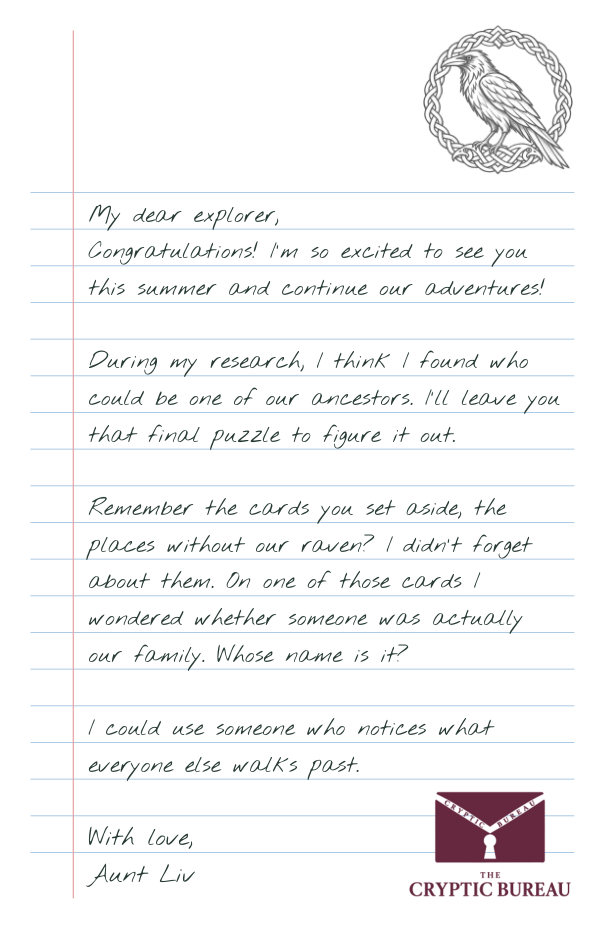
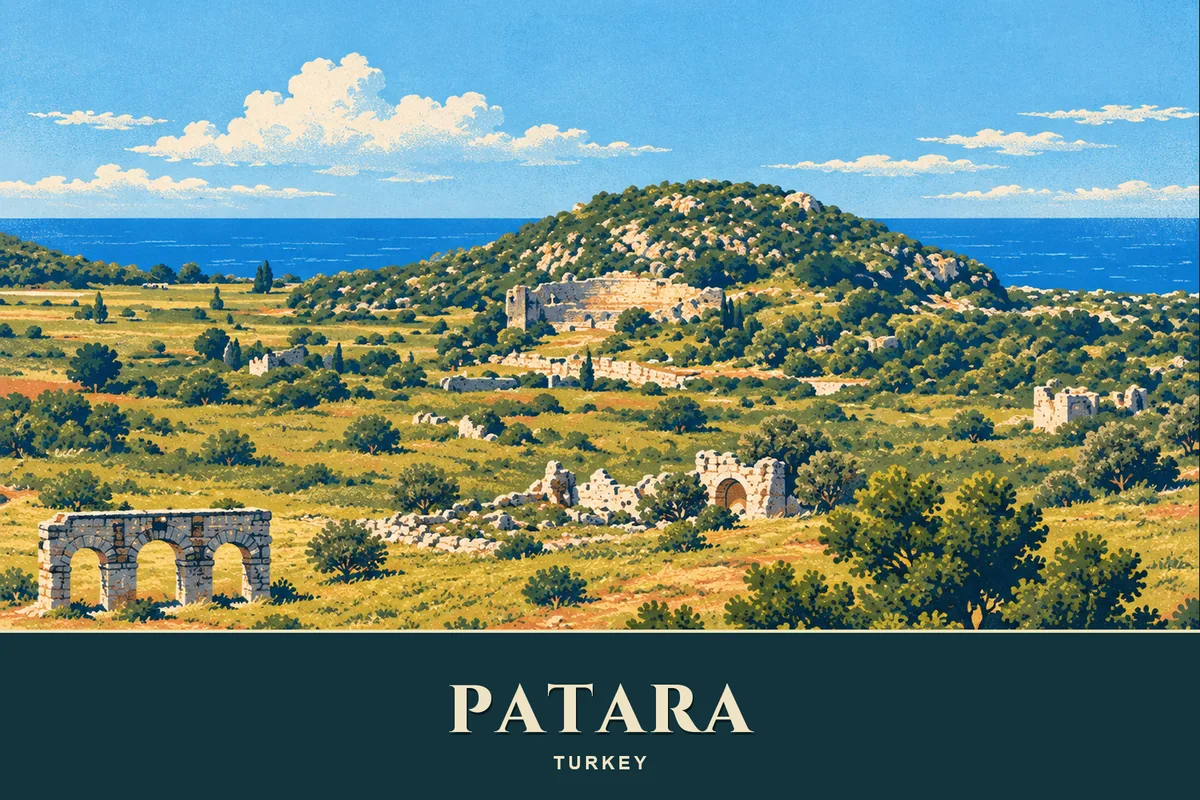
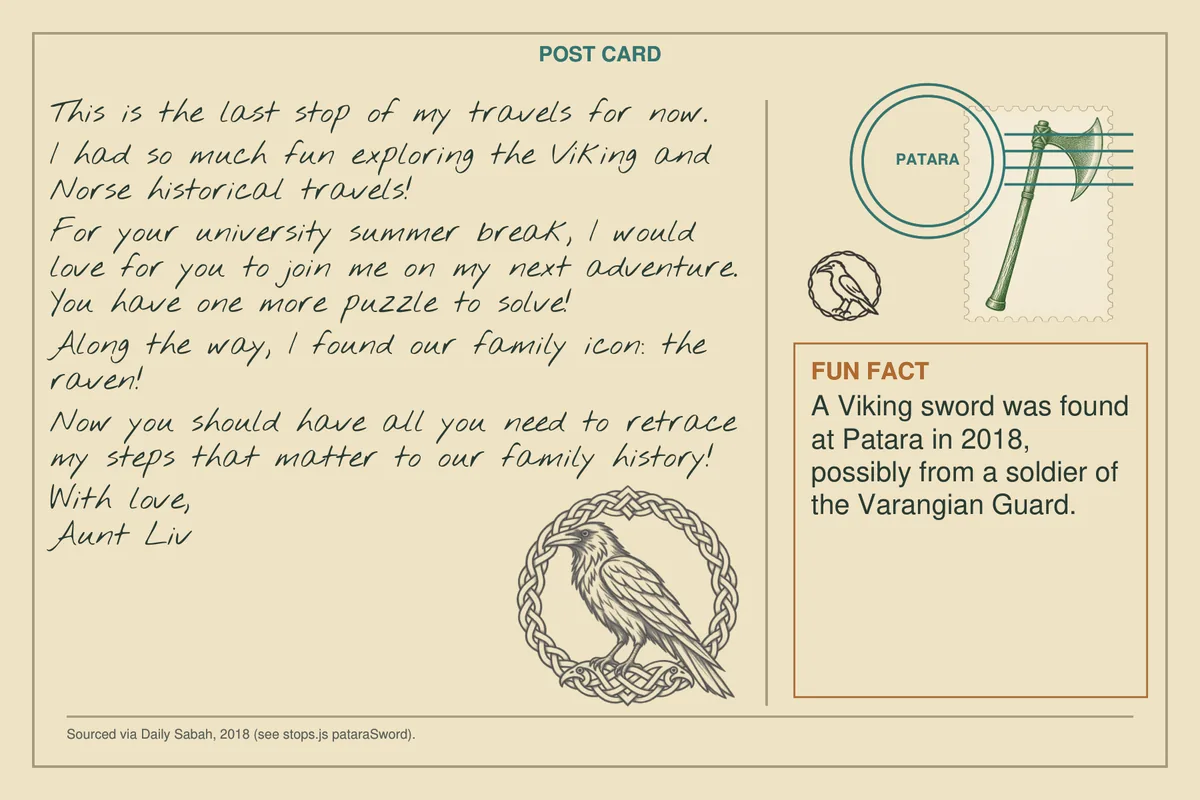
Uses: Postcard L1 · L'Anse aux Meadows · on the box Postcard L2 · Battle Harbour (Markland) · envelope 2 Postcard L3 · Qikiqtarjuaq, Baffin Island (Helluland) · envelope 2 Postcard LD · Brattahlíð (decoy) · envelope 6 Postcard R1 · Châlus · envelope 5 Postcard R2 · Rouen · envelope 8 Postcard R3 · Bayeux · envelope 9 Postcard R4 · Winchester · envelope 9 Postcard R5 · Battle · envelope 9 Postcard R6 · Roumare Forest · envelope 5 Postcard RD · Walcheren (decoy) · envelope 5 Postcard A1 · Dögurðarnes · envelope 7 Postcard A2 · Hvammur · envelope 4 Postcard A3 · Esjuberg · envelope 7 Postcard AD · Bjarnarhöfn (decoy) · envelope 1 Postcard H1 · Oslo · envelope 10 Postcard H2 · Staraya Ladoga · envelope 3 Postcard H3 · Kyiv · envelope 3 Postcard H4 · Hedeby · envelope 11 Postcard H5 · Aci Castello, Sicily · envelope 11 Postcard H6 · Patara · envelope 12 Postcard HD · Constantinople (decoy) · envelope 3 Leif's trail map (The Western Lands) · envelope 6 Rollo's trail map (The Granted Lands) · envelope 8 Aud's trail map (The Island Settlement) · envelope 4 Harald's trail map (The Varangian Road) · envelope 10 Travel tickets (hops and flights) · envelope 12 Viking Museum of Brattahlíð ticket · envelope 6 Aud's Treasure Museum ticket · envelope 4 Musée Ducal de Rouen ticket · envelope 8 Hnefatafl Museum ticket, Oslo · envelope 10
Twenty-two cards, four of them decoys. Filter, sort, trace, and read the four shapes as four digits.
Players have: 17 Oct 2026 (designer, Q-062): the 22 postcards (18 carry Liv's small raven, the 4 decoys none), the four maps (each with its stamp), the 18 hop tickets (one page per journey, stops chain from one to the next, decoys included), (dropped 20 Oct 2026; every hop ticket is dated), and H6's note about the family icon. 12 Oct 2026 (Q-054): the 22 postcards (18 carry a family mark, the 4 decoys carry none), the four maps (each now shows its journey's stamp), and Liv's journal page with the family iconography. 19 Oct 2026 (designer): every hop ticket and booking now carries a departure date (PP-039, 8 Sep to 12 Dec 2025). The stop order still comes from chaining the routes; the dates also confirm it. Code stays 1972. Retest needed.
Players do: 17 Oct 2026 (designer, Q-062): set aside the four cards with no raven. Put each remaining card beside the map with the same stamp. Chain the journey's travel tickets (decoys included) to get the stop order, then join the raven stops in that order on the map. Each map traces one digit; the ticket dates give the order of the four journeys (20 Oct 2026). 12 Oct 2026 (Q-054): set aside the four cards with no mark. Put each remaining card beside the map that shows the same stamp. On each map, order the cards by their marks, in the order Liv's journal page lists them under each drawing (symbol: raven, longship, sun-wheel; crest: bearded axe, round shield, wolf, anchor, drinking horn, valknut), and join the stops in that order. Each trail traces one digit. Nobody needs to reread a card's text.
They get: Code 1972. Opening this lock releases PP-043, PP-044.
Why it is there: The cards work first as story and individual clues, then return as the final meta-puzzle. Every place name gains a second meaning.
Set aside the four postcards with no raven. Match the rest to the maps by their stamps. Chain each journey's travel tickets (each goes from one stop to the next) to put its stops in order; the decoy stops appear on the tickets too, so skip any whose postcard has no raven. On each map, join the raven stops in that order: Leif's map draws 1, Rollo's 9, Aud's 7 and Harald's 2. The ticket dates put the journeys in order: Leif (September), Rollo (late September to mid October), Aud (late October), Harald (November to December): 1972.
Code: 1972 → wheel runes ᛈᛚᚹᛉ → envelope 13
What it costs to make a box and what it is made of. Quotes so far: the print shops (Newprint, LoudMouth) and a few listed prices; everything else is still to be quoted.
| Envelope | Item | Record | Qty | Prototype now | Production idea | Size / spec | Status / open |
|---|---|---|---|---|---|---|---|
| Box | Box | PP-045 | 1 | Not bought | Board-game-style box | 11.5 × 11.5 × 2 in (outside) | Inside size not measured (Q-049). What it is in the story: Q-047. |
| Box | Luggage tags | PP-023 | 2 | Lewis N. Clark tags, bought ($9.95 CAD each retail) | Printed card parcel tags on twine (Q-047 option) | 4.25 × 2.5 in | How tags attach to a box is open (Q-047). |
| Box | Luggage tag inserts | PP-023 | 2 | Printed business cards | Same, or printed straight on the card tag | Business card | |
| Box | Rune cypher wheel (4 disks + arm) | PP-047 | 1 | Cardstock print, hand cut | Die-cut cardboard | Disks 196, 156, 116, 76 mm; arm 202 × 18 mm | Prototype not yet printed or assembled. |
| Box | Brass fastener for the wheel | PP-047 | 1 | Brass split pin | Brass split pin or plastic rivet | Through all 5 layers | |
| Box | Rune labels for envelopes | PP-047 | 13 | Printed sheet, cut by hand | Printed straight on the envelopes | 58 × 22 mm | Decoy envelopes would add labels (Q-050). |
| Box | Envelopes, paper | PR-007 | 9 | — | Kraft or cream envelopes | 6 × 9 in assumed (folded maps fit) | Assumption: envelopes 2, 3, 4, 5, 6, 8, 9, 11, 12. Sizes open (Q-049). |
| Box | Envelopes, padded or gusseted | PR-007 | 4 | — | Padded envelopes | Fits 1, 7, 10, 13 | Assumption: magnifier, coins + tally, game pieces, medallion. Sizes open (Q-049). |
| Various | Postcards (18 stops + 4 decoys) | PP-001–PP-022 | 22 | Printed, double-sided | Printed card stock | 5 × 3.5 in, double-sided | L1 starts loose in the box; the rest are spread over envelopes 1–12. |
| 1 | Magnifier | PP-027 | 1 | Candidate: 90 mm glass, wooden handle | Flat Fresnel card magnifier | Credit-card size (production idea) | Must make the branch runes and the 1576 top edge readable. Not tested. |
| 2 | Aud's comb | PP-028 | 1 | 3D print | Die-cut cardboard grille | Sits over postcard AD | Tooth gaps must still expose the BOOK letters. |
| 4 | Architect's scale ruler | PP-025 | 1 | Ruler on hand (length not recorded) | Printed card ruler (Claude's idea, not the designer's) | Needs 1:25 and 1:125 scales | A 30 cm ruler won't lie flat in the box (Q-049). |
| 4, 6, 8, 10 | Trail maps | PP-029/030/032/034 | 4 | Letter sheets, laminated | Not laminated, folded in half | 8.5 × 11 in; Harald's is double-sided | Check Harald's back still reads without lamination. |
| 4 | Aud's Treasure Museum ticket | PP-031 | 1 | Printed | Printed card | Size not recorded | |
| 6 | Viking Museum of Brattahlíð ticket | PP-024 | 1 | Printed | Printed card | About 2 in wide | Front/back registration drift seen in a test print. |
| 7 | Coin hoard | PP-037 | 12 | 3D print | Open: not discussed | 5 dirhams, 4 deniers, 3 Norse coins | Cheap options to price: stock replica coins, wooden or card discs. |
| 7 | Treasure tally | PP-026 | 1 | 3D-printed four-wheel counter | Cardboard wheels in windows | Seven-segment digits | 3705 must read SOLE upside down. |
| 8 | Musée Ducal de Rouen ticket | PP-033 | 1 | Printed | Printed card | 2 × 3 in | To re-print (record, 29 Sept). |
| 10 | Hnefatafl board | PP-035 | 1 | 3D print / printed | Printed cardboard board | 11 × 11 squares; size not recorded | Must fit the box (fold if needed). |
| 10 | Hnefatafl pieces | PP-035 | 23 | 3D print | Stock wooden pawns | 16 dark, 6 light, 1 king | King must look different (taller piece). |
| 10 | Hnefatafl Museum ticket, Oslo | PP-036 | 1 | Printed | Printed card | Size not recorded | Mirrored back must read through when held to the light; test on chosen stock. |
| 11 | The raven's flights card | PP-038 | 1 | To print | Printed card | Half letter (proposed) | |
| 12 | Travel tickets (hop tickets) | PP-039 | 18 | Printed | Printed card | Size not recorded | 18 hop tickets, business card 3.5 × 2. The 3 itinerary receipts were dropped 20 Oct 2026 (hop-ticket dates give the journey order). |
| 12 | Liv's journal | PP-040 | 1 | Printed | Printed | Letter; page count not recorded | |
| 12 | Family logo and crest note | PP-041 | 1 | Printed | Printed | Size not recorded | |
| 13 | Plane ticket and letter | PP-043 | 1 | Printed | Printed | Size not recorded | Counted as one set (ticket + letter). |
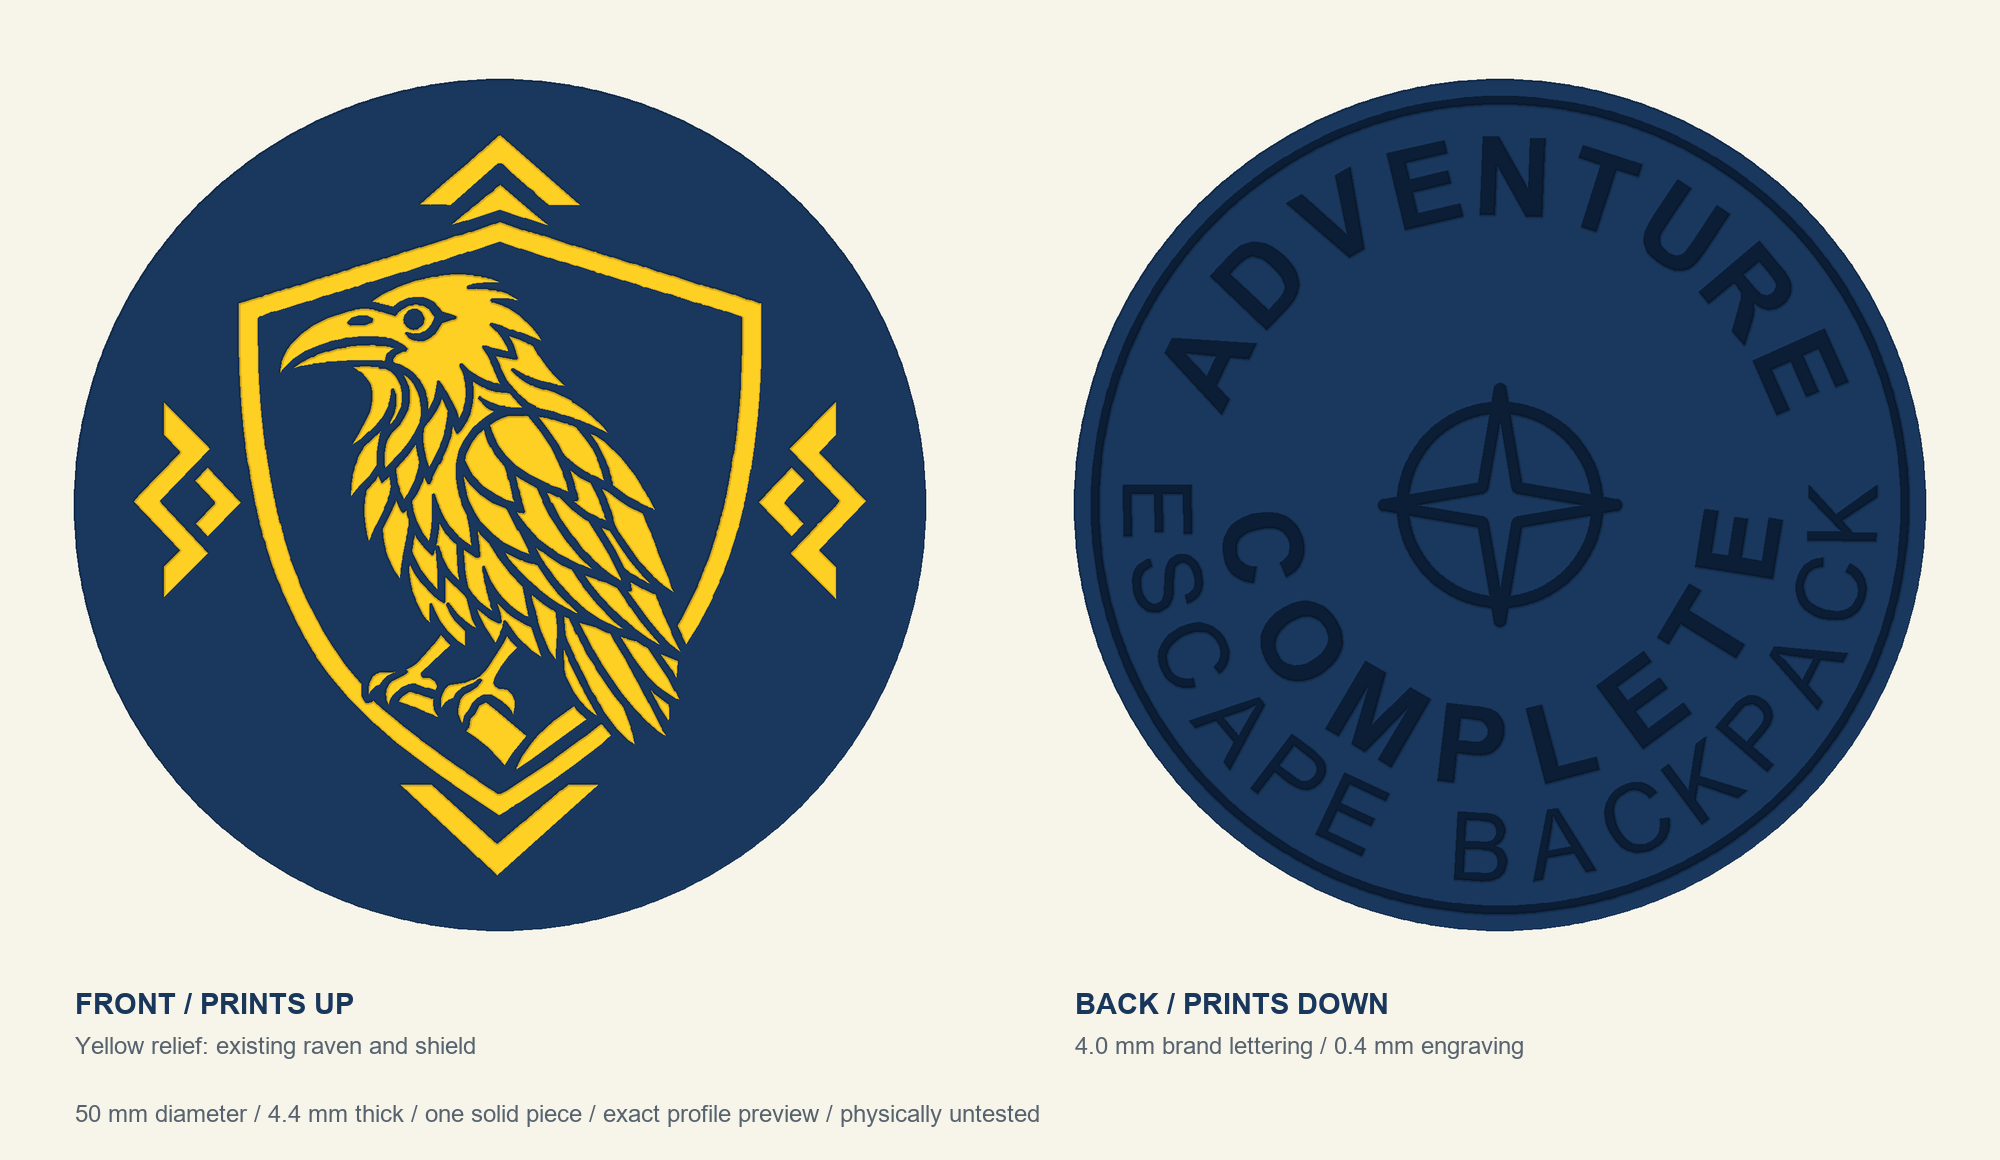
| 13 | Adventure medallion | PP-044 | 1 | 3D print | Open: not discussed | 50 mm × 4.4 mm | Cheap options to price: struck metal coin, wooden token. |
| Box | Hint page card (QR code) | — | 1 | — | Printed card | Business card | Not in the records: Claude's suggestion. Hint page address is known. |
| Box | How to use the cypher wheel | — | 1 | — | Printed card or print on the box lid | Not set | Not in the records: Claude's suggestion. |
Each price is the total for one design from a shop's quote system, in CAD. Enter a quote for any shop and quantity; the page takes the cheapest for each item and works out the cost per box (designs per box × price ÷ quantity). Shipping is a flat amount per quote; tick HST to add 13%. Edits are saved for everyone signed in to the Studio (otherwise they stay in this browser); Reset to quotes brings back the 20 Oct 2026 quotes. Notes and specs are kept with each quote so the exact product is not lost.
| Shop | Where | Website | Notes |
|---|---|---|---|
| Shop | @25 | @50 | @100 | @200 | @250 | @500 | @1,000 | Shipping | Quote date | Link | Spec (paper, finish, packaging…) |
|---|---|---|---|---|---|---|---|---|---|---|---|
| Existing quotes (Newprint or LoudMouth) | |||||||||||
| Newprint | |||||||||||
| LoudMouth | |||||||||||
| ASAP PM | |||||||||||
| ePrint It | |||||||||||
| Allegra Ottawa Downtown | |||||||||||
| Vistaprint Canada | |||||||||||
| Printcloud | |||||||||||
| Other shop | |||||||||||
| Cheapest | |||||||||||
| Shop | @25 | @50 | @100 | @200 | @250 | @500 | @1,000 | Shipping | Quote date | Link | Spec (paper, finish, packaging…) |
|---|---|---|---|---|---|---|---|---|---|---|---|
| Existing quotes (Newprint or LoudMouth) | |||||||||||
| Newprint | |||||||||||
| LoudMouth | |||||||||||
| ASAP PM | |||||||||||
| ePrint It | |||||||||||
| Allegra Ottawa Downtown | |||||||||||
| Vistaprint Canada | |||||||||||
| Printcloud | |||||||||||
| Other shop | |||||||||||
| Cheapest | |||||||||||
| Shop | @25 | @50 | @100 | @200 | @250 | @500 | @1,000 | Shipping | Quote date | Link | Spec (paper, finish, packaging…) |
|---|---|---|---|---|---|---|---|---|---|---|---|
| Existing quotes (Newprint or LoudMouth) | |||||||||||
| Newprint | |||||||||||
| LoudMouth | |||||||||||
| ASAP PM | |||||||||||
| ePrint It | |||||||||||
| Allegra Ottawa Downtown | |||||||||||
| Vistaprint Canada | |||||||||||
| Printcloud | |||||||||||
| Other shop | |||||||||||
| Cheapest | |||||||||||
| Shop | @25 | @50 | @100 | @200 | @250 | @500 | @1,000 | Shipping | Quote date | Link | Spec (paper, finish, packaging…) |
|---|---|---|---|---|---|---|---|---|---|---|---|
| Existing quotes (Newprint or LoudMouth) | |||||||||||
| Newprint | |||||||||||
| LoudMouth | |||||||||||
| ASAP PM | |||||||||||
| ePrint It | |||||||||||
| Allegra Ottawa Downtown | |||||||||||
| Vistaprint Canada | |||||||||||
| Printcloud | |||||||||||
| Other shop | |||||||||||
| Cheapest | |||||||||||
| Shop | @25 | @50 | @100 | @200 | @250 | @500 | @1,000 | Shipping | Quote date | Link | Spec (paper, finish, packaging…) |
|---|---|---|---|---|---|---|---|---|---|---|---|
| Existing quotes (Newprint or LoudMouth) | |||||||||||
| Newprint | |||||||||||
| LoudMouth | |||||||||||
| ASAP PM | |||||||||||
| ePrint It | |||||||||||
| Allegra Ottawa Downtown | |||||||||||
| Vistaprint Canada | |||||||||||
| Printcloud | |||||||||||
| Other shop | |||||||||||
| Cheapest | |||||||||||
| Shop | @25 | @50 | @100 | @200 | @250 | @500 | @1,000 | Shipping | Quote date | Link | Spec (paper, finish, packaging…) |
|---|---|---|---|---|---|---|---|---|---|---|---|
| Existing quotes (Newprint or LoudMouth) | |||||||||||
| Newprint | |||||||||||
| LoudMouth | |||||||||||
| ASAP PM | |||||||||||
| ePrint It | |||||||||||
| Allegra Ottawa Downtown | |||||||||||
| Vistaprint Canada | |||||||||||
| Printcloud | |||||||||||
| Other shop | |||||||||||
| Cheapest | |||||||||||
| Shop | @25 | @50 | @100 | @200 | @250 | @500 | @1,000 | Shipping | Quote date | Link | Spec (paper, finish, packaging…) |
|---|---|---|---|---|---|---|---|---|---|---|---|
| Existing quotes (Newprint or LoudMouth) | |||||||||||
| Newprint | |||||||||||
| LoudMouth | |||||||||||
| ASAP PM | |||||||||||
| ePrint It | |||||||||||
| Allegra Ottawa Downtown | |||||||||||
| Vistaprint Canada | |||||||||||
| Printcloud | |||||||||||
| Other shop | |||||||||||
| Cheapest | |||||||||||
| Item | Product | Designs per box | @25 | @50 | @100 | @200 | @250 | @500 | @1,000 |
|---|---|---|---|---|---|---|---|---|---|
| Postcards | Postcard 4 × 6 · 2 sides | 22 | |||||||
| Liv's note (QR code + helper on the back) | Postcard 4 × 6 · 2 sides | 1 | |||||||
| Final Liv note One side | Postcard 4 × 6 · 1 side | 1 | |||||||
| Museum tickets (Brattahlíð, Aud, Rouen, Oslo) Size open | Bookmark 2 × 6 · 2 sides | 4 | |||||||
| Raven's path card Built 20 Oct | Business card 3.5 × 2 · 1 side | 1 | |||||||
| Travel tickets: hops Built 20 Oct | Business card 3.5 × 2 · 1 side | 18 | |||||||
| Travel tickets: final plane ticket Was 7 × 2.9; not rebuilt | Business card 3.5 × 2 · 1 side | 1 | |||||||
| Ruler Built 20 Oct | Bookmark 2 × 6 · 1 side | 1 | |||||||
| Trail maps (Leif, Rollo, Aud) Production size; prototype stays Letter | Flyer 5.5 × 8.5 · 14 pt card · 1 side | 3 | |||||||
| Harald's map (board note on the back) Production size; prototype stays Letter | Flyer 5.5 × 8.5 · 14 pt card · 2 sides | 1 | |||||||
| Printing per box | |||||||||
| Whole print order (per box × quantity) | |||||||||
| Rows without a price |
| Shop | @25 | @50 | @100 | @200 | @250 | @500 | @1,000 |
|---|---|---|---|---|---|---|---|
| Existing quotes (Newprint or LoudMouth) | |||||||
| Newprint | |||||||
| LoudMouth | |||||||
| ASAP PM | |||||||
| ePrint It | |||||||
| Allegra Ottawa Downtown | |||||||
| Vistaprint Canada | |||||||
| Printcloud | |||||||
| Other shop |
| Shop | Order size | Printing, whole order | Per box | Spare boxes | Items without a price |
|---|---|---|---|---|---|
| Cheapest shop for each item (as set above) | |||||
| Existing quotes (Newprint or LoudMouth) | |||||
| Newprint | |||||
| LoudMouth | |||||
| ASAP PM | |||||
| ePrint It | |||||
| Allegra Ottawa Downtown | |||||
| Vistaprint Canada | |||||
| Printcloud | |||||
| Other shop |
| Item | Per box | Items per pack | Pack price | Link | Price each | Cost per box | Notes |
|---|---|---|---|---|---|---|---|
| 6 × 9 clasp envelopes Envelopes 4, 6, 8, 10 + 1 decoy (assumed) | |||||||
| Small string-tie envelopes 4.5 × 6.7 Prototype pack; 9 envelopes + 1 decoy (assumed) | |||||||
| Magnifier, Fresnel card 3.3 × 2.2 in Kronabelle, 200 pcs (PP-027) | |||||||
| Brass fastener (cypher wheel centre) PP-047 | |||||||
| Small paper clips (treasure tally) Paper tally holds digits with 4 clips (PP-026) | |||||||
| Hnefatafl pieces (19 dark, 6 light, 1 king) Stock wooden pawns; the king must look different (PP-035) | |||||||
| Bought in packs, per box |
| Box | Per box | Each @250 | Each @500 | Each @1,000 | Link | Notes |
|---|---|---|---|---|---|---|
| Sales Presentation Box 11.75 × 1 × 10 in, 18 pt SBS Newprint; inside/outside size and 1 in depth to check | ||||||
| Box 10 × 8 × 2 in |
| Part | Per box | One-time | Each @250 | Each @500 | Each @1,000 | Link | Notes |
|---|---|---|---|---|---|---|---|
| Die-cut card sheet: cypher wheel + treasure tally + Aud's comb Wheel disks 196/156/116/76 mm + 202 × 34 mm arm; tally 4 × 2 in sleeve, rails, four 6 in strips; comb 100.7 × 87.8 mm | |||||||
| Hnefatafl playing board, 11 × 11 (printed card) Or print it on the box or a flyer back | |||||||
| Coin hoard (12 coins) 3D-printed in the prototype (PP-037) | |||||||
| Adventure medallion, 50 mm 3D-printed in the prototype (PP-044) |
| @25 | @50 | @100 | @200 | @250 | @500 | @1,000 | |
|---|---|---|---|---|---|---|---|
| Printing per box | |||||||
| Bought in packs | |||||||
| Box (ticked; the 100 column uses its 250 price) | |||||||
| Made parts (one-time costs spread over the quantity) | |||||||
| Total per box | |||||||
| Prices still missing |
From the Kickstarter plan (a plan, not a decision; ballpark prices are guesses, not quotes).
The full component list already exists: Production/Norse_Parts_List.xlsx (29 rows, no prices yet). Add five rows the sheet leaves out:
| Extra cost | How to get the number |
|---|---|
| Kitting (stuffing 15 envelopes + box) | Time yourself packing 3 boxes; × hourly rate |
| Mailer bag + label | Supplier listing price |
| Shipping per region | Weigh the full prototype; quote Canada Post, Chit Chats or Stallion Express (CA→US) |
| Kickstarter + payment fees | Budget 10% of funds (5% platform + about 3% + $0.20 per pledge processing, plus pledge manager) |
| Spares + damage | 5% extra print run |
Only real price so far: ImprintNow printed envelopes, CAD $1.35 each at 500, $1.30 at 1,000 (15 × 22 cm only; Q-052). With 15 envelopes per box that alone is about $20 per box — the single biggest cost to fix.
| Group | Ballpark CAD at 500–1,000 | Biggest lever |
|---|---|---|
| Printed mailer box + bag | $4–7 | Box size is standard; white board, 1–2 colours outside |
| 15 envelopes + rune labels | $3–20 | Plain bulk envelopes + printed labels instead of custom-printed envelopes |
| Paper: 22 postcards, 4 maps, tickets, letters | $3–6 | One paper stock, ganged on few sheets, no hand trimming |
| Card parts: wheel, comb, tally, coins, ruler, hnefatafl | $2–8 | One punchboard sheet instead of six processes |
| Bought bits: magnifier, fastener, 23 pawns, medallion | $2–6 | Fresnel card; stock pawns; card or wood medallion |
| Kitting labour | $3–8 | Fewer loose pieces |
| Total landed (before shipping) | about $17–55 | The wide range is why quotes come first |
Real print quotes, 20 Oct 2026 (online quote system, each design ordered separately; Q-052): all printed cards and maps cost $10.17 per box at 500 ($14.66 at 250, $7.87 at 1,000), above the $3–6 guessed for paper above. Postcards are about half of it. Next lever: ask for a ganged quote (several designs on one press run).
Pricing rule of thumb: pledge price ≈ 2.5–3 × landed cost per box, shipping charged separately. A box costing $20 lands at a $55–60 CAD pledge. Benchmarks seen: Escape Room in a Box ran a $45 USD tier; Envelescape (envelope escape game, CAD campaign) averaged $116 CAD per backer.
Ranked by savings. None changes a puzzle's answer.
| Item | Now | Nearest standard | Change |
|---|---|---|---|
| 22 postcards, Liv's memo, Liv's notes | 4 × 6 | Postcard 4 × 6 | none |
20 Oct update: Liv's notes now include the approved help QR and code guide on the back. Quote 23 two-sided designs (22 postcards + Liv's notes) and 1 single-sided design (Liv's memo). The cost table and workbook Print quotes tab reflect this split; existing entered quote prices are preserved.
| 14 rail, bus, ferry hop tickets | 3.5 × 1.75 | Business card 3.5 × 2 | +¼ in height |
|---|---|---|---|
| 4 air hop tickets | 4 × 1.75 | Business card 3.5 × 2, or event ticket 5.5 × 2 | narrower, or longer |
| Brattahlíð and Aud museum tickets | 3.5 × 6 | Postcard 4 × 6 | +½ in width |
| Rouen museum ticket | 3.5 × 5.5 | Postcard 4 × 6, or quarter-Letter 4.25 × 5.5 (4 per sheet, no waste) | small |
| Oslo hnefatafl ticket | about 2.5 × 5.1 | Event ticket 2 × 5.5 | check the text fits |
| 3 transition receipts | about 5.4 × 2.5 | Event ticket 5.5 × 2 | check the text fits |
| Plane ticket | about 7 × 2.9 | Large event ticket 8.5 × 2.75 | small |
| Hnefatafl setup insert | about 4.75 × 7 | Card 5 × 7 | small |
That leaves four sizes: 4 × 6, 3.5 × 2, 5.5 × 2 and 8.5 × 2.75 (plus 5 × 7). Every resize needs its own layout pass and paper test.
| Part | Local / small run | Larger run |
|---|---|---|
| Mailer box | Newprint (Ottawa; offset + digital, die-cut packaging, labels, fulfilment) | Packaging printers (Packlane, Arka type) |
| Paper, postcards, tickets | Newprint; ASAP PM and Artext (Ottawa, offset/digital) for comparison quotes | Same |
| Die-cut card parts | Newprint (ask: die-cut on heavy board, loose or in sheets) | Chicago Game and Card (US, from 50 units); Panda, QinPrinting (Asia, ~500 minimum) |
| Envelopes | Plain bulk string envelopes (designer's direction) | Alibaba suppliers (plain, bulk) |
| Review copies (10–20) | The Game Crafter (print on demand: cards, punchboard, boxes) | — |
No Canadian board-game component manufacturer turned up in searches (20 Oct); Stitchy Lizard (Toronto area) prints custom games from 1,000 units, promo-focused.
Printing in Canada has an extra benefit: US duties follow the country of origin, and China-made games have faced high US tariffs since 2025. Check the current rule for Canadian-made printed games before setting US shipping (see Admin below).
1,000 is the upside case, not the base case, for a first campaign with no existing audience. Comparable escape-in-a-box campaigns: A Haunting in the Highlands raised £5,217 (likely about 100–150 backers); Envelescape about 617 backers ($71,593 CAD ÷ $116 average).
| Scenario | Backers | Print run | Self-packing at 20 min/box (guess; time a real pack) |
|---|---|---|---|
| Base | 300 | ~350 | ~115 h |
| Good | 600 | ~700 | ~230 h |
| Upside | 1,000 | ~1,150 | ~380 h |
Drafted 20 Oct 2026 (Claude) for the Norse box game (PR-007: mailer box, 13 rune-marked envelopes + 2 decoys, rune cypher wheel). This is a plan, not a decision. Nothing here changes the game records. Prices marked ballpark are Claude's rough planning guesses, not quotes; replace them in Norse_Parts_List.xlsx as quotes arrive.
| Phase | When | Done when |
|---|---|---|
| 0. Fix playtest blockers | now → 8 Nov 2026 | The six Q-063 items below are closed or knowingly parked |
| 1. Blind playtests | 9 Nov → 20 Dec 2026 | 5+ fresh teams played with no designer in the room; exit targets met |
| 2. Costs and cheaper parts | 1 Nov 2026 → 15 Jan 2027 (parallel with 1) | Every line in the parts list has a quote at 500 and 1,000; prototype of the production version exists |
| 3. Pre-launch | 15 Jan → 1 Mar 2027 | Pre-launch page live, 1,000+ followers, reviews in hand, page and video finished |
| 4. Campaign | Tue 2 Mar → Tue 23 Mar 2027 (21 days) | Funded; late pledges turned on before it closes |
| 5. Make and ship | Apr → Jul 2027 | Boxes delivered — "in time for Liv's summer 2027 ticket" |
Go / no-go gate before launch: at least 1,000 pre-launch followers and a quoted cost per box. If either is missing on 15 Feb 2027, move launch to April (avoid Easter week, 28 Mar 2027).
Open records that block or shape the next playtests. The full wording is in the records.
21 Oct 2026 (designer): where to find local people to try the prototype. This is the "blind playtests" phase of Production/Kickstarter_Plan.md (phase 1, rounds B and C). Nobody has been contacted yet.
For game testing:
## Follow-up review after live adoption, 17 October 2026 (Codex)
Latest assessment; earlier review below is historical where superseded here. Recommendations only. No game assets, rules or order changed.
Playtest 1 (feedback relayed 11 Oct 2026): “Maps would need some work — need to be done later.” No specifics were recorded. The one concrete map fault, Walcheren missing from Rollo's sheet, is fixed (PP-032). Left open on purpose: what the work is, and for which of the four maps, still needs the designer's notes from the playtest.
Phases, playtest rounds, pre-launch, the campaign, awards, wording and risks.
From the 17 Oct review (Q-063). A blind playtest is wasted if the box itself has known faults.
found_in fields still show the pre-15-Oct contents of envelopes 1–3, and envelope 12 still lists the retired journal and crest note.escapepack.ca/help/norse.| Round | Teams | Setup | What it proves |
|---|---|---|---|
| A. Friends, observed | 2 | You watch silently, take notes, no help | Where people stall; how long each envelope takes |
| B. Blind, unobserved | 3+ | Box handed over (or mailed) with a feedback form; you are not there | It works without the designer — the real Kickstarter situation |
| C. Reset test | the same B teams | They repack with the repacking letter and pass it on | "Play it, repack it, lend it" is true (a selling point, see wording) |
Good sources for B teams: Ottawa escape-room staff and regulars, board-game cafés, r/escaperooms, and players of the free Hiking game on escapepack.ca.
To fund on day 1 you need roughly: goal backers ÷ 0.32 followers. A 300-backer goal needs about 950 followers. Set the bar at 1,000 followers before launch.
| Tier | Contents | Why |
|---|---|---|
| Early raven (48 h, limited) | The box, small discount or a bonus postcard | Rewards day-1 backers; drives momentum |
| The Raven Inheritance | The box | The main tier |
| Two families | 2 boxes, small discount | Gift buyers; second copy to lend |
| Liv's patron (optional) | Box + metal medallion + name in Liv's acknowledgements | Higher pledge without changing the base box |
Avoid a digital-only tier until the digital game is finished (Q-051; physical game first).
Most awards need a finished, available product, so they come after delivery. Before launch, reviews and Kickstarter's own badge do the same job.
| Award / badge | Fit | When | Note |
|---|---|---|---|
| Kickstarter "Project We Love" | High | Before launch | Chosen by staff; a polished page and video, shared early, help |
| Room Escape Artist reviews and Golden Lock Award (tabletop category since 2022) | Best fit | Review copy before launch; award after | REA awards games they reviewed; format changed after 2024, check current rules |
| Origins Awards (GAMA) | Medium | After delivery | Needs a published product; check categories and fees |
| Family / parent seals (Dad's Choice, Family Choice, Mom's Choice) | Medium for gift buyers | After delivery | Pay to enter (about $100–£125 per entry); less weight with hobby gamers |
| BoardGameGeek Golden Geek | Low | Year after release | Community vote; needs a large audience |
| Mensa Select | Low | — | Average play time must be 90 min or less; Norse is likely longer |
No current Canadian game award turned up: the Canadian Toy Testing Council (Ottawa) closed in 2015. Worth a separate search later (Canadian Game of the Year, local game-design contests).
| Use | Avoid |
|---|---|
| cooperative, escape game, puzzle adventure, rune, postcards, sealed envelopes | "revolutionary", "like nothing you've seen", vague "epic" |
| real Viking places, family secret, inheritance | Answer-revealing images (no postcard backs, no map routes) |
| play it, repack it, lend it | "Replayable" (it isn't; "shareable" is honest) |
| Item | Why it matters | Action |
|---|---|---|
| AI-generated art | Kickstarter requires creators to disclose AI-generated content; part of the tabletop audience is hostile to it. Stamps, ravens, logos, box art and ticket logos were made with ImageGen. | Decide: disclose plainly, or commission a human artist for the box cover and key art (add the cost). |
| Image licences | Some postcard fronts adapt CC BY / CC BY-SA photos (Q-009, Q-010). Commercial use is allowed; ShareAlike means those adapted images stay under the same licence. | Confirm every postcard image's source and licence before printing (the credits page is the record). |
| Age rating | Products for children 12 and under need third-party safety testing in the US (CPSIA) and must meet Canada's toy rules; coins and pawns are small parts. | Label 14+ and market as adult/family-with-teens. |
| Name | "The Raven Inheritance" may already be used. | Trademark and Kickstarter/BGG search. |
| Business and tax | Canadian sales tax (GST/HST) applies once sales pass $30,000 in four quarters; Kickstarter income is taxable. | Register the business; one hour with an accountant before launch. |
| US duties | Rules changed several times in 2025–26 (de minimis ended; tariff rulings). | Check current duty for Canadian-made printed games in January 2027 before fixing US shipping prices. |